How to Save Contact Form 7 Submissions to Google Sheets
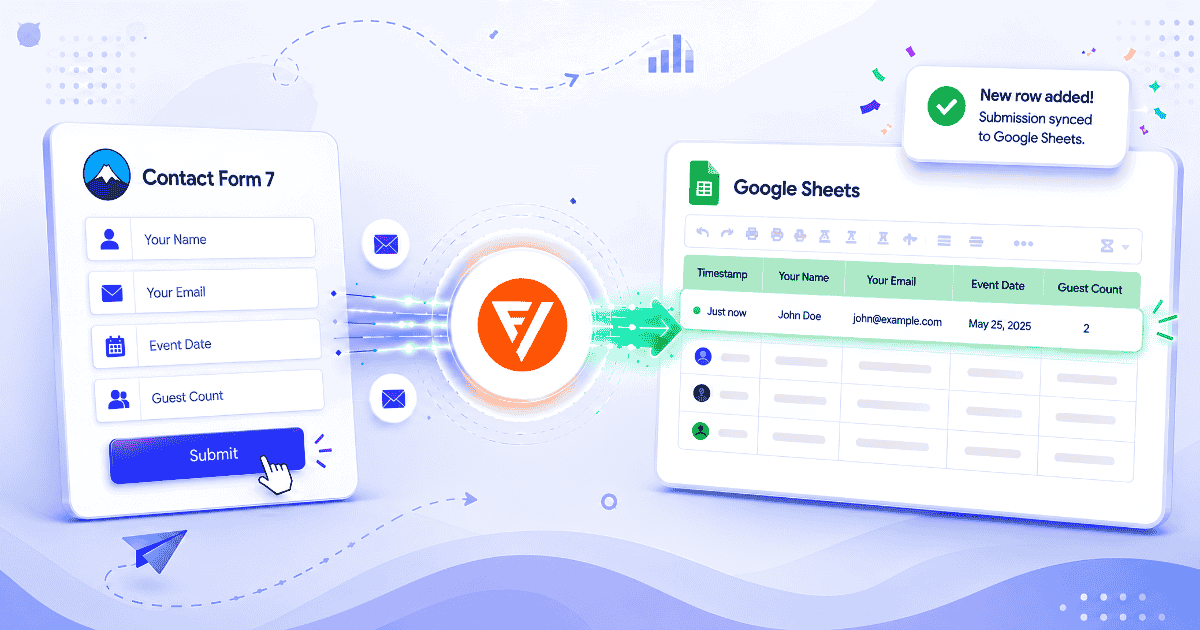
Every Contact Form 7 submission lives in exactly one place: your inbox. If that email lands in spam, or your SMTP setup breaks for a day, that submission is gone. There’s no second copy anywhere, because Contact Form 7 was never built to store data at all.
This guide fixes both problems at once. Form Vibes Pro connects Contact Form 7 to Google Sheets automatically, and saves every submission to your WordPress database at the same time. No automation platform, no per-task limits, and no more relying on a single email that might not arrive.
Does Contact Form 7 Save Submissions Anywhere on Its Own?
No. Contact Form 7 sends every submission by email and nothing else. There’s no entries table in your WordPress dashboard, no export button, and no built-in backup if that email fails to arrive.
This is intentional. Contact Form 7 was designed to be lightweight, and email-only delivery is part of that design. But it means the only record of a submission is whatever lands in an inbox. A spam filter, a broken SMTP connection, or someone accidentally deleting an email can permanently erase a lead with no way to recover it.
This is exactly the gap Form Vibes closes. Every submission gets saved to your WordPress database the moment it comes in, and from there it can also sync straight to a Google Sheet.
Contact Form 7 was never built to store your data. That’s by design. Form Vibes Pro adds the missing safety net, plus Google Sheets sync, in one plugin
Is Google Sheets Sync a Free or Pro Feature?
Google Sheets sync is a Form Vibes Pro feature. Here’s what’s relevant to this guide:
| Feature | Free | Pro |
|---|---|---|
| Save Contact Form 7 entries to WordPress database | Yes | Yes |
| Export to CSV on demand | Yes (up to 1,000 rows) | Yes (unlimited) |
| Automatic sync to Google Sheets | No | Yes |
| Filter which submissions get synced | No | Yes |
See full Form Vibes Pro feature list.
Before You Start
Contact Form 7 active on your WordPress site, with at least one form already built
Form Vibes Pro active on your WordPress site
A Google account with access to the target spreadsheet
Access to Google Cloud Console to create the API credentials
How to Connect Contact Form 7 to Google Sheets
To keep this concrete, we’ll set this up for a simple RSVP form with four fields: your-name, your-email, your-event-date, and your-guest-count. Your own form’s field names will be different, but the steps are the same.
Create Your Google API Credentials
Google requires API credentials so Form Vibes can communicate securely with your Google account. These consist of a Client ID and a Client Secret, generated in Google Cloud Console. The full credential creation process is covered in a dedicated guide. Follow that guide to generate your Client ID and Client Secret, then return here to continue.
Connect Form Vibes to Google Sheets
Go to Form Vibes > Settings > Google Sheet in your WordPress admin. Paste your Client ID and Client Secret into their respective fields. Click Authenticate and sign in with your Google account when prompted. After approving the requested permissions, the connection status updates to show the account as connected.
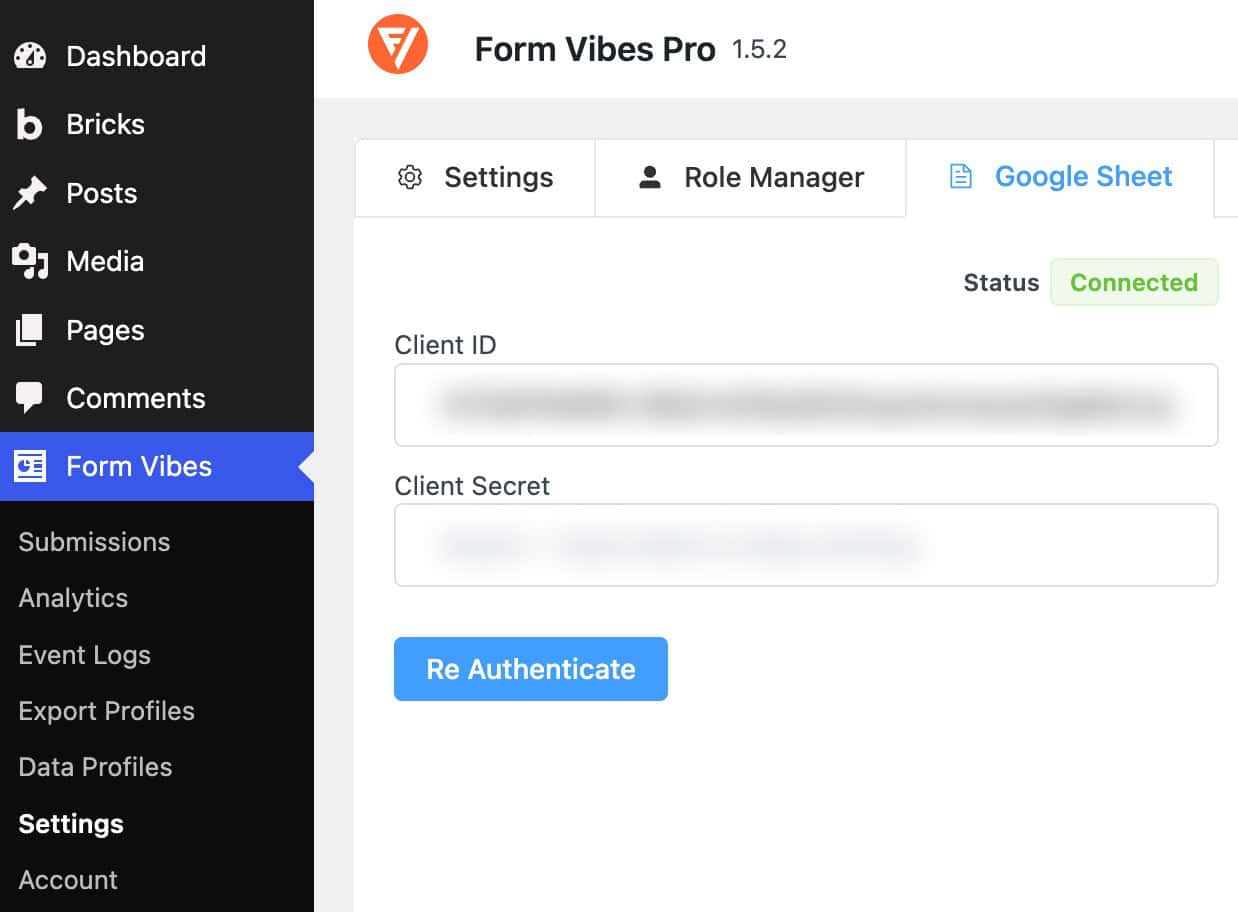
Tips: During authentication, Google shows an “App is not verified” warning. This is expected for a self-configured OAuth connection. Click Show Advanced, then Go to App, and approve all requested permissions. The connection completes normally.
Set Up the Google Sheets Connection for Your CF7 Form
With your Google account connected, go to Form Vibes > Export Profiles and click Add New. Under Type, select Google Sheet instead of Local Download. This tells Form Vibes to push submissions to a spreadsheet rather than generate a downloadable file.

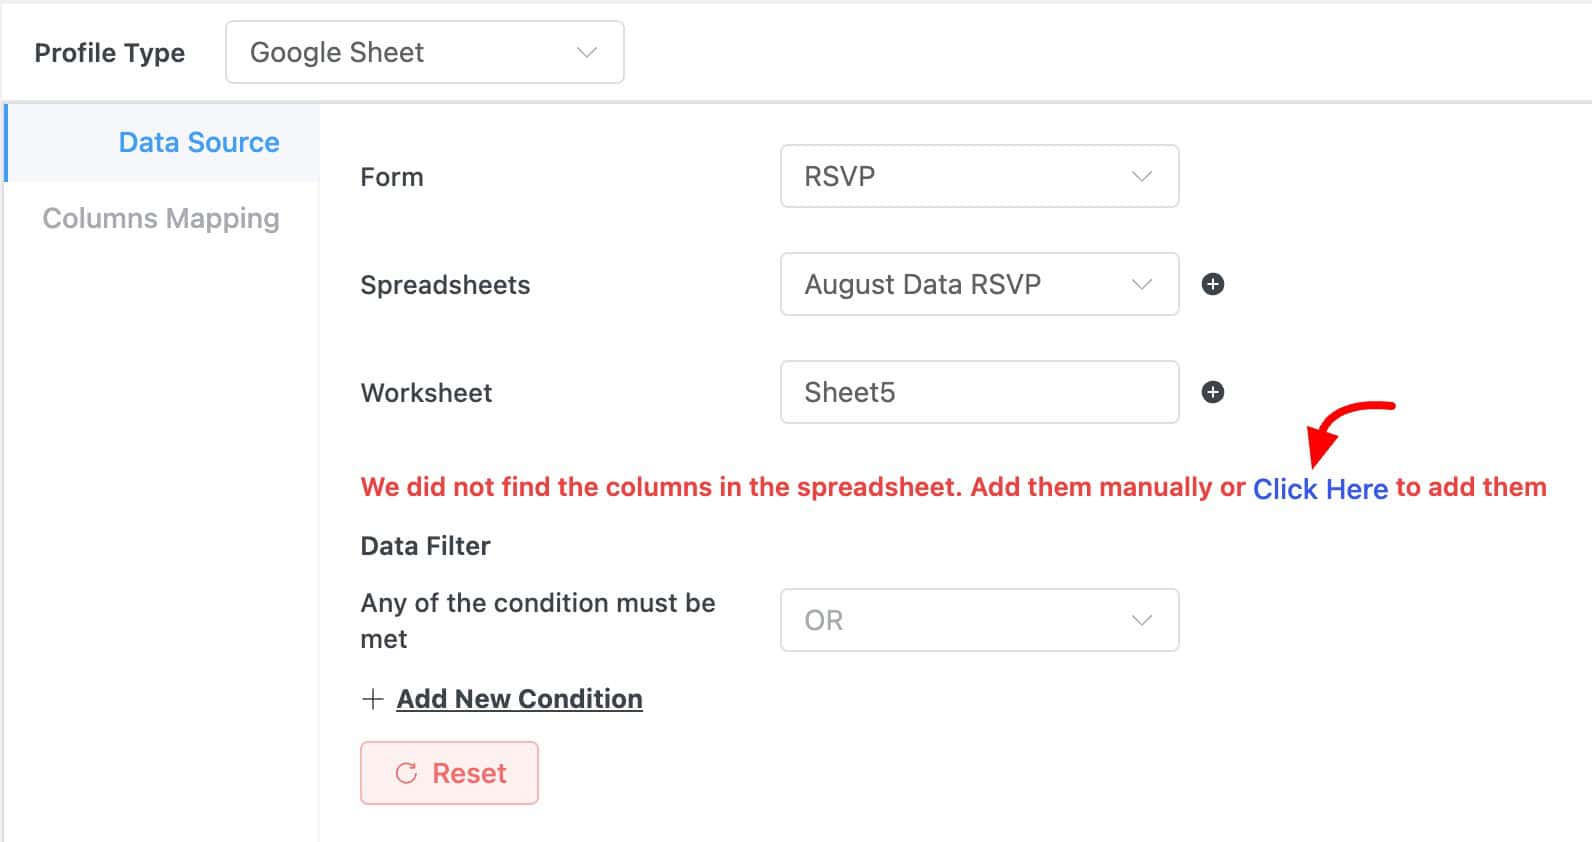
Choose the Form, Spreadsheet, and Worksheet
On the Data Source tab, select your RSVP form from the Form dropdown. Since Contact Form 7 doesn’t have a visual field builder, this dropdown lists the form’s admin title, such as “Event RSVP Form,” not the individual field tags. Forms appear here once they’ve received at least one submission.
Choose the Google Spreadsheet where data should be sent. If the spreadsheet you need does not appear, check that the connected Google account has access to it. To create a new spreadsheet directly from Form Vibes, click the plus icon next to the spreadsheet selector.
Select the specific worksheet, or tab, within the spreadsheet. Create a new one using the plus icon if needed.
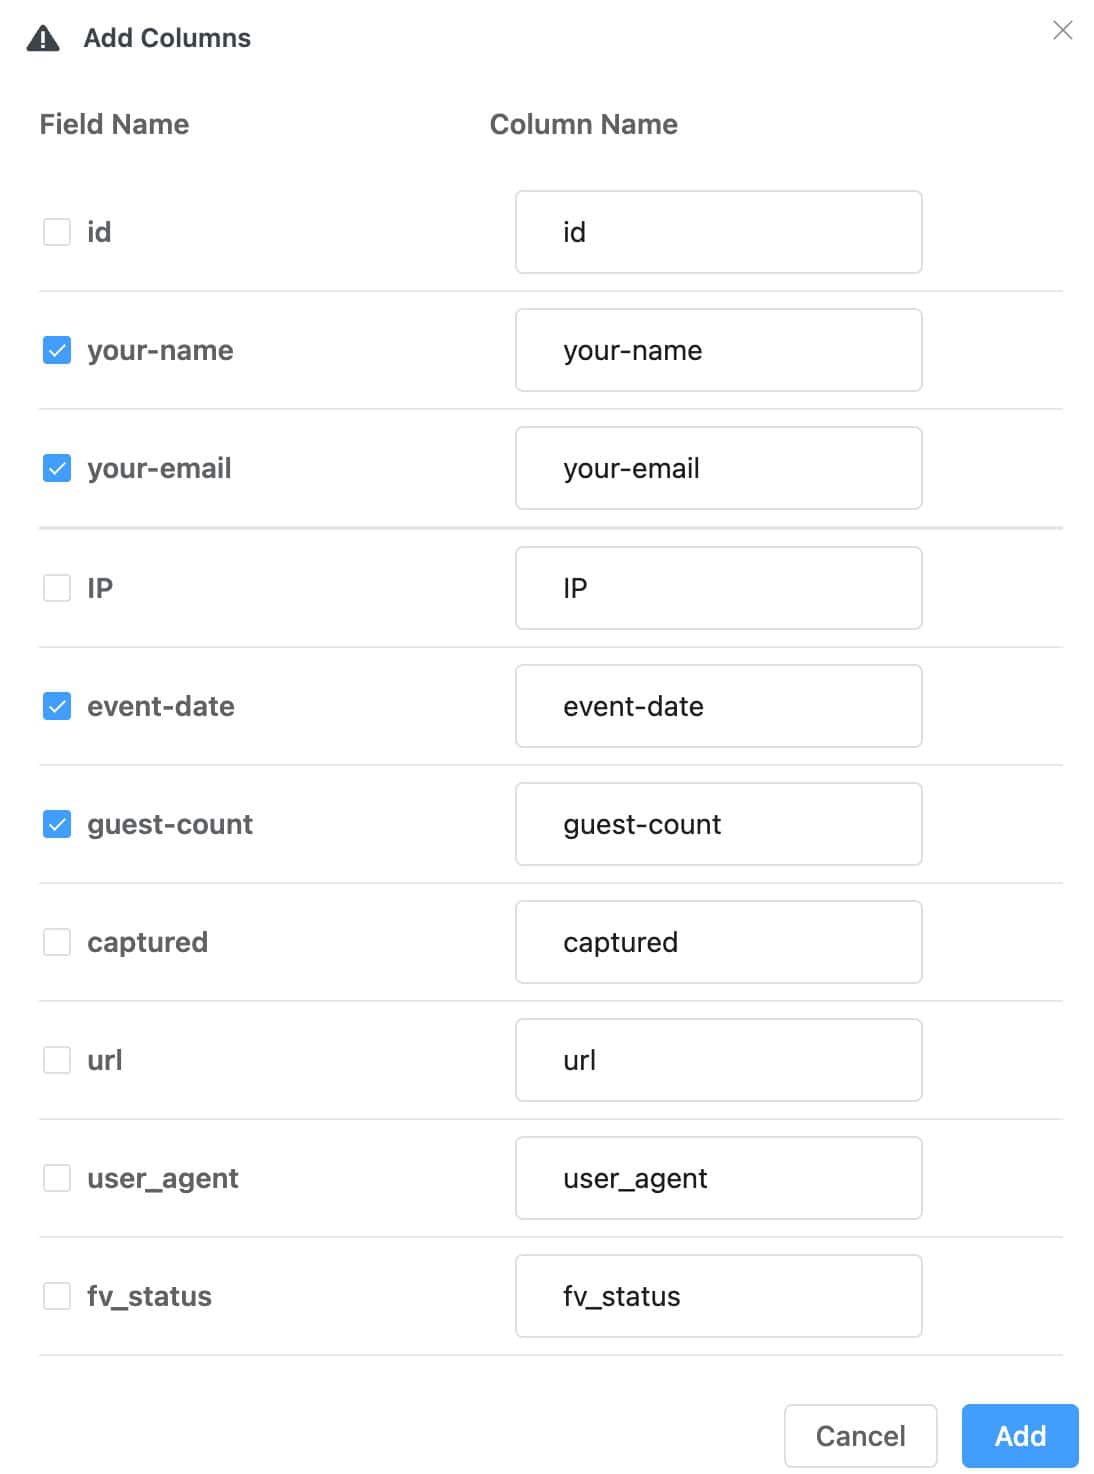
Then, you will be asked to map the columns to your Google Sheet. Click the “Click here” option to start mapping the columns.
If you want to use custom column headers in the sheet, you can enter the desired names here and map them to the corresponding form fields. For example, you can set the column header Name and map it to the your-name form field.
The Data Filter section lets you sync only the submissions that match specific conditions, instead of sending every submission to Google Sheets. This step is optional. Skip it if you want every RSVP synced.
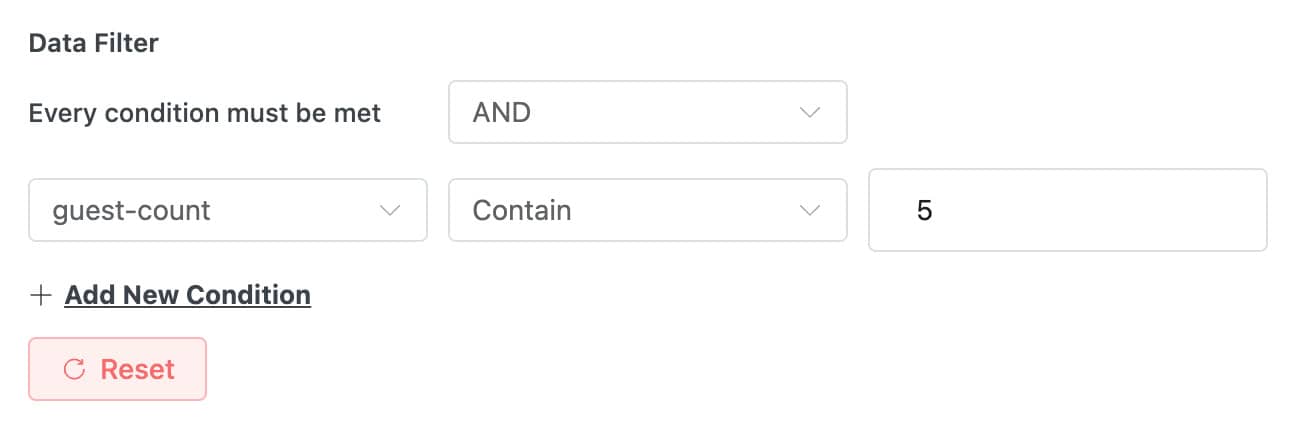
Notes: Filtered-out submissions are still saved to your WordPress database. The Data Filter only controls what gets pushed to Google Sheets.
Map Your Fields on the Columns Mapping Tab
Switch to the Columns Mapping tab. If you want to change the default column mapping or assign a specific form field to a particular spreadsheet column, you can do it here.
After that, map each spreadsheet column to the appropriate Contact Form 7 field. Click Publish to save and activate the connection.
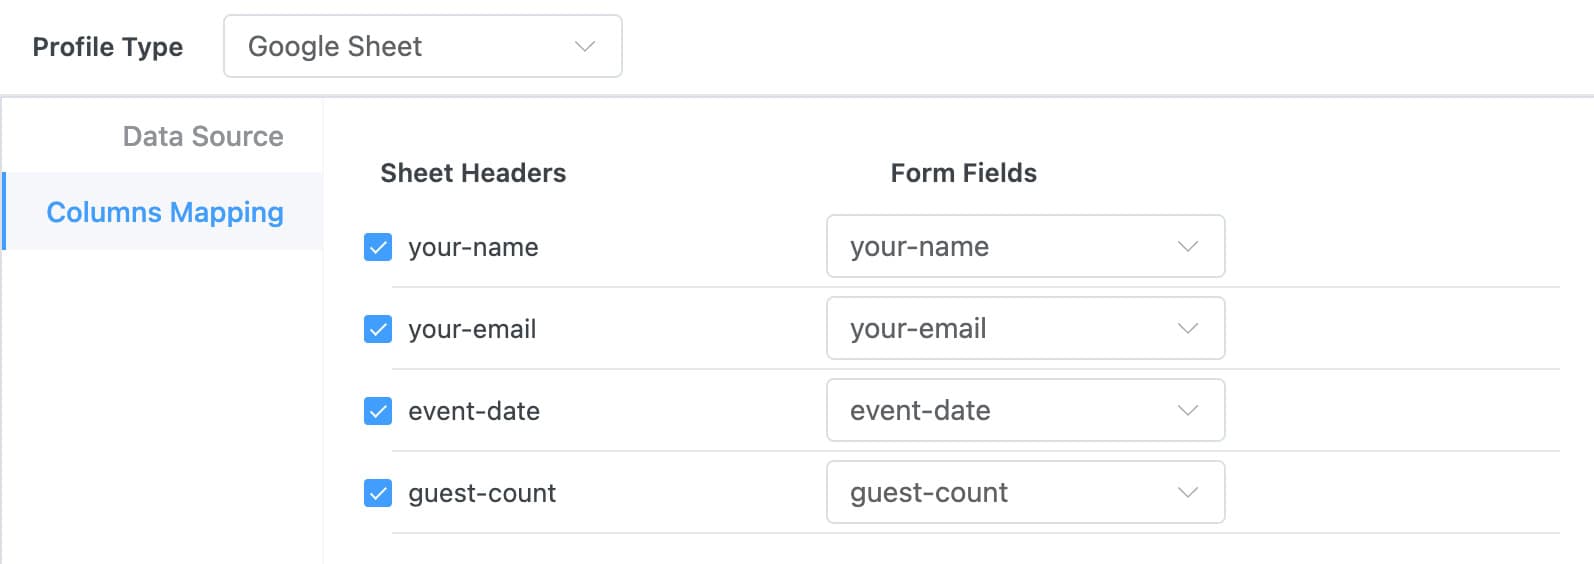
Important: The Export Profile must be in Published status for submissions to sync automatically. One left in Draft will not push any data to the spreadsheet. Always confirm it is published before sending a test submission.
What Happens After Someone Submits Your Contact Form 7 Form?
Once the connection is published, no further action is needed. When a guest submits the RSVP form, Form Vibes saves their name, email, event date, and guest count to your WordPress database, and immediately pushes a new row with those same details to the connected Google Spreadsheet.
The row appears within moments. Anyone with access to the spreadsheet can see the new RSVP without logging into WordPress. Where before this data only existed in an email you might never open, it now lives in two places at once.
Why Aren’t Contact Form 7 Submissions Reaching Google Sheets?
The most common cause with Contact Form 7 specifically is a field name mismatch, since CF7 tags are typed by hand rather than picked from a visual list. Beyond that, submissions can also fail to sync because a form isn’t yet listed in the dropdown, the connected account can’t access the spreadsheet, there’s a redirect URI mismatch, or the Google Sheets and Drive APIs aren’t enabled. Submit a test RSVP from the frontend first, then check the causes below.
Data is appearing in the wrong columns, or not at all. Open the Export Profile and compare each mapped field against the actual tag names in your Contact Form 7 form editor. A field written as your-eventdate in the form but mapped as your-event-date in Form Vibes will fail silently. Retype the mapping to match exactly.
The Contact Form 7 form is not showing in the Form dropdown. Confirm Contact Form 7 is active. Then confirm the form has received at least one submission on the frontend since Form Vibes was activated. Form Vibes only lists forms that have already received at least one submission.
Spreadsheet is not showing in the dropdown. Check that the Google account connected in Form Vibes Settings has access to the spreadsheet. If the spreadsheet is owned by a different Google account, share it with the connected account before trying again.
Redirect URI mismatch error. The redirect URI entered in your Google Cloud Console app settings must match exactly the one Form Vibes provides. Open your Google Cloud Console project, navigate to OAuth credentials, and verify the redirect URI matches the one shown in Form Vibes Settings.
Google Sheets and Drive APIs are not enabled. Both APIs must be enabled inside your Google Cloud Console project. If sync silently fails and the field mapping checks out, this is usually the cause.
App verification warning during authentication. This is expected for self-configured OAuth apps and does not indicate a problem. Click Show Advanced, then Go to App, and approve all permissions.
Why Form Vibes for Contact Form 7 and Google Sheets?
- It starts you from zero, not from a smoother sync. Some plugins improve on a feature Contact Form 7 already has. Contact Form 7 has nothing to improve on here. It has no entries table and no storage of any kind, so Form Vibes is the entire foundation, not an upgrade to one.
- Every submission is also saved to your WordPress database. So a temporary Google API hiccup, or a sync that hasn’t run yet, never means the data is lost. It’s already sitting in WordPress.
- One plugin for nine form builders. If you use Contact Form 7 alongside Elementor Forms or WPForms, one Form Vibes install handles all of them. No second connector plugin, no second Google configuration. Setting up Elementor forms with Google Sheets works exactly the same way.
- Notes, submission status, analytics, and a role manager included, none of which Contact Form 7 has on its own.
Conclusion
Contact Form 7 was built to be lightweight, and that means it stores nothing on its own. One missed email is the only thing standing between a submission and losing it for good. Form Vibes Pro closes that gap completely: every entry is saved to your WordPress database and synced to Google Sheets automatically, so a single inbox is never the only record you have.

Never Lose a Contact Form 7 Submission Again
Form Vibes Pro saves every Contact Form 7 entry to WordPress and pushes it straight to Google Sheets, the moment it’s submitted. Set it up once and stop depending on email alone.
Frequently Asked Questions
Common questions about saving Contact Form 7 form submissions to Google Sheets.
Does Contact Form 7 have a built-in Google Sheets integration?
No. Contact Form 7 sends submissions by email only and has no built-in database, export option, or Google Sheets connection. A plugin like Form Vibes Pro is required to sync submissions to a spreadsheet.
Do I need Form Vibes Pro to connect Contact Form 7 to Google Sheets?
Yes. The Google Sheets integration is a Form Vibes Pro feature. The free version still saves every Contact Form 7 submission to your WordPress database and lets you export to CSV on demand. The automatic real-time push to Google Sheets is the Pro upgrade.
What if my Contact Form 7 field names don’t match my sheet’s column headers?
Nothing will sync correctly until they match. Since Contact Form 7 fields are typed manually rather than chosen from a visual list, open the Export Profile’s Columns Mapping tab and compare each field tag against your actual form editor. Fields like your-event-date and your-eventdate look similar but won’t map to each other automatically.
Can I sync multiple Contact Form 7 forms to different Google Sheets?
Yes. Set up one Export Profile per Contact Form 7 form, and point each one to its own spreadsheet or its own worksheet inside the same spreadsheet. There’s no limit on how many forms you can connect.
Can I filter which Contact Form 7 submissions get sent to Google Sheets?
Yes. The Data Filter section supports Equal, Not Equal, Contain, and Not Contain conditions, and lets you choose whether any or all conditions must match. Filtered-out submissions still get saved to your WordPress database; the filter only affects what reaches Sheets.
Does the same integration work with my other form plugins?
Yes. The Google Sheets sync in Form Vibes Pro works with Elementor Forms, WPForms, Gravity Forms, Ninja Forms, WS Form, Bricks Builder forms, Beaver Builder forms, and Everest Forms, alongside Contact Form 7. One plugin, one Google connection, all your forms.


Leave a Reply