How to Display Elementor Form Submissions on the Frontend Using Form Vibes
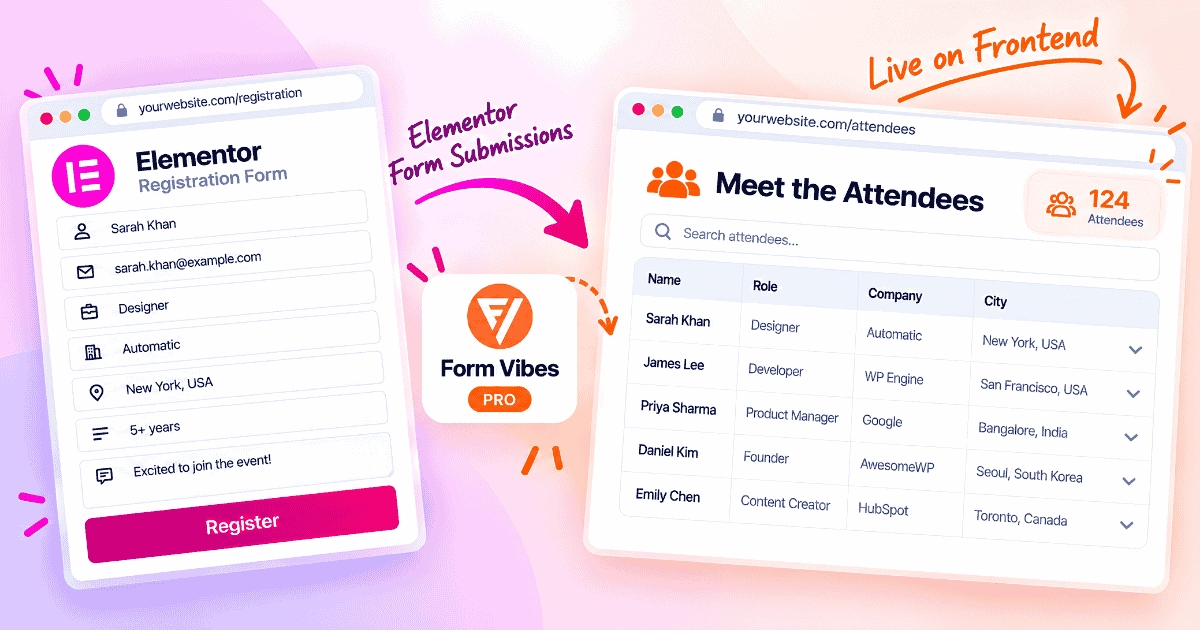
You built a registration form in Elementor for your WordPress meetup, and sign-ups are coming in. Now attendees are asking the obvious question: who else is going? Every answer is already on your site, sitting in the WordPress admin where only you can see it.
Form Vibes Pro lets you display Elementor form submissions on the frontend of your site as a searchable table or a simple counter. You choose which fields appear, rename the columns, and place the result on any page with the Form Vibes FV – Data Table widget or a shortcode.
In this guide, you’ll build a “Meet the Attendees” page from a real event registration form. Each attendee’s name, role, and company appear in a clean table and extra details open when a visitor expands a row.
Why can’t Elementor show form submissions on the frontend by default
Elementor Pro stores form submissions inside the WordPress admin, not on your website. Every entry lands under Elementor > Submissions, a screen built for site administrators to review and export data. Elementor has no built-in option to place that list on a page.
Sharing the data means exporting a CSV and copying details onto a page by hand. That copy goes out of date the moment a new person registers, so you end up repeating the job every time.
The submissions already exist. What’s missing is a live way to show them to the people who need them. If you’re not sure where your entries are stored in the first place, this guide on where WordPress form submissions go explains it for every major form plugin. Elementor’s own form submissions documentation covers the native admin screen.
What can you build with Elementor form data on a page?
Displaying Elementor form submissions on a page works anywhere people benefit from seeing collected entries without logging in to WordPress. This tutorial builds an attendee directory for a WordPress meetup, which shows the whole process from form to finished page.
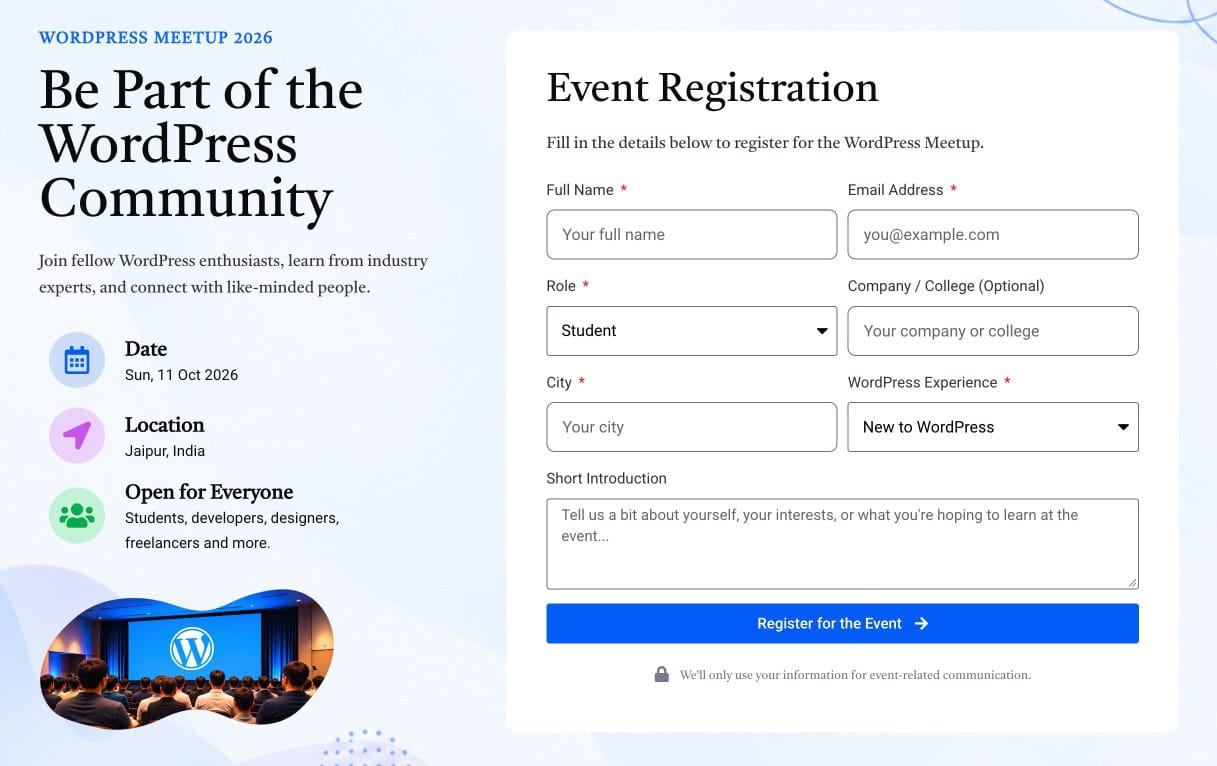
The registration form collects Full Name, Email Address, Role, Company or College, City, WordPress Experience, and a Short Introduction. The “Meet the Attendees” page shows Name, Role, and Company in the main table. City, Experience, and Bio appear when a visitor expands a row. Email Address is collected but never displayed.
The same setup works for other everyday needs:
- A client page showing enquiries from their contact form, without a WordPress login
- A registration counter on an event or webinar page
- A public speaker, volunteer, or exhibitor list
- An internal page where your team tracks incoming requests
What do you need before you start?
You need Elementor Pro, Form Vibes with Form Vibes Pro, and at least one submission on your form before you begin.
Before You Start
Elementor Pro with a published Form widget on your site
Form Vibes and Form Vibes Pro installed and active
At least one frontend submission on your form after installing Form Vibes.
Form Vibes lists an Elementor form only after it has received a submission, so send a test entry first if your form is new.
Tips:Form Vibes captures Elementor submissions automatically, with no changes to your form. The full setup is covered in how to save Elementor form submissions.
How do you display Elementor form submissions with Form Vibes?
Form Vibes Pro shows Elementor form submissions on your website using a Data Profile. A Data Profile decides which submissions appear on the page and which details visitors can see.
The process has two parts. First, you create a Data Profile in the Form Vibes dashboard. Then you add it to a page with the FV – Data Table widget or a shortcode. Once the page is live, new submissions appear on it automatically.
How do you create a Data Profile?
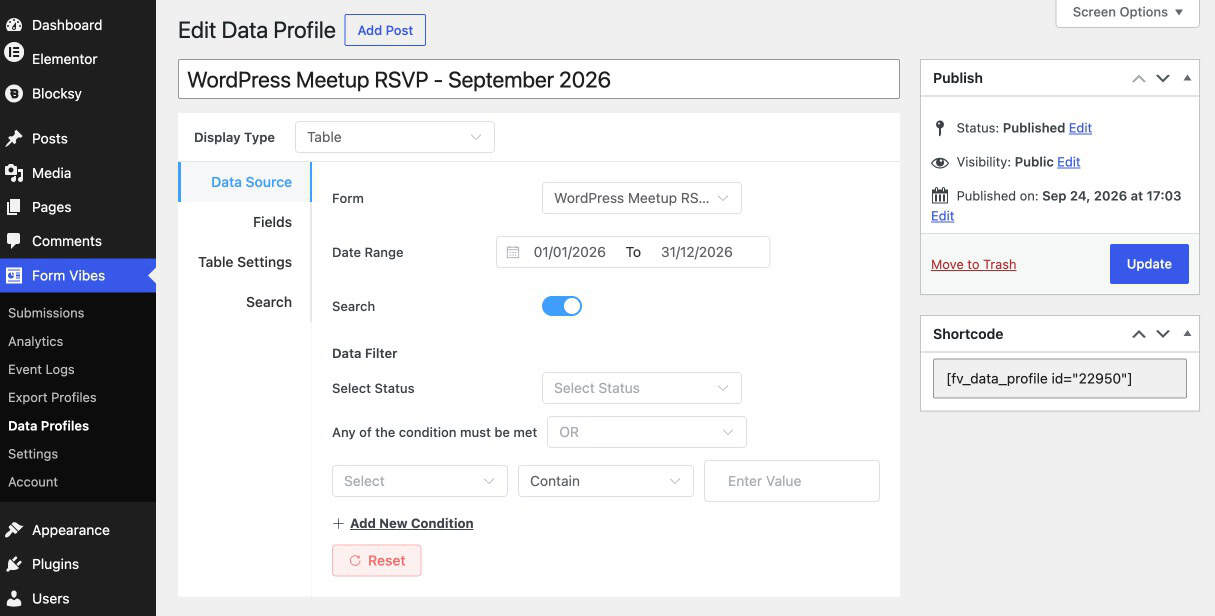
Go to Form Vibes > Data Profile and click Add Post. Give the Data Profile a name you’ll recognise, and set the Display Type to Table. The rest of the settings are split into four tabs.
Data Source
Start by telling Form Vibes where the data comes from. Pick your meetup registration form from the Form dropdown, then set the Date Range to cover the whole registration period. If the range starts too late, your earliest sign-ups won’t appear.
Next, clean up the list. Under Data Filter, use Select Status to exclude entries marked as Spam, so fake registrations never reach a public page. If you only want certain people on the list, click Add New Condition. For example, you could show only attendees whose Role contains “Developer.” Finally, turn on Search if you want visitors to be able to look someone up.
Fields
The Fields tab is where you decide what visitors actually see. Every field from your form is listed here, along with a few details Form Vibes records on its own, like IP address and user agent.
The eye icon under Column Visibility shows or hides each field. For the attendee page, show Name, Role, and Company, and keep Email, IP, and User Agent hidden. Next to each field is a Column Label box, where you can rename it. A field name like message looks odd on a public page, so rename it to “Bio.”
Some details are useful but would crowd the table. Turn on Show data on row expand and select City, Experience, and Bio. They stay tucked away until a visitor clicks the plus icon on a row.
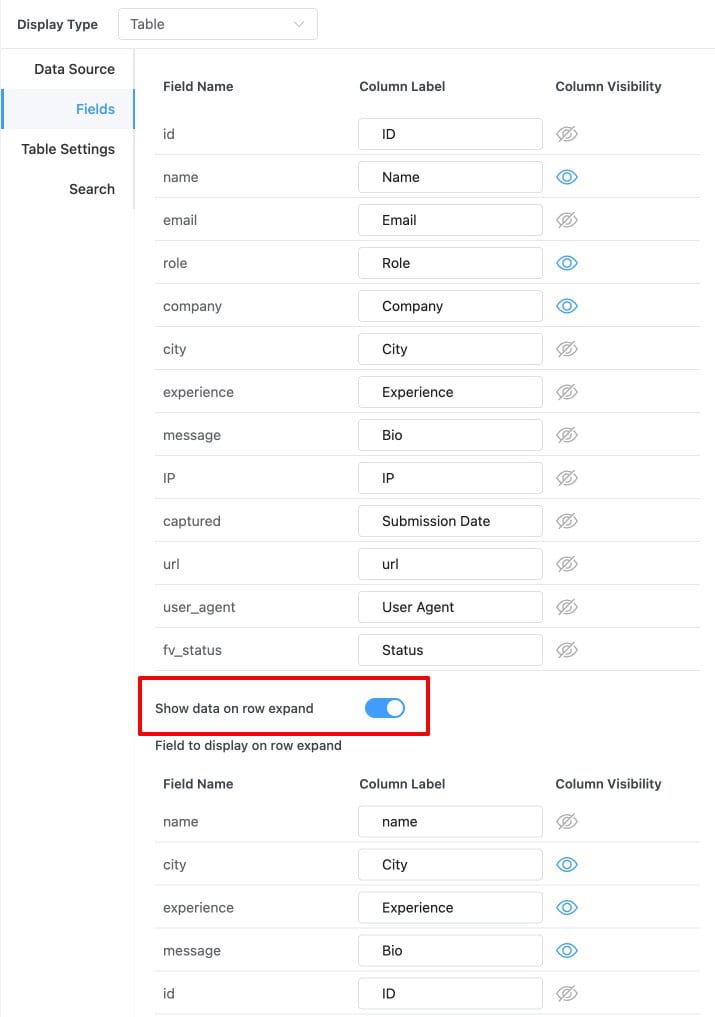
Table Settings
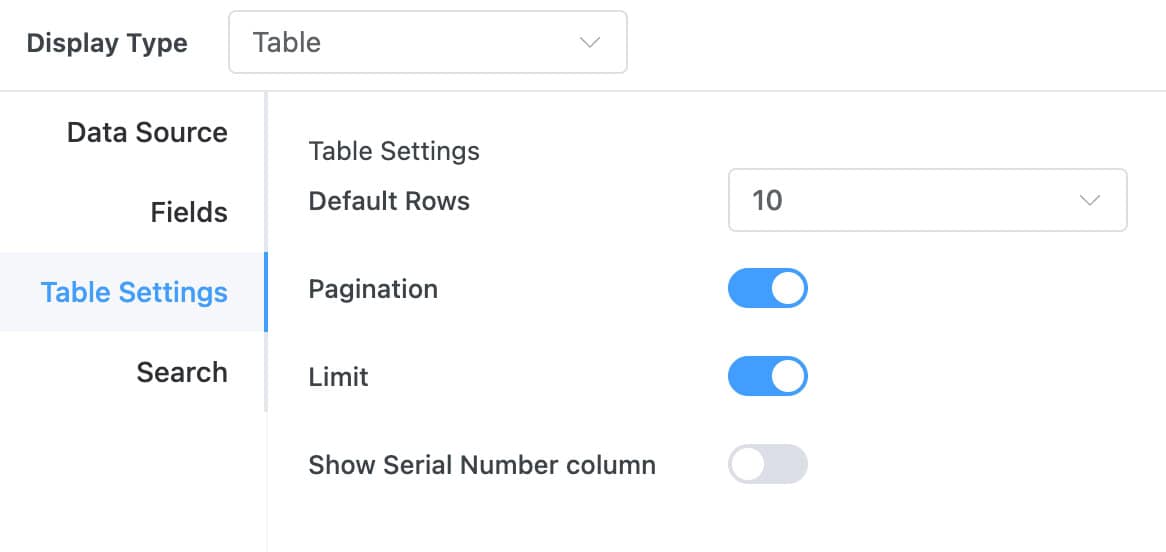
The Table Settings tab shapes how the table looks as your list grows. Default Rows sets how many attendees appear at first, and Pagination splits a long list into pages so visitors don’t have to scroll endlessly.
Limit caps the total number of rows the table can show. Leave it off for the attendee page so every registration appears, and turn it on only when you want to display a fixed number of entries. If you’d like each row numbered, turn on Show Serial Number column.
Search
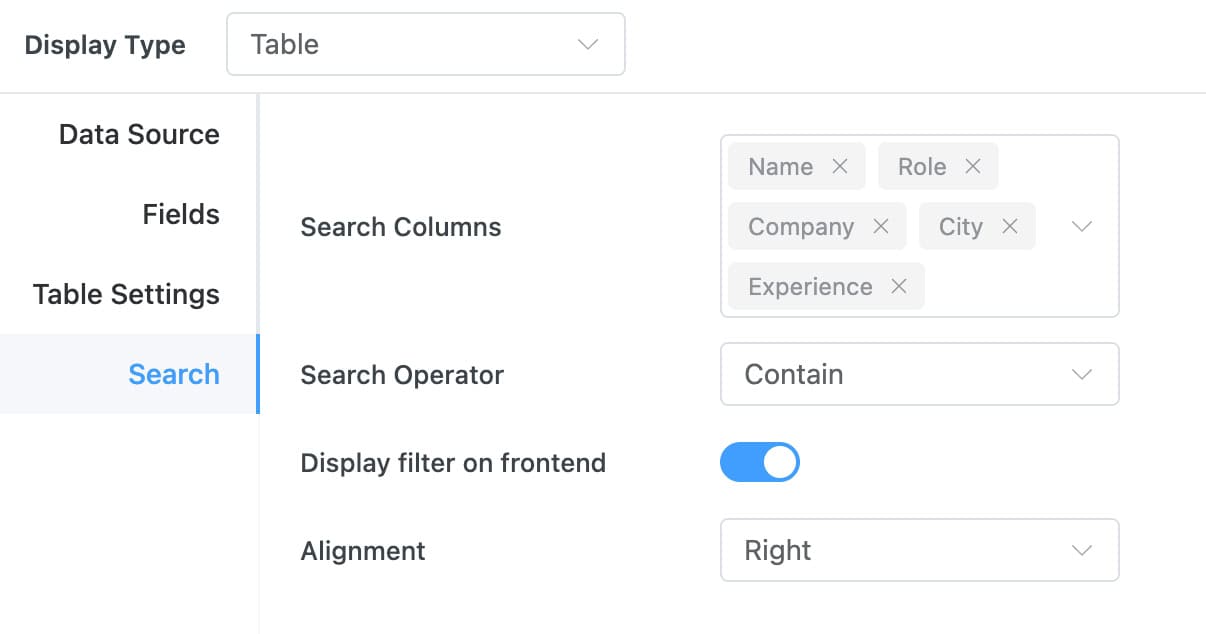
Once Search is on, the Search tab decides how it works. In Search Columns, pick the fields visitors can search. Stick to public ones like Name, Role, and Company, and leave Email out, even though it’s already hidden in the table.
Search Operator controls how results match. Contain is the most forgiving option, because typing “Ava” finds “Ava Thompson.” Turn on Display filter on frontend so the search box shows on the page, then use Alignment to place it on the left, center, or right.
When everything looks right, click Publish. Form Vibes saves the Data Profile and creates a shortcode for the next step.
Notes: Want to show only the number of registrations instead of a full list? Set the Display Type to Counter. It works well on an event page to show how many people have signed up.
How do you display Elementor form submissions with the FV – Data Table widget?
The Form Vibes FV – Data Table widget places your Data Profile on any Elementor page. Open the page in Elementor, drag the FV – Data Table widget into your layout, and select your Data Profile. The fields, labels, and expand row settings come straight from that profile.
How do you add the FV – Data Table widget to your page?
- Open the page where the table should appear and click Edit with Elementor.
- Search for FV – Data Table in the Elementor widget panel.
- Drag the widget into your section or container.
- Select the Data Profile you created for the registration form.
- Click Publish or Update.
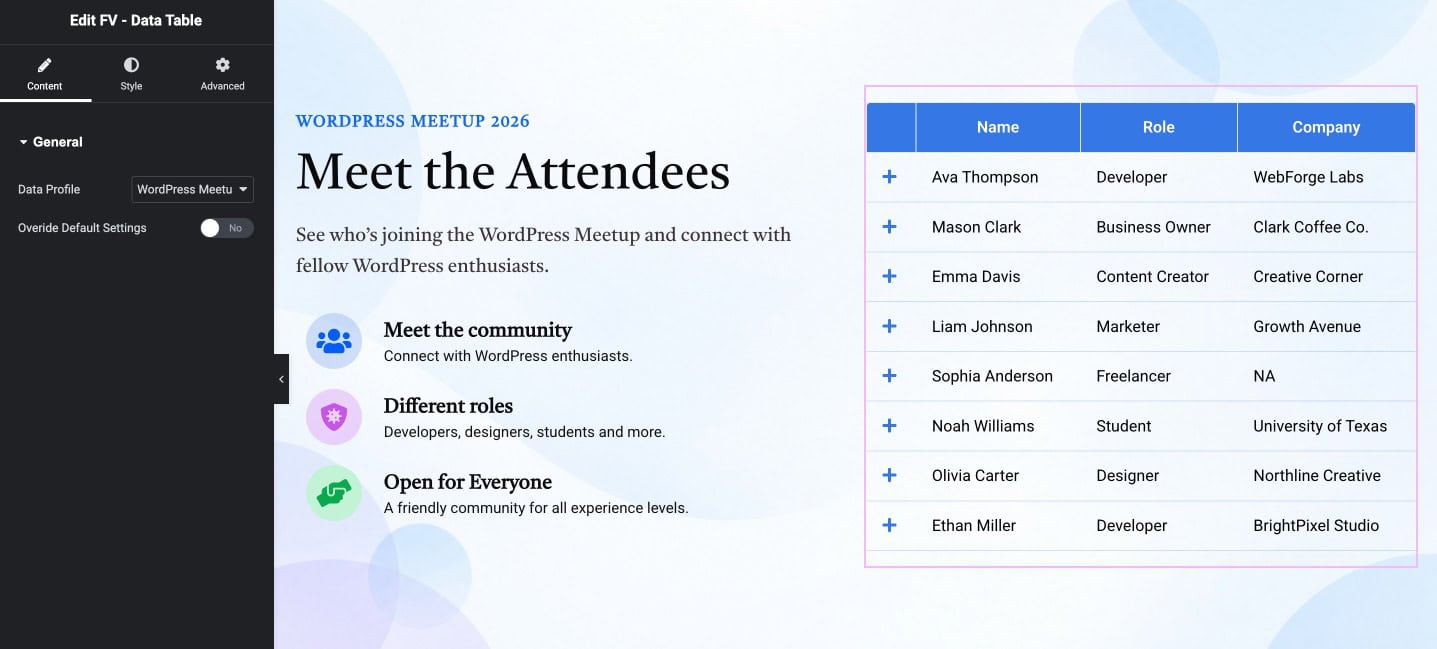
The table updates on its own. Each new registration appears on the page without anyone touching it again.
Important: By default, the FV – Data Table widget uses the settings you chose in the Data Profile. To change them for one page only, turn on Override Default Settings in the widget and adjust the options under Custom Settings.
How do you style the table to match your page?
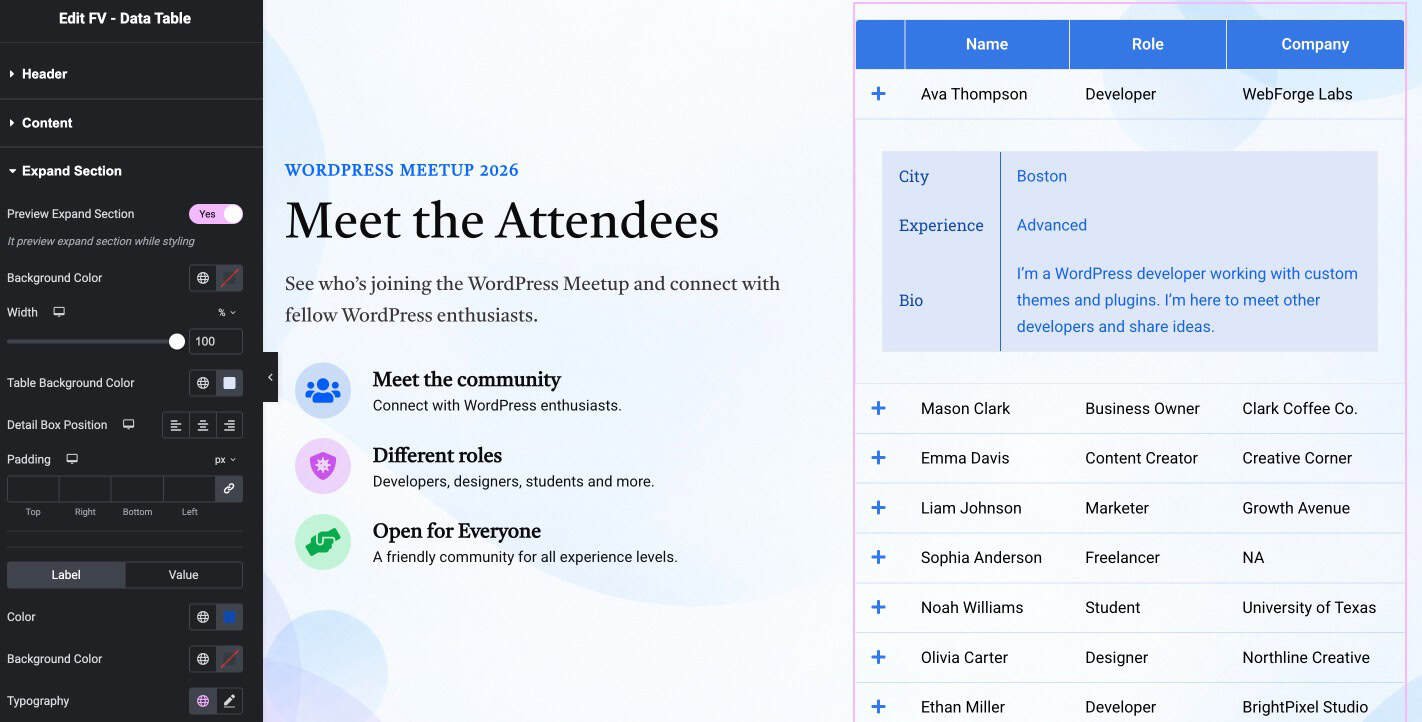
The FV – Data Table widget’s Style tab controls how the table looks, and each part of the table has its own styling options. Start with the header, where you set the background and text colors.
Next, style the content rows so the attendee details are easy to read. The expand row can be styled separately, which helps the extra details like City, Experience, and Bio stand apart from the main row when a visitor opens them. Turn on Preview Expand Section to keep the expanded row open in the editor, so you can see your changes as you make them. Finally, style the pagination so the page buttons match the rest of your design.
How do you add the table with a Form Vibes shortcode instead?
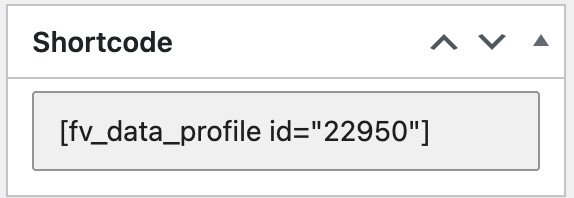
A Form Vibes shortcode displays the same Data Profile anywhere on your site, with or without Elementor. After you publish a Data Profile, Form Vibes generates a shortcode for it. Copy the shortcode and paste it into a Shortcode widget in Elementor or a Shortcode block in the WordPress block editor.
Use the shortcode when a page isn’t built with Elementor, or when you want the same table on several pages. The shortcode and the FV – Data Table widget read the same Data Profile, so the fields and labels match wherever the table appears.
How do you keep displayed form submissions private?
Display only the fields people expect to be public, and tell them before they submit. A frontend table is visible to anyone who can open the page, so privacy decisions should come before you publish.
Important: A public table shows every entry that matches your Data Profile. Check the selected fields and filters before publishing the page.
- Keep contact and technical details out of the display. Hide email addresses, phone numbers, IP addresses, and user agent data using Column Visibility in the Data Profile. Also remove those fields from Search Columns, so a hidden field can’t be searched on the frontend.
- Tell people at the point of submission. If names and companies will appear on a public list, say so near the submit button, or add a consent checkbox to the form. A note that promises data will only be used for event communication doesn’t fit a public attendee list.
- Exclude Spam entries with the Status filter so junk submissions never go live.
- Restrict internal pages. For a team or client dashboard, use WordPress page visibility settings. Private pages are visible only to Editors and Administrators, so Password Protected is the practical choice for sharing with clients who don’t have those roles.
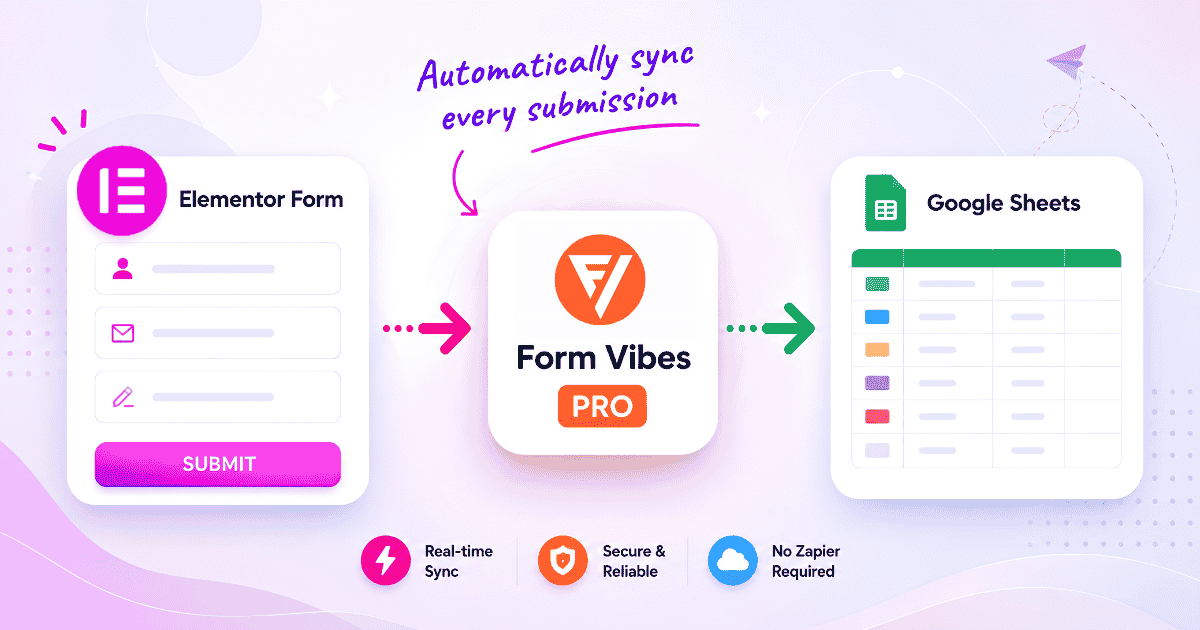
- Share privately with Google Sheets instead. If submissions are only meant for your team or a client, they don’t need to be on your website at all. Form Vibes Pro can sync Elementor form submissions to a Google Sheet, and only the people you share the sheet with can see it. Follow our guide on connecting Elementor forms to Google Sheets.
Frequently Asked Questions
Can you display Elementor form submissions on a page without code?
Yes. Form Vibes Pro displays Elementor form submissions on the frontend through a Data Profile, with no code required. You select the form, choose the fields, and place the table using the Form Vibes FV – Data Table widget in Elementor or the shortcode Form Vibes generates.
Why isn’t my Elementor form showing in Form Vibes?
Form Vibes lists an Elementor form only after the form receives at least one frontend submission after Form Vibes is installed. Open the page with your form, submit a test entry, and the form will appear in Form Vibes and in the Data Profile form list.
Can clients see Elementor form submissions without WordPress admin access?
Yes. Create a Data Profile in Form Vibes Pro, display it on a page with the FV – Data Table widget or shortcode, sync form submissions to Google Sheets, and set the page to Password Protected. Clients can then view submissions on that page with the password, without a WordPress login.
How do you show a form submission count in WordPress?
Create a Data Profile in Form Vibes Pro and choose Counter as the display type. Form Vibes shows the number of entries matching your filters, which you can place on any page with the generated shortcode. Filters let you count only specific entries, such as non-spam registrations.
Is it safe to display form submissions publicly?
It’s safe when you control what appears. In Form Vibes Pro, hide email addresses and other private fields in the Data Profile, and remove them from the search columns too. Tell people on the form that their details will appear publicly, and exclude Spam entries with the Status filter.
Ready to put your Elementor form data on a page?
You created a Data Profile, chose and renamed the fields, and placed a live table on the frontend with the FV – Data Table widget or a shortcode. With a privacy check in place, your attendee list stays useful to visitors and safe for the people on it.
The same setup works for your next event, waitlist, or client form. Try Form Vibes Pro and turn submissions you’re already collecting into pages people can actually use. Using more than one form plugin? See how to display form submissions from any form plugin.


Leave a Reply