When your website starts collecting form submissions, reviewing and managing those entries becomes an important task. After capturing submissions, you can view all the collected entries under the Form Vibes Submissions page in your WordPress dashboard.
The Submissions page displays all captured entries in a tabular format, allowing you to quickly review the information submitted by users. Each entry contains the details filled out in the form fields along with additional metadata.
However, while reviewing submissions, you may sometimes need to add internal notes to certain entries. For example, you might want to mark a submission as important, note that you have responded to a user, or add a reminder for follow-up.
This is where the Notes feature available in Form Vibes Pro becomes useful.
With this feature, administrators can easily add notes to form submissions so important details are not forgotten when reviewing entries later.
Table of Contents
Why Add Notes to Form Submissions?
Adding notes helps administrators and team members keep track of important updates related to specific submissions.
For example, you may want to add notes such as:
- “Responded to the customer inquiry”
- “Waiting for follow-up reply”
- “Important lead – contact soon”
- “Sent quotation to the client”
These notes make submissions easier to track, especially when managing a large number of entries.
Steps to Configure the Notes in Form Vibes
Here are the steps that you can follow to configure the Notes feature in Form Vibes.
Step 1: Enable the Notes Module
Before adding notes, you must enable the Notes Module in Form Vibes Pro.
Follow these steps:
- Go to Form Vibes → Settings.
- Locate the Notes Module option.
- Enable the module.
Once enabled, the notes functionality will become available on the submissions page.

Add Notes to Form Submissions
After enabling the Notes module, you can start adding notes to individual submissions.
Follow these steps:
- Go to Form Vibes → Submissions.
- Locate the submission where you want to add a note.
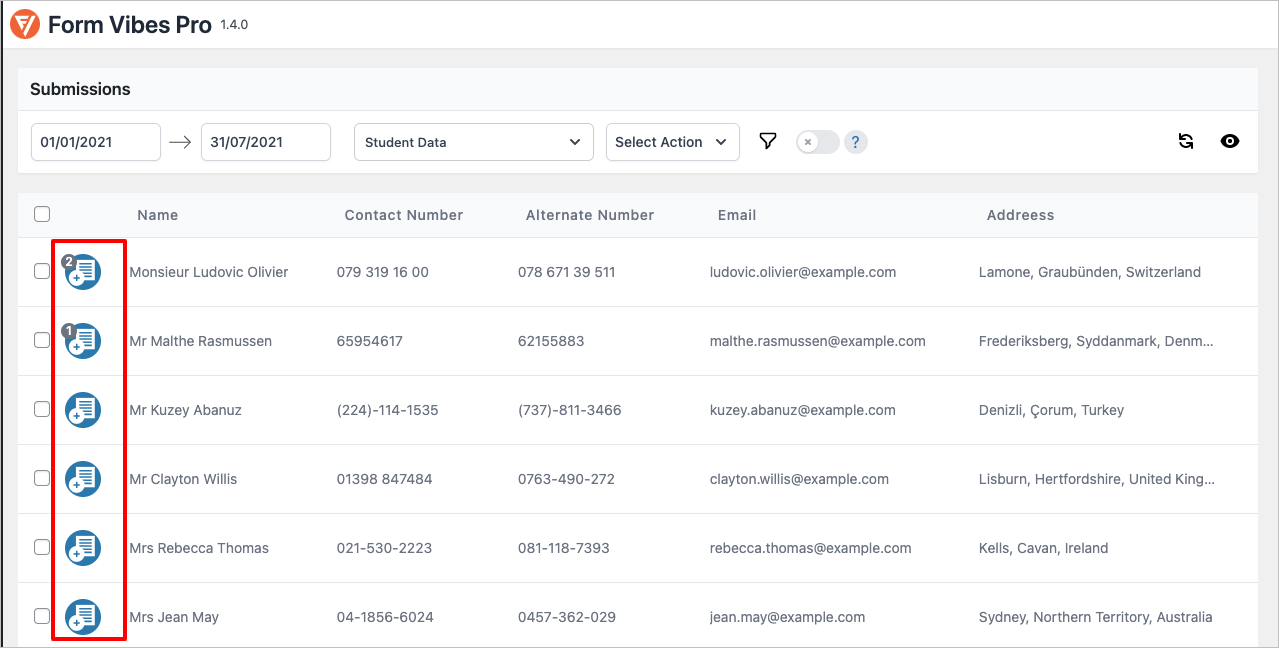
- Click the Add Note icon corresponding to that submission.
- A popup window will appear.
- Enter the note text.
- Click Add Note to save the note.
The note will now be attached to that particular submission.

Viewing and Deleting Notes
Once a note is added, you can easily view or manage it.
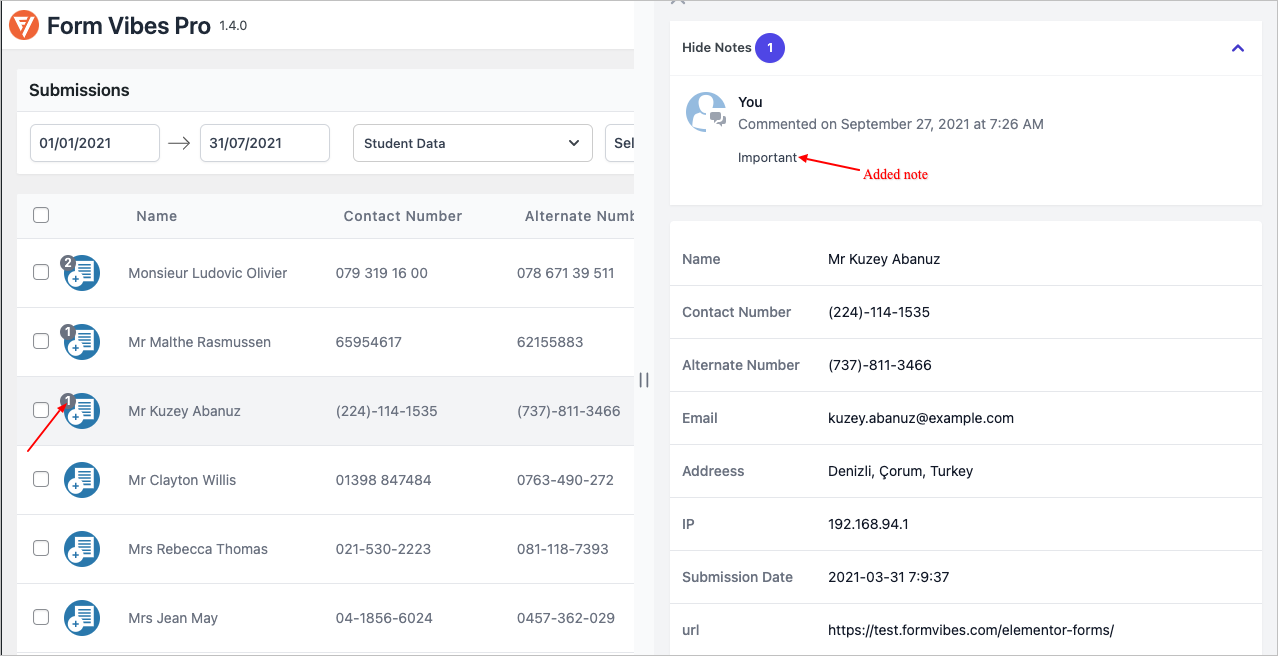
To view notes:
- Expand the specific submission entry.
- Click Show Notes.
You will be able to see all notes associated with that submission.
To delete a note:
- Click the Delete Note option next to the note.
- The note will be removed from the submission.
You will also see a count of notes added to each entry, helping you quickly identify submissions with notes.
Managing Notes
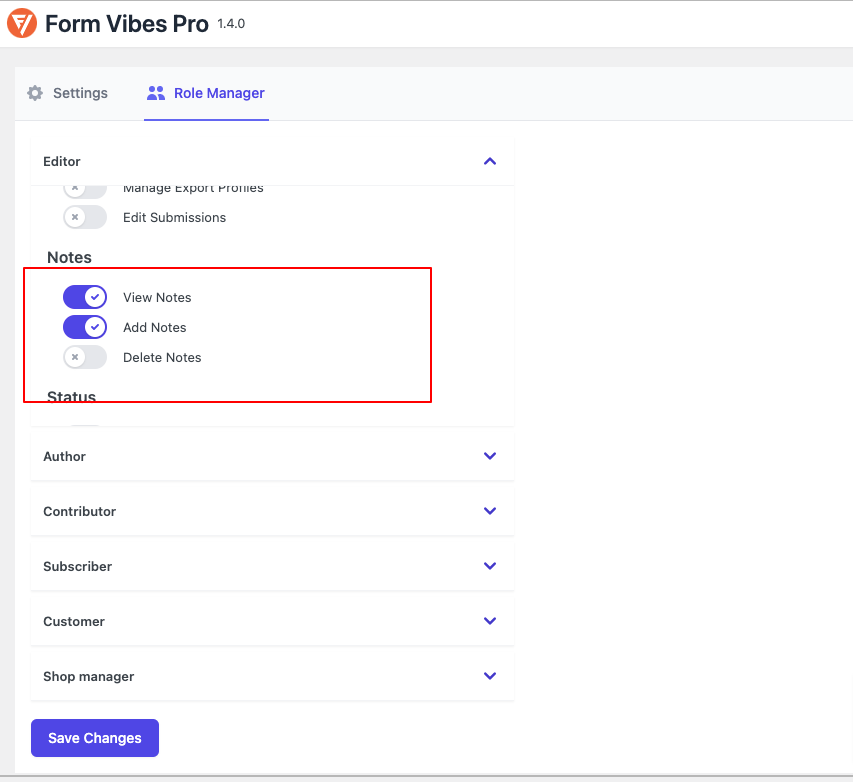
If, as site Admin, you want to restrict some WordPress Users from accessing the Notes feature, you can quickly do this under the Role Manager.
You can easily manage who can Add, Delete, and View the created notes on the form submissions.