How to Create and Configure Forms in Gravity Forms

Gravity Forms is one of the most capable form builders available for WordPress. Getting the most out of it means understanding not just how to add fields but how to configure field behavior, manage conditional logic, set up email notifications, control submission confirmations, and embed forms correctly on your pages.
This guide covers every step of creating and configuring a Gravity Forms form, from installation through to embedding on your website and managing the submissions that come in. By the end you will have a fully configured form live on your site and a clear understanding of everything the settings panel offers.
Before You Start
A Gravity Forms licence purchased and the plugin installed on your WordPress site
Admin access to your WordPress dashboard
At least one page or post ready to embed your form on
Form Vibes installed and active
What Do You Need to Get Started with Gravity Forms?
Gravity Forms is a premium WordPress plugin. Purchase a licence from the Gravity Forms website, download the plugin file, then go to Plugins > Add New > Upload Plugin in your WordPress admin. Select the downloaded file, click Install Now, then Activate.
Once activated, a Forms menu item appears in your WordPress admin sidebar. All your forms are created and managed from here.

Notes: Gravity Forms is a premium WordPress plugin, so you’ll need an active license to download and use it on your website.
How Do You Create a New Form in Gravity Forms?
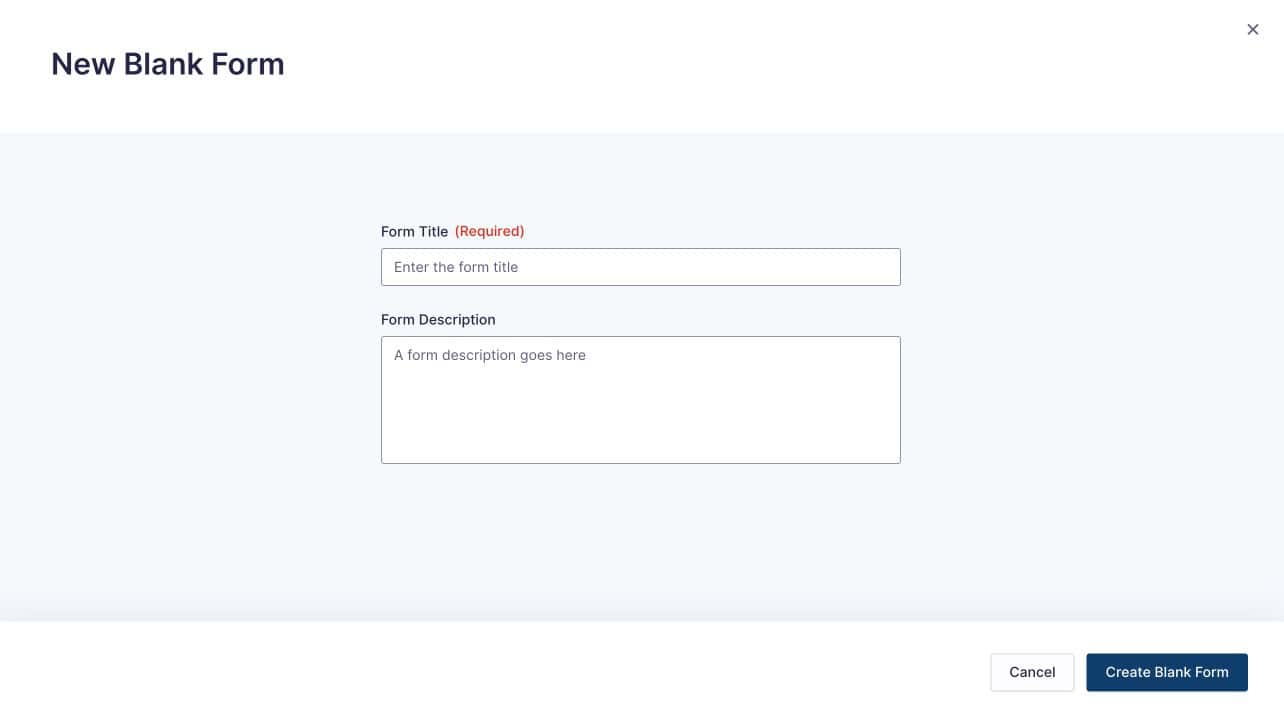
Go to Forms > New Form in your WordPress admin. You can either choose a pre-built template from the template library or start with a blank form.
Enter a Form Title and an optional description, then click Create Form. The Gravity Forms builder interface opens with your new empty form.
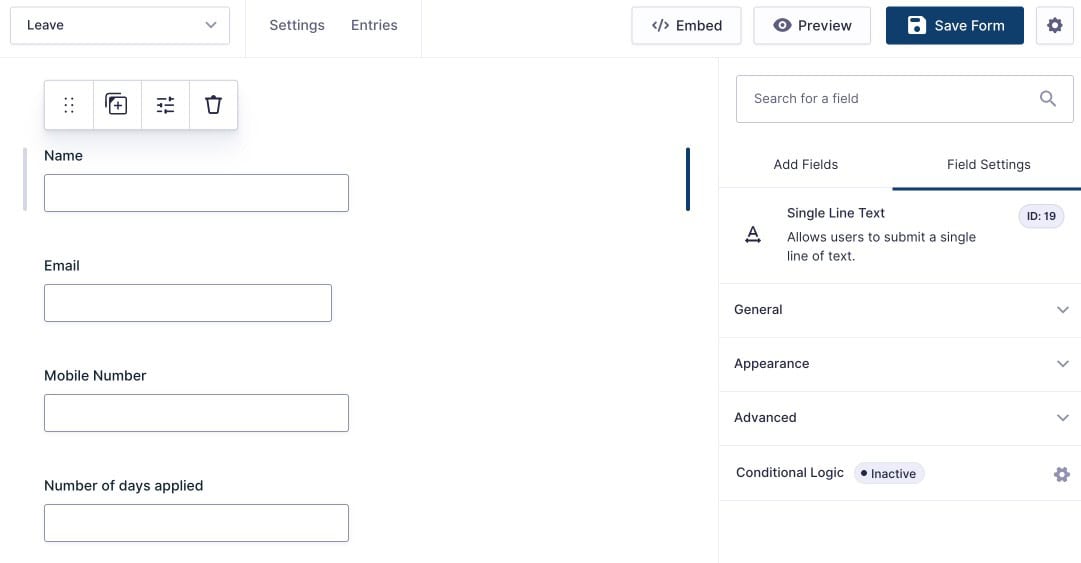
Adding Fields
The form builder shows field categories in the right panel. Available categories include Standard Fields (Name, Email, Text, Dropdown, Radio Buttons), Advanced Fields (Phone, Address, Date, File Upload), Pricing Fields (Product, Quantity, Total), and Post Fields (Title, Body, Category).
Click any field to add it to the form, or drag it directly into position on the canvas. Reorder fields by dragging them within the form area.
Already using Gravity Forms? Form Vibes connects in two steps and adds a unified submission dashboard, analytics, and CSV export on top – free to install.
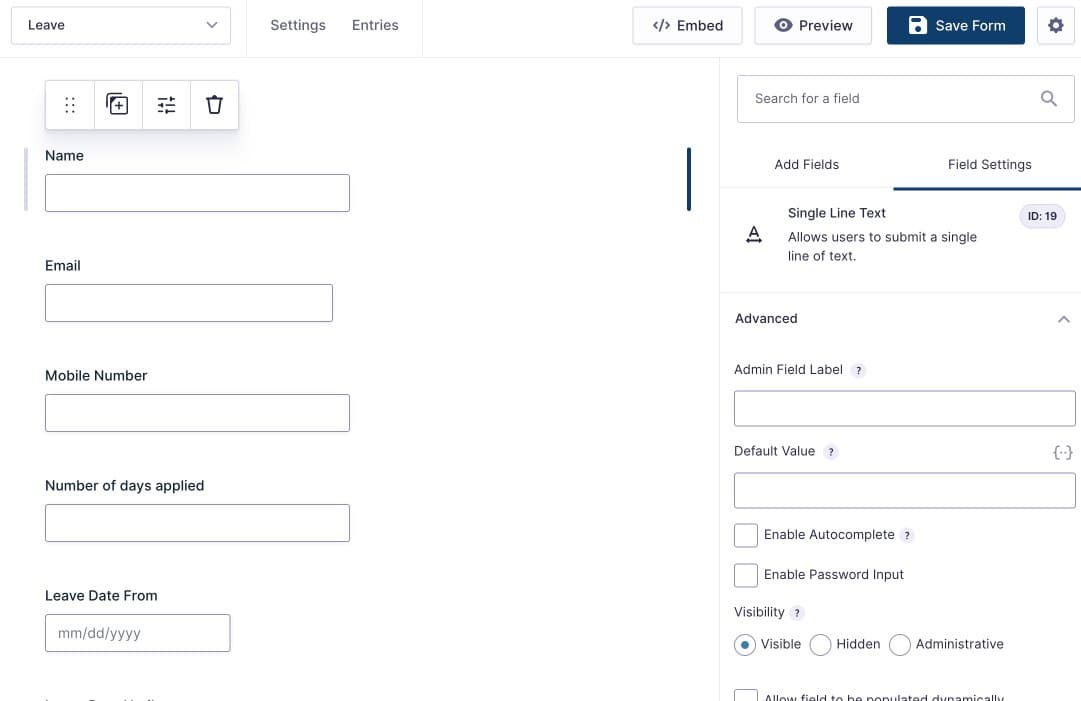
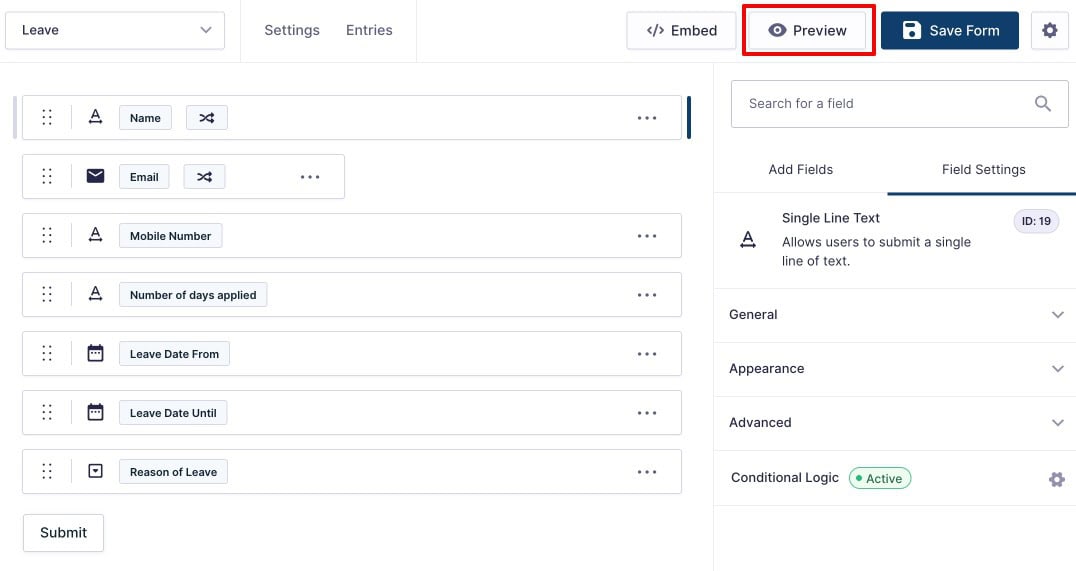
What Field Settings Are Available in Gravity Forms?
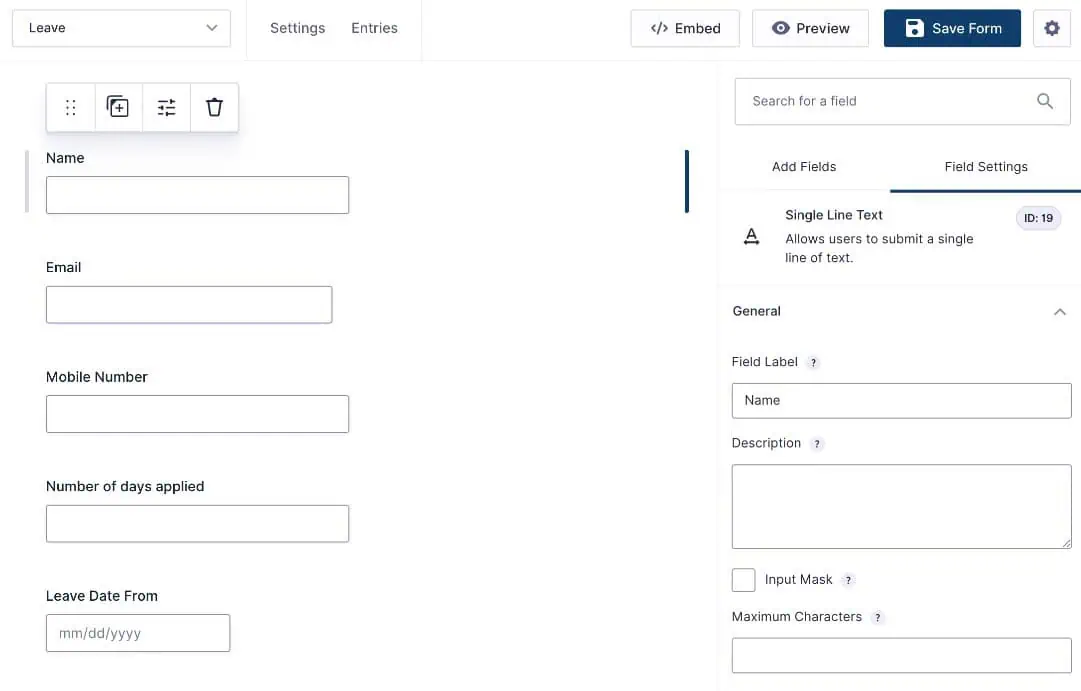
Click on any field in the form builder to open its configuration panel. Each field has four setting tabs.
General controls the core behaviour of the field. Set the field label, add a description, mark the field as Required, and enable the No Duplicates option which prevents submissions with a value that already exists in your database, useful for email fields on registration forms.
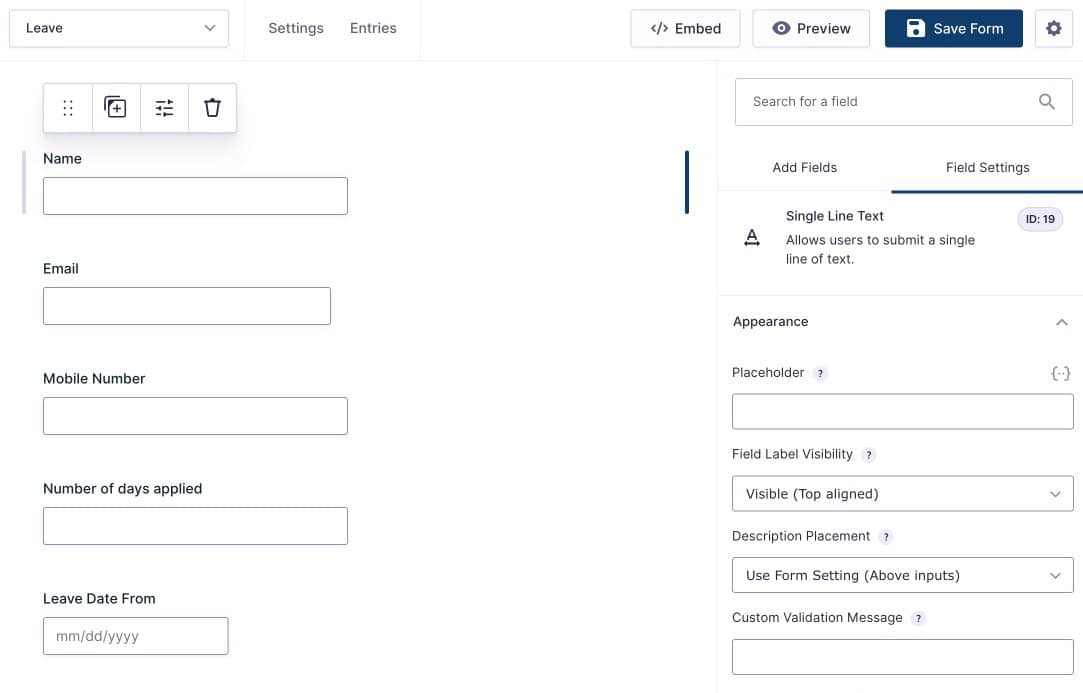
Appearance controls how the field looks on the frontend. Configure field size (Small, Medium, Large), placeholder text, label visibility, and custom CSS classes. These settings let you adjust layout and design without writing code.
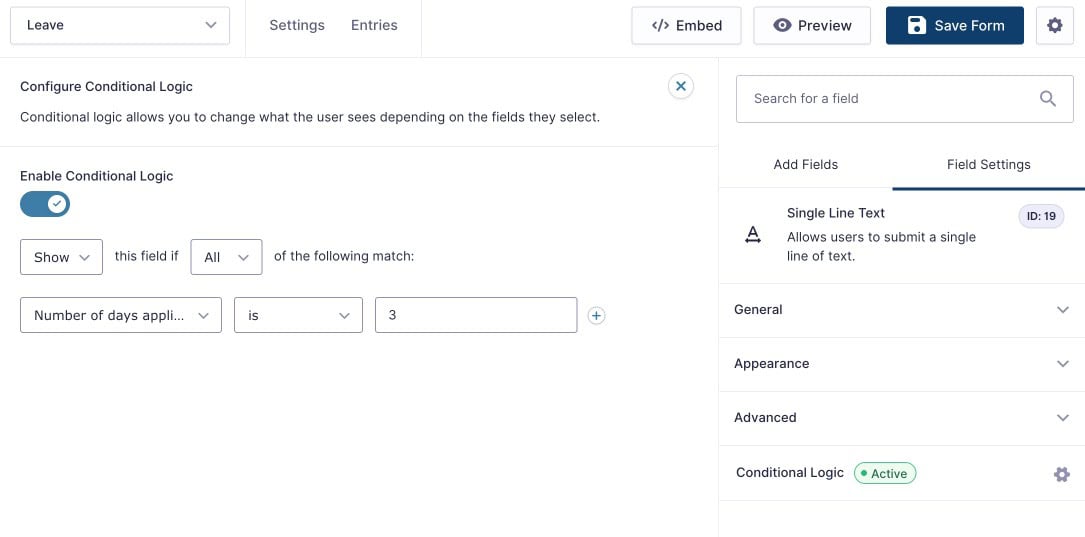
Advanced gives you additional control over field behaviour. Set a default value, adjust field visibility (Visible, Hidden, or Administrative), enable conditional logic on individual fields, and configure custom validation rules.
Conditional Logic on a field controls when it is shown or hidden based on the value entered in another field. For example, show a Budget field only when a service type dropdown is set to a specific value. This creates dynamic forms that adapt to user input without showing irrelevant fields.
Tips: Avoid showing too many fields at once. Using Conditional Logic keeps forms shorter and helps users complete them faster.
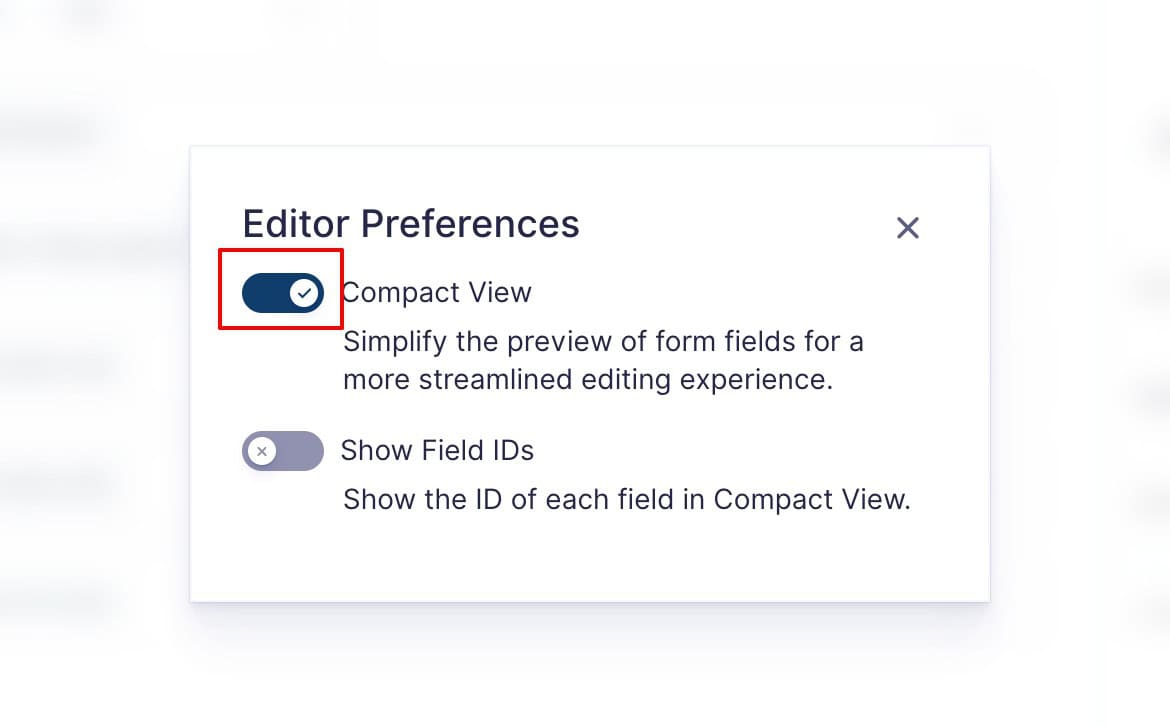
Using Compact View and Field IDs
For complex forms with many fields, Compact View reduces visual spacing between fields so you can see more of the form at once. Enable it from the Settings icon in the top right of the form builder.
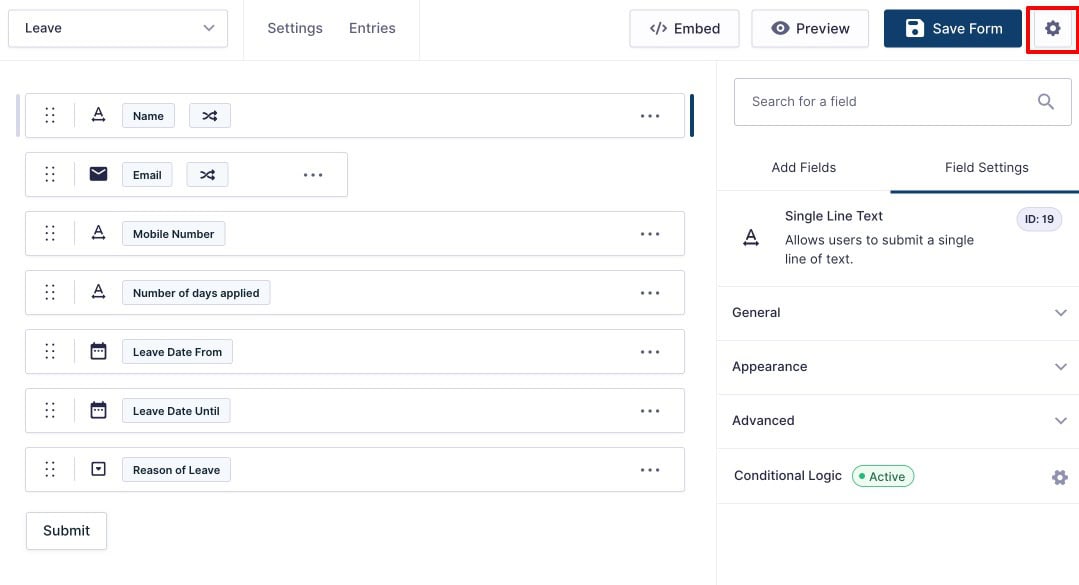
Compact View also gives you the option to display Field IDs alongside each field, useful when writing email notification templates that reference field values.
Previewing Your Form
Before embedding, click the Preview button at the top of the form builder to open the form in a new tab. Test every field, trigger conditional logic rules, and verify required field validation is working as expected.
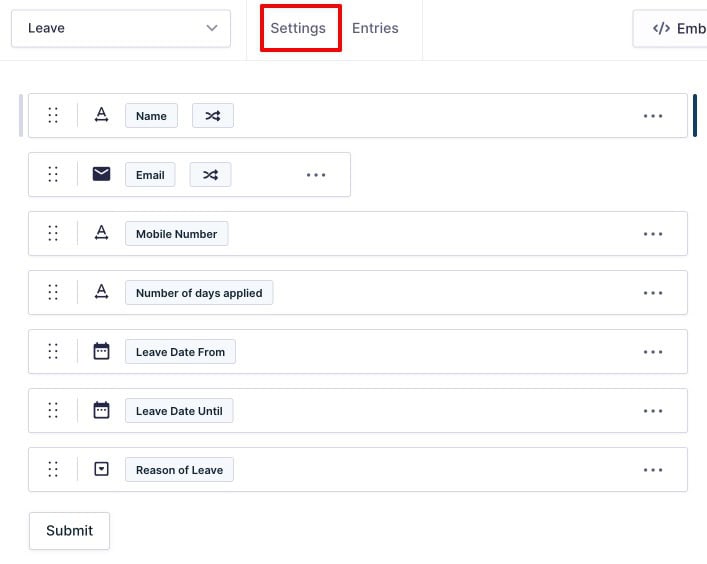
Which Form Settings Should You Configure Before Going Live?
Click the Settings option at the top of the form builder to access form-level configuration. The settings area has four sections.
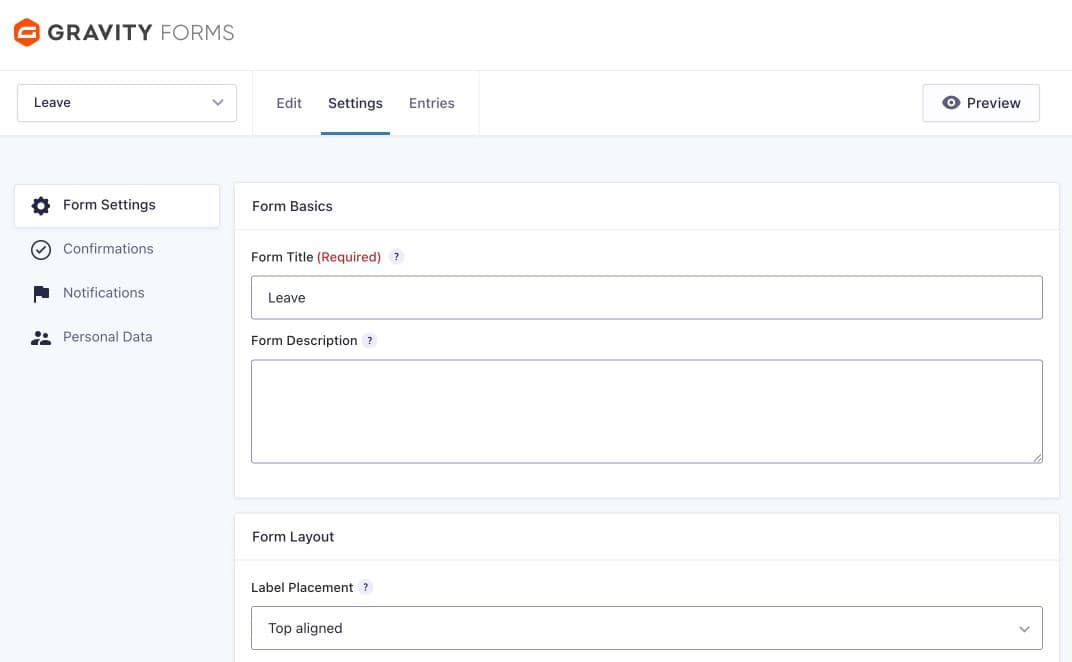
Form Settings controls the overall behaviour of the form. Configure the form title, layout, required field indicator style, submission limits (cap the number of entries the form will accept), form scheduling (set a start and end date for availability), require users to be logged in before submitting, enable spam detection, and enable animation when conditional logic fields appear.
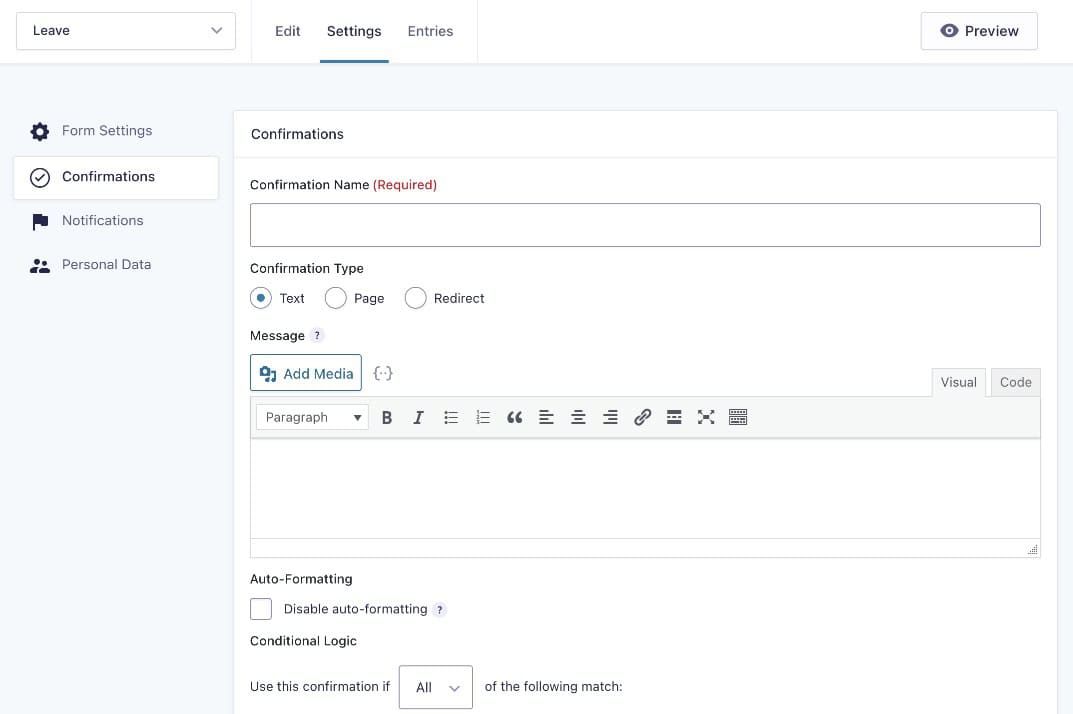
Confirmations defines what the visitor sees after a successful submission. Choose from three options: display a custom text message, redirect to a specific page on your site, or redirect to an external URL. Use a dedicated thank-you page redirect to guide leads to a next step or trigger a conversion event in Google Analytics.
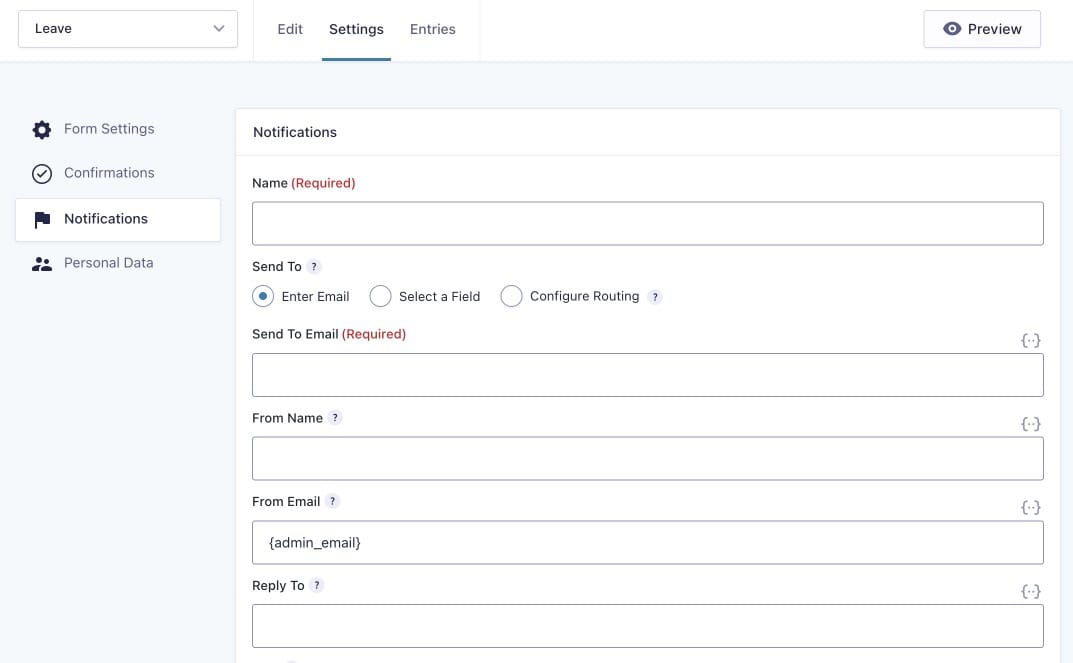
Notifications controls the emails sent after a form submission. By default, Gravity Forms sends an admin notification to the site owner. Configure additional notifications for any other recipient, including the person who submitted the form. Use dynamic merge tags to pull submitted field values into the email subject and body. Setting a Reply-To value using the submitter’s email field tag means you can reply to any notification and reach the lead directly.
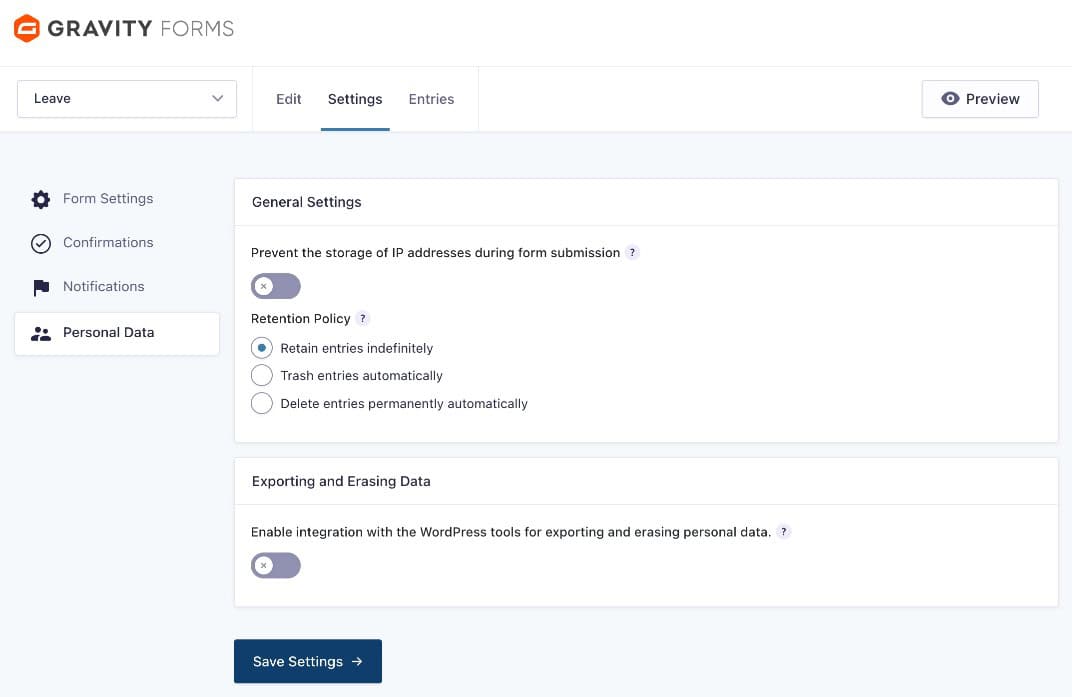
Personal Data manages how submitted data is stored and handled in relation to privacy regulations. Configure data retention periods, enable options for exporting or erasing personal data on request, and control how Gravity Forms handles user-submitted information in line with GDPR and similar requirements.
What Are the Different Ways to Embed a Gravity Form?
Once your form is configured and ready, Gravity Forms provides three methods for adding it to any page on your site.
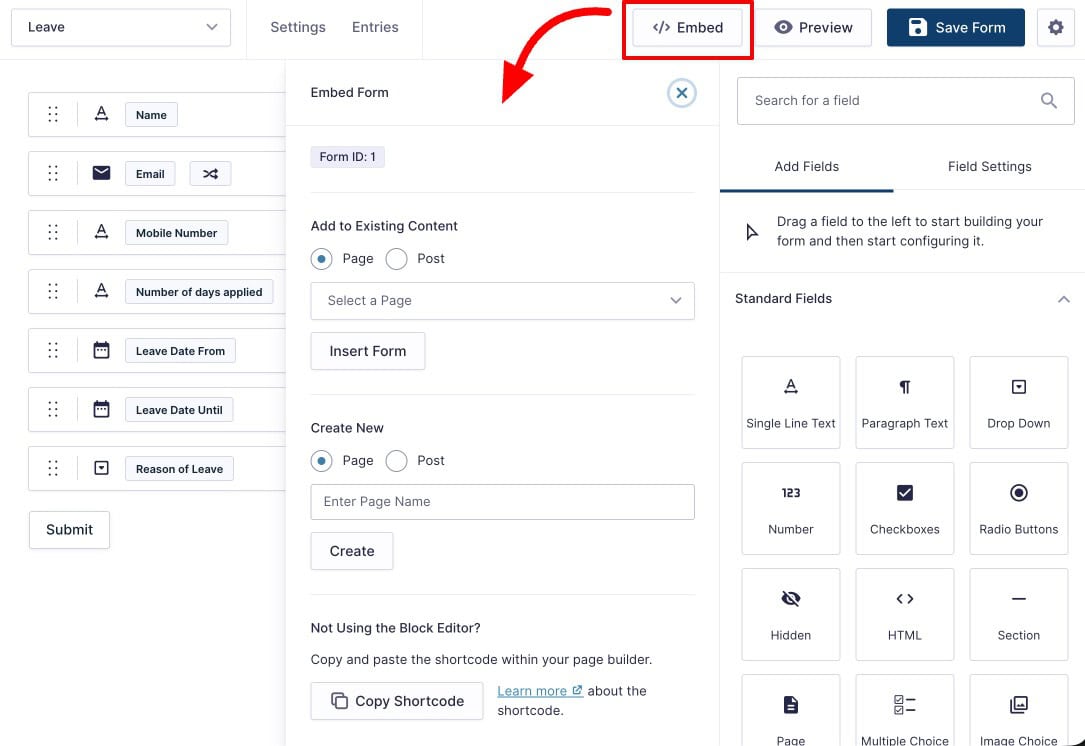
Option 1: Direct Embed from the Builder
Open the form and click the Embed button in the form builder toolbar. Choose whether to add the form to an existing page or create a new page specifically for it. Select the page and confirm. Gravity Forms inserts the form block automatically.
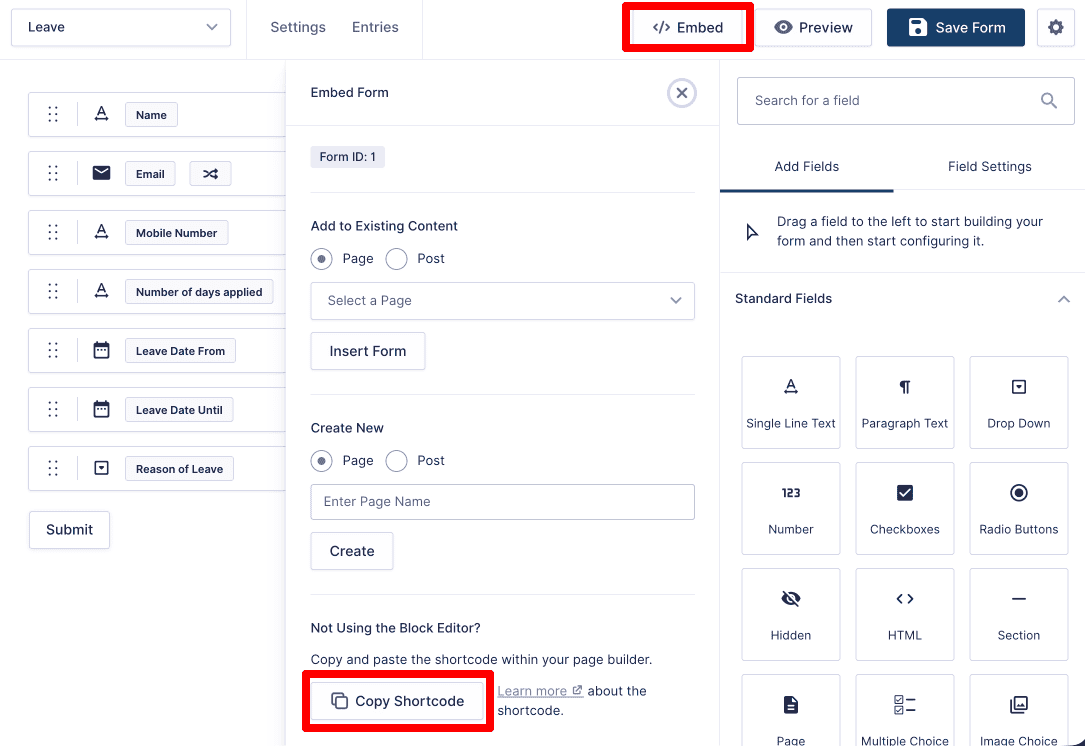
Option 2: Using Shortcode
Every Gravity Forms form has a unique shortcode. Click the Embed button, copy the shortcode shown in the panel, open any page in the WordPress editor, add a Shortcode block, and paste the shortcode. The form renders on the frontend wherever the shortcode is placed.
Option 3: Using Gutenberg Block
In the WordPress block editor, click the Add Block button, search for “Forms”, and select your form from the dropdown. This is the most straightforward method for most users working in the standard WordPress editor.

What Happens to Submissions After Your Form Goes Live?
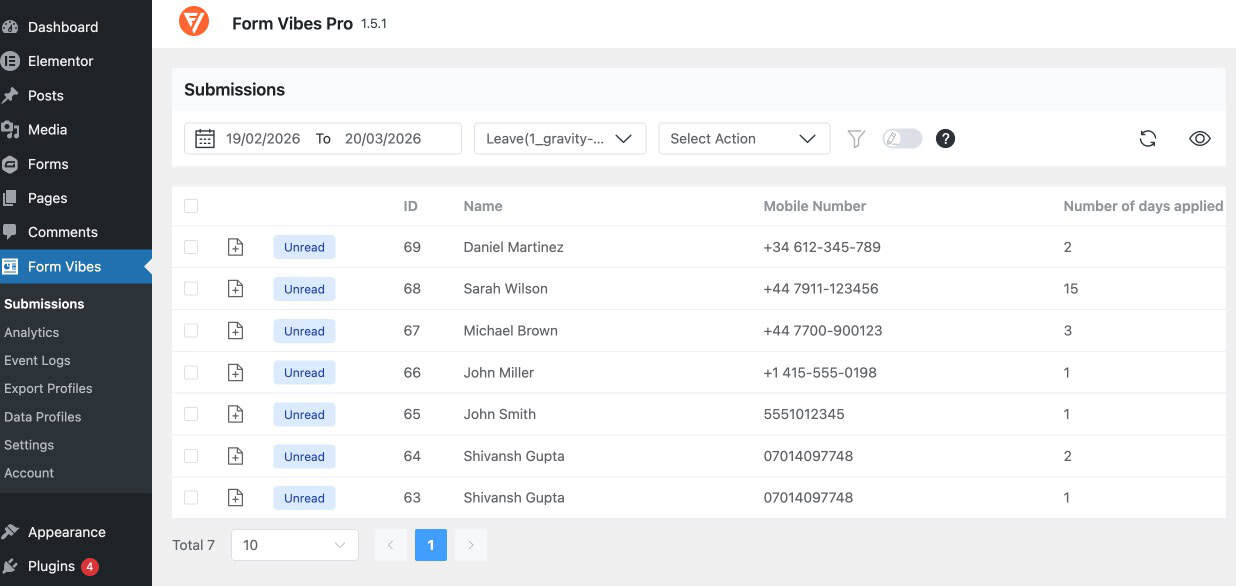
Gravity Forms stores every submission automatically under Forms > Entries. From the Entries page you can view individual submissions, filter by field value, apply bulk actions (mark as read, mark as spam, delete), and export entries to CSV.
For sites where form data needs more than basic entry viewing, Form Vibes adds an additional management layer on top of what Gravity Forms already stores.
With Form Vibes active, every Gravity Forms submission is available at Form Vibes > Submissions alongside entries from any other form plugin on your site. The analytics dashboard at Form Vibes > Analytics shows daily, weekly, and monthly submission trends for each form. Form Vibes Pro adds Submission Status marking (Read, Unread, Spam) for team triage workflows, advanced field-level filtering with AND/OR logic, Export Profiles for saved reusable exports, and an Event Log that records every change made to every entry.
For a complete guide to viewing, filtering, exporting, and managing Gravity Forms entries using both Gravity Forms’ native tools and Form Vibes, see How to Manage Gravity Forms Submissions in WordPress.
Important: If your site runs multiple form plugins, for example Gravity Forms on your lead form and Contact Form 7 on your contact page. Form Vibes brings all submissions into one unified dashboard for easier management.
Conclusion
Gravity Forms gives you full control over every aspect of form creation — field types and behaviour, conditional logic, confirmation handling, email notifications, privacy settings, and multiple embedding options. Once the form is live and collecting submissions, managing those entries efficiently is the next step.
For a complete guide to viewing, filtering, exporting, and analysing Gravity Forms submissions see the dedicated guide on Integrating Gravity Form with Form Vibes.
Manage your Gravity Forms submissions more efficiently
Manage Gravity Forms submissions more efficiently with Form Vibes. View analytics, filter entries, export submissions, and organize workflows directly inside your WordPress dashboard.
Frequently Asked Questions
Common questions about saving and filtering Elementor form submissions.
Is Gravity Forms free?
No, Gravity Forms is a premium WordPress plugin. You need to purchase a license to use it. Different plans offer varying features and add-ons depending on your needs.
How do I embed a Gravity Form on a page?
You can embed a form by:
– Using the Embed button inside the form builder
– Adding the Gravity Forms block in the WordPress editor
– Pasting the form’s shortcode into a page or post
How do I create a form in Gravity Forms?
Go to Forms → New Form, enter a title and description, and start adding fields using the drag-and-drop builder. You can either use a template or build the form from scratch.
How do I apply conditional logic in Gravity Forms?
Click on a field, open the Advanced settings tab, and enable Conditional Logic. You can set rules to show or hide fields based on user input.


Leave a Reply