Build Better Forms Faster: Everest Forms Guide for WordPress Users

Everest Forms is a drag-and-drop form builder that covers the full range of WordPress form needs – contact forms, registration forms, multi-step forms, payment forms, and more with a free version that includes features other plugins lock behind paid plans.
This guide covers the complete Everest Forms workflow from installation to embedding. It walks through form creation, general settings, email notification configuration, confirmation options, visual styling, and what happens to submissions after the form goes live.
Before You Start
A WordPress website with admin access
Everest Forms plugin installed and activated
At least one page or post ready to embed your form on
Form Vibes installed and activated
How Do You Create a Form with Everest Forms
Creating a form with Everest Forms is simple and straightforward. The plugin provides both ready-made templates and a blank canvas to build exactly the form you need.
1
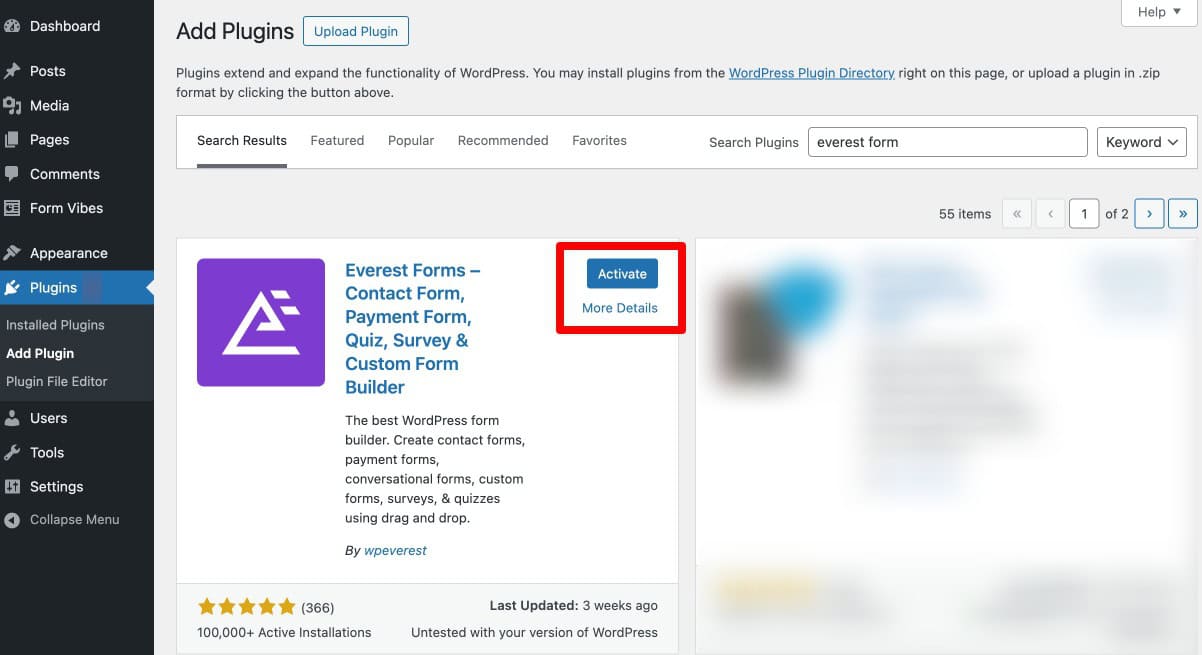
Install and Activate Everest Forms
Go to WordPress Dashboard > Plugins > Add New, search for “Everest Forms”, click Install Now, then Activate. Once activated, a new Everest Forms menu item appears in your WordPress dashboard sidebar.
2
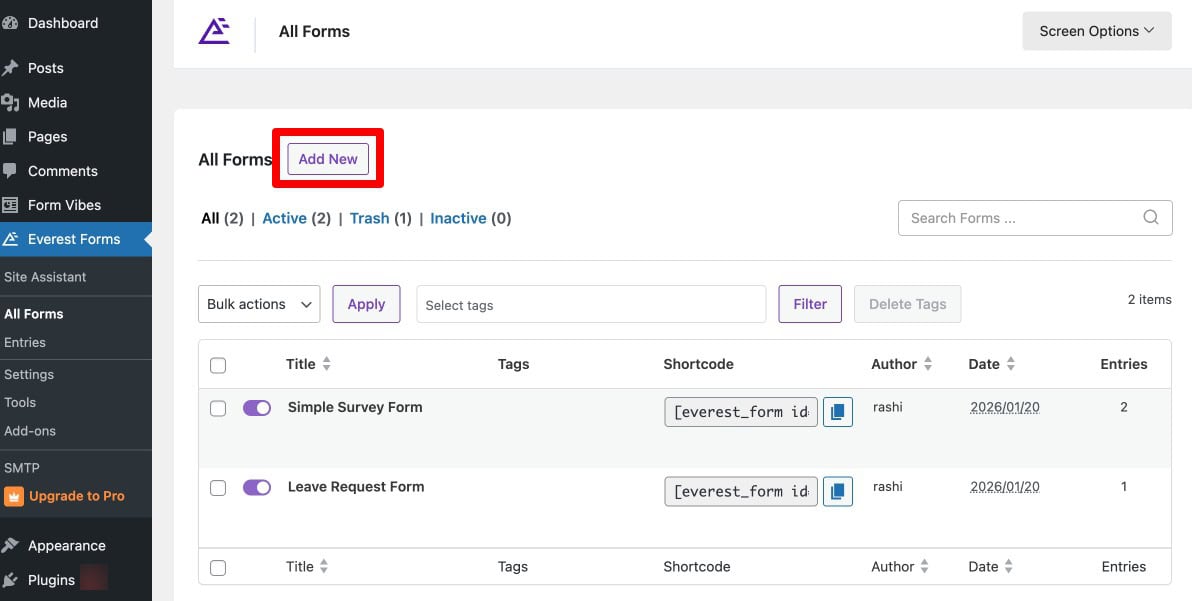
Create a Form
Go to Everest Forms > All Forms > Add New. This opens the form builder interface.
3
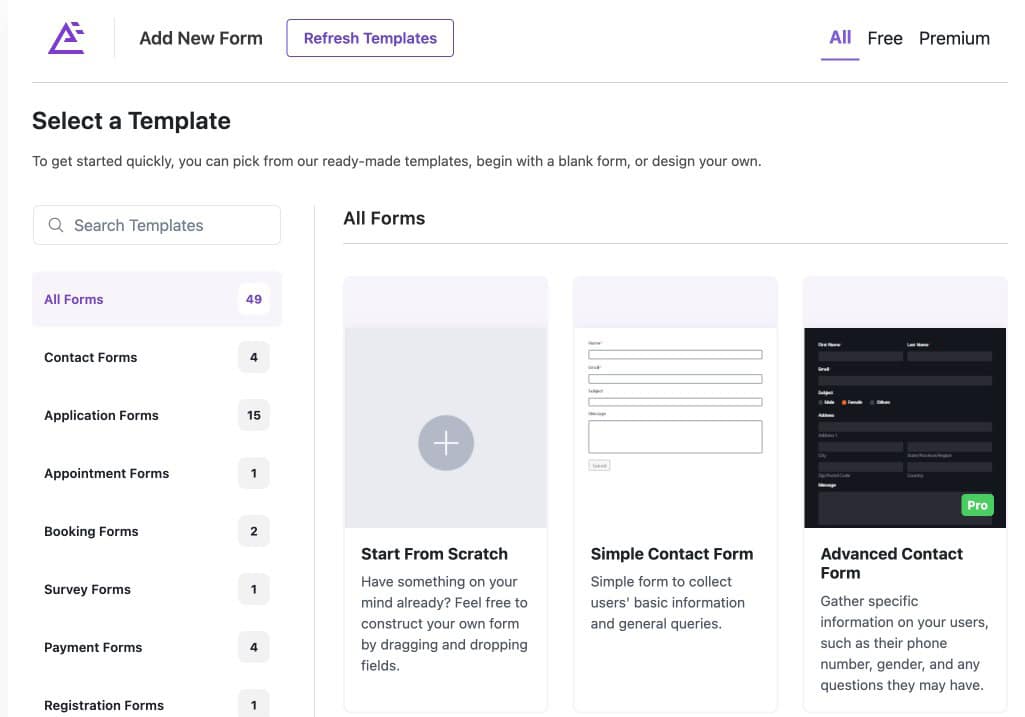
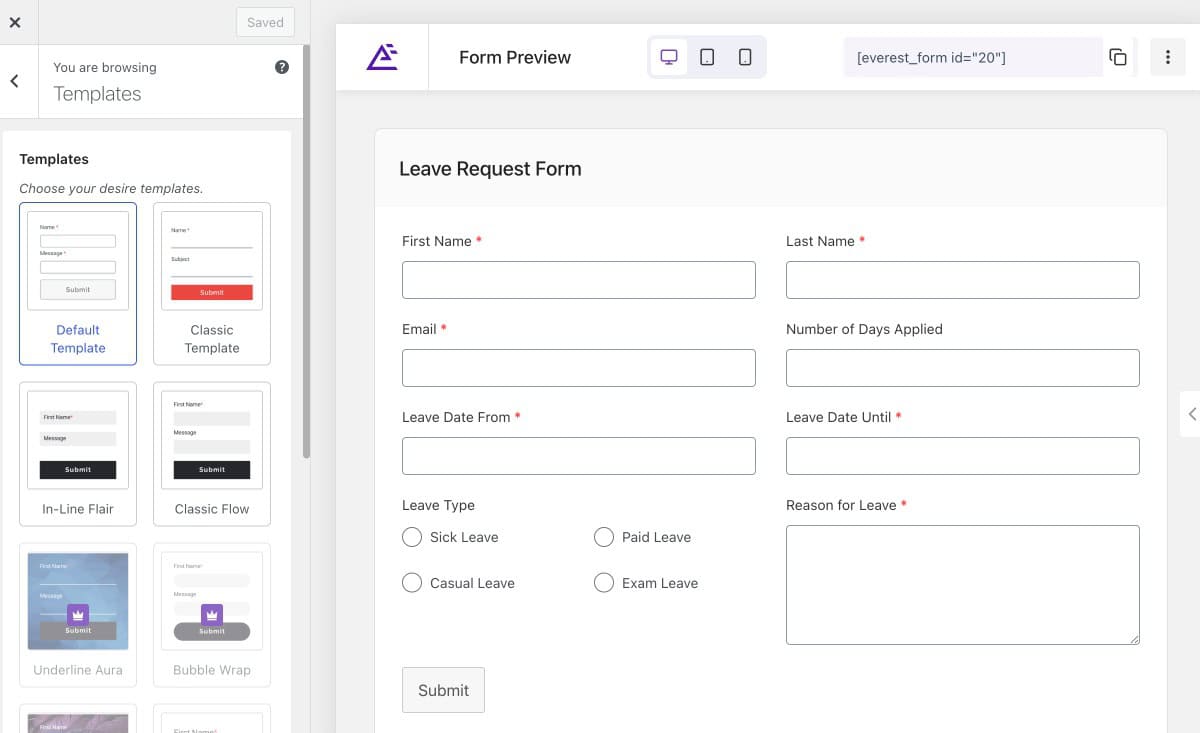
Choose a Template or Start with a Blank Form
Everest Forms gives you two ways to begin.
Use a pre-built template. Choose from available templates such as Contact Form, Job Application, Newsletter Signup, and more. Templates help you get started quickly with pre-configured fields already in place.
Start with a blank form. If you prefer full control, build the form from scratch by adding and arranging fields manually.
4
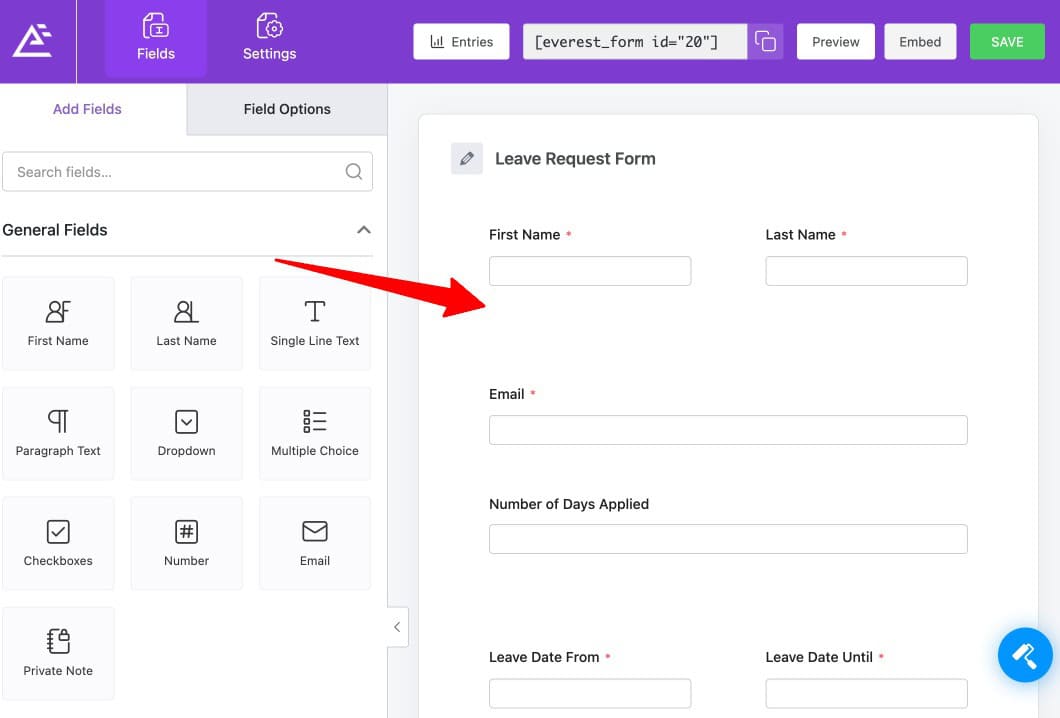
Drag and Drop Form Fields
The builder uses a drag-and-drop interface. Drag fields like Name, Email, Text, Number, Dropdown, Checkbox, Radio Button, and more from the panel onto the form canvas. Rearrange fields by dragging them into position. Click on any field to edit its label, placeholder text, and other settings.
Tips: Avoid adding too many unnecessary fields. Shorter forms usually improve submission rates and provide a better user experience.
What Settings Can You Configure for Your Everest Form?
Once your form is created, navigate to the Settings section of the form builder to access configuration options across General, Email, and Confirmation tabs.
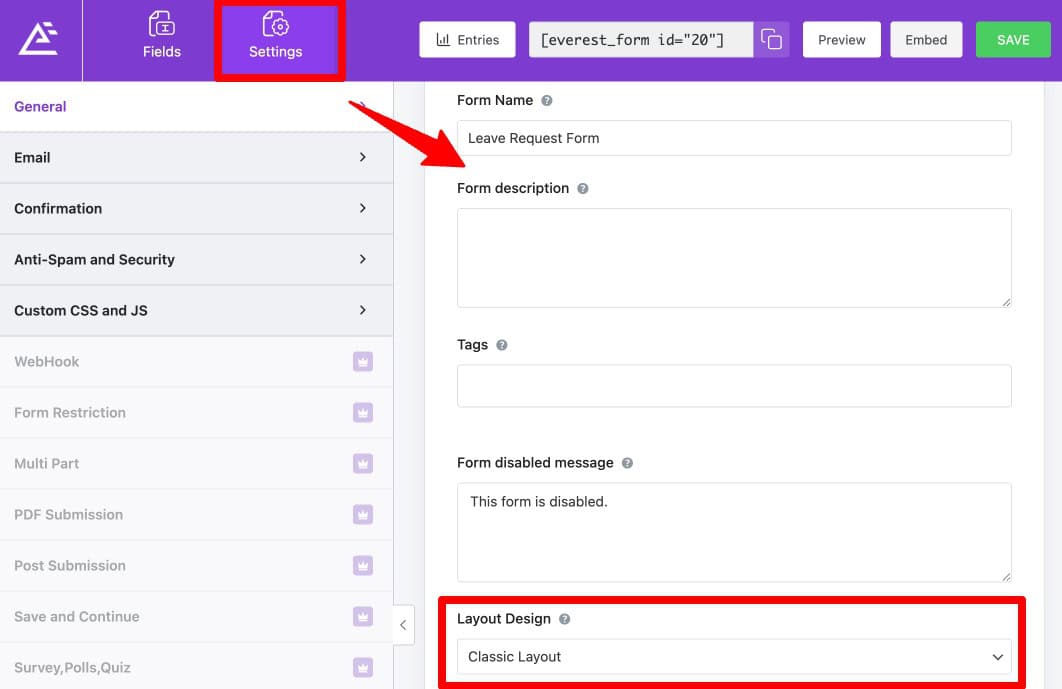
Layout Options in General Settings
Start by adding the form name and an optional description. You can also enter a custom message to display when the form is disabled.
Everest Forms offers two layout options. Default Layout provides a clean and modern vertical form design. Classic Layout uses a traditional horizontal form style. From the General settings you can also customise the Submit button label, style, and processing behaviour.
Enable AJAX Form Submission
Everest Forms lets you enable AJAX form submission so users can submit the form without a page reload. You can also enable the Disable Storing Entry Information option if you do not want form submissions saved to the WordPress database.

Important: If you enable “Disable Storing Entry Information”, Everest Forms will not save submissions to your database. This means email is your only copy of every entry. If email delivery fails for any reason, that submission is gone. Leave this option disabled unless you have a specific reason to turn it on.
Don’t rely only on email notifications for important submissions. Form Vibes can still capture Everest Forms entries inside database even when entry storage is disabled.
Configure Email Notifications
Email notification settings are found under Settings > Email > Email Notification inside the form editor.
- To Address – the email address where submission notifications are sent, usually the admin email.
- From Name – the name shown as the sender on the notification email.
- From Address – the sender’s email address.
- Reply To – the address where replies to the notification should go.
- Email Subject – the subject line of the notification.
- Email Message – the body of the notification email. Use dynamic tags such as
{all_fields}to include all submitted form data automatically.
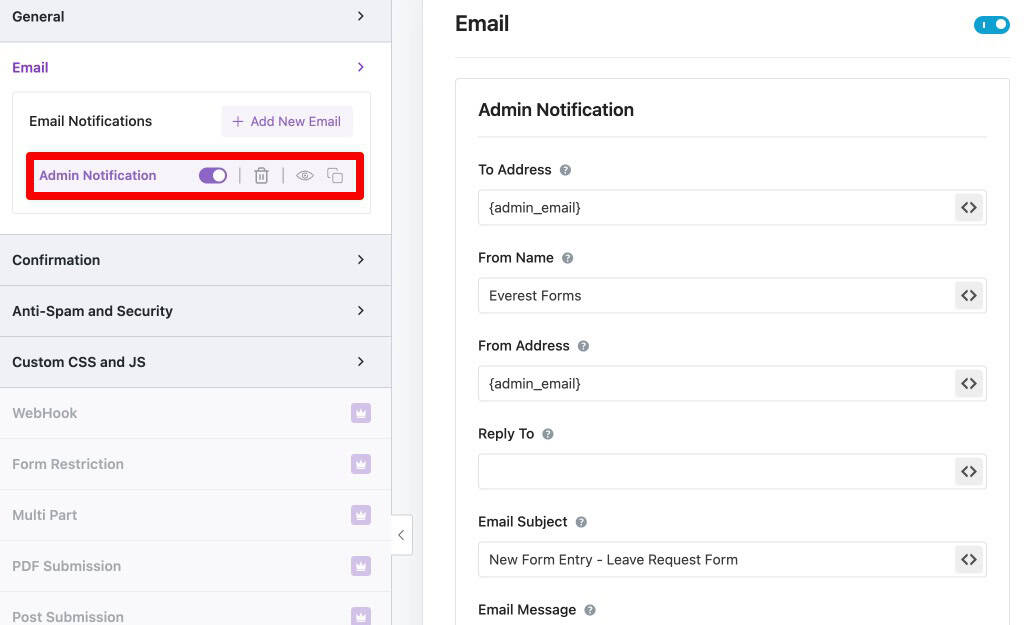
Tips: Set the Reply To field to {email} (the submitter’s email field). This means when you reply to any admin notification, your reply goes directly to the person who submitted the form – not back to your own inbox.
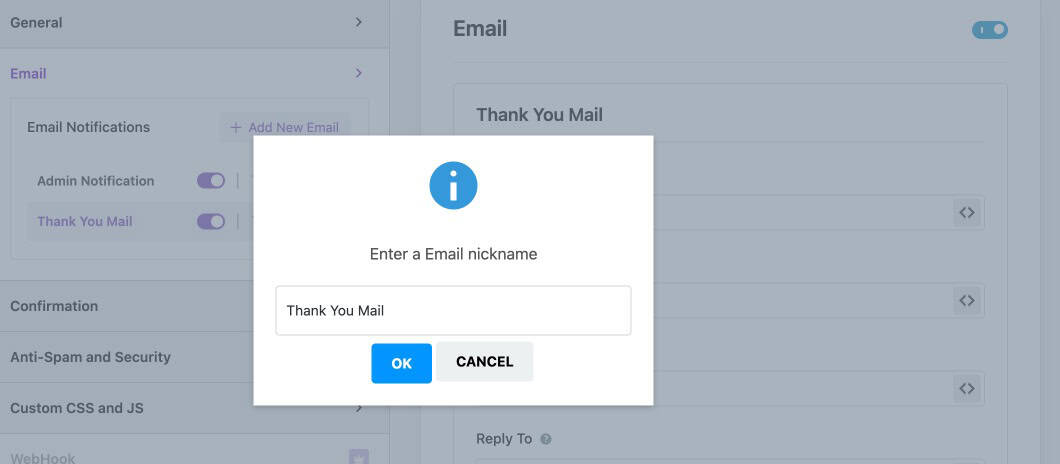
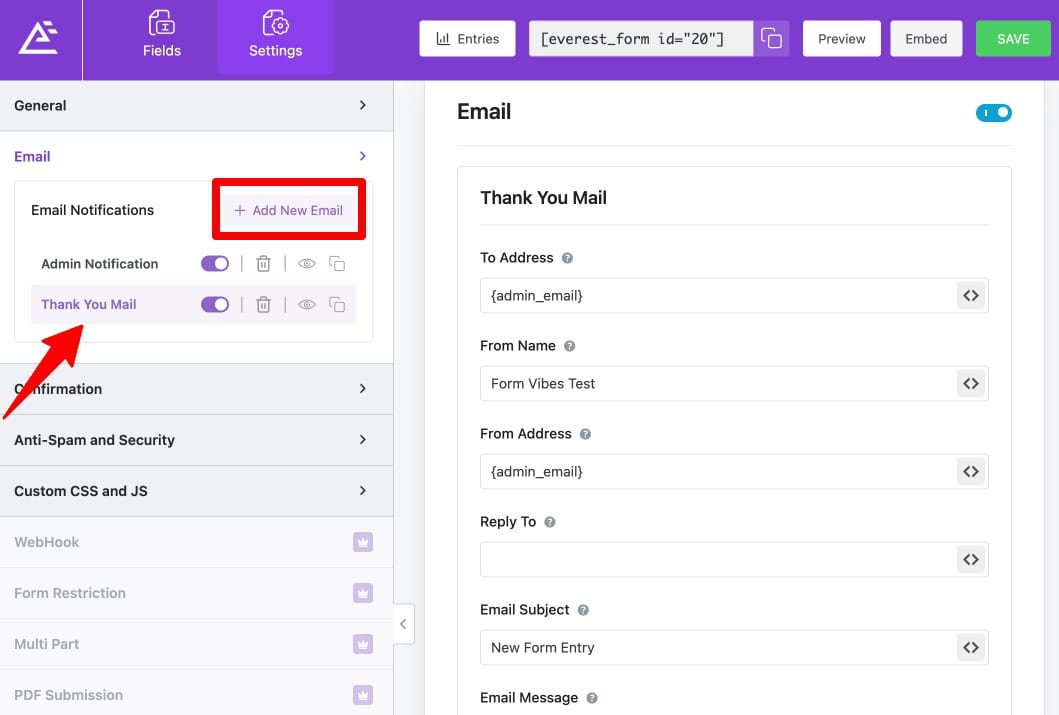
Create a Separate User Notification
To send a confirmation or thank-you email to the person who submitted the form, click Add New Email in the Email settings. Name the notification (for example, “Thank You Email”) and configure the To Address field using the submitter’s email field tag — for example {email}. Customise the subject and message body for the user-facing confirmation.
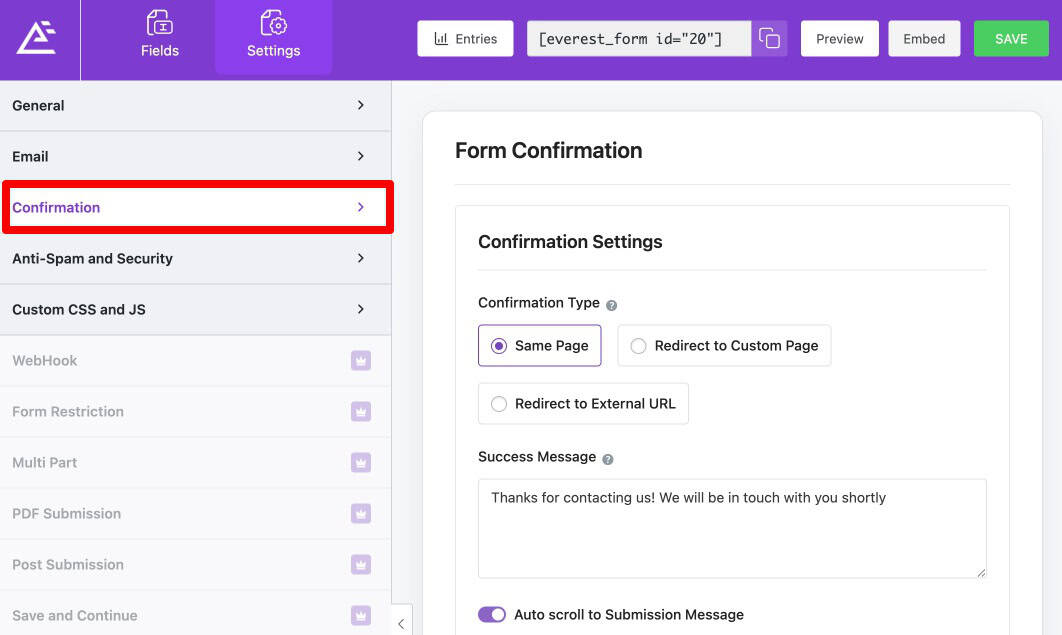
Configure What Happens After Submission
Submission behaviour is controlled under Settings > Confirmation.
Everest Forms provides multiple options for what happens after a user submits a form. Stay on the Same Page with a Custom Message displays a success message directly on the page. Redirect to a Custom Page sends users to another page on your site such as a dedicated Thank You page. Redirect to an External URL sends users to a URL outside your site.
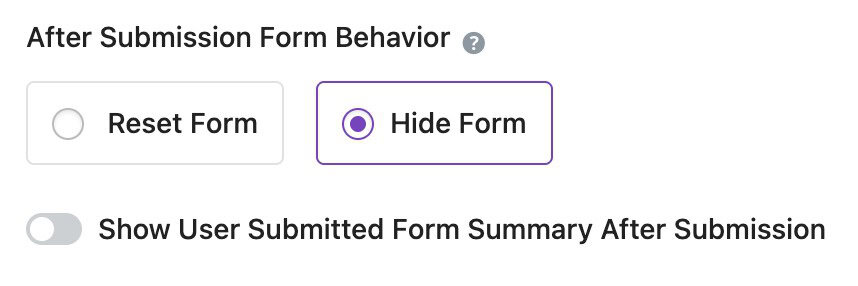
You can also control what happens to the form itself after submission. Hide the form removes it from the page after successful submission. Reset the form clears all fields so the user can submit again.
Everest Forms also lets you display a custom success message on the page, show the confirmation as a popup, or display the submitted form data back to the user.

How Do You Style an Everest Form?
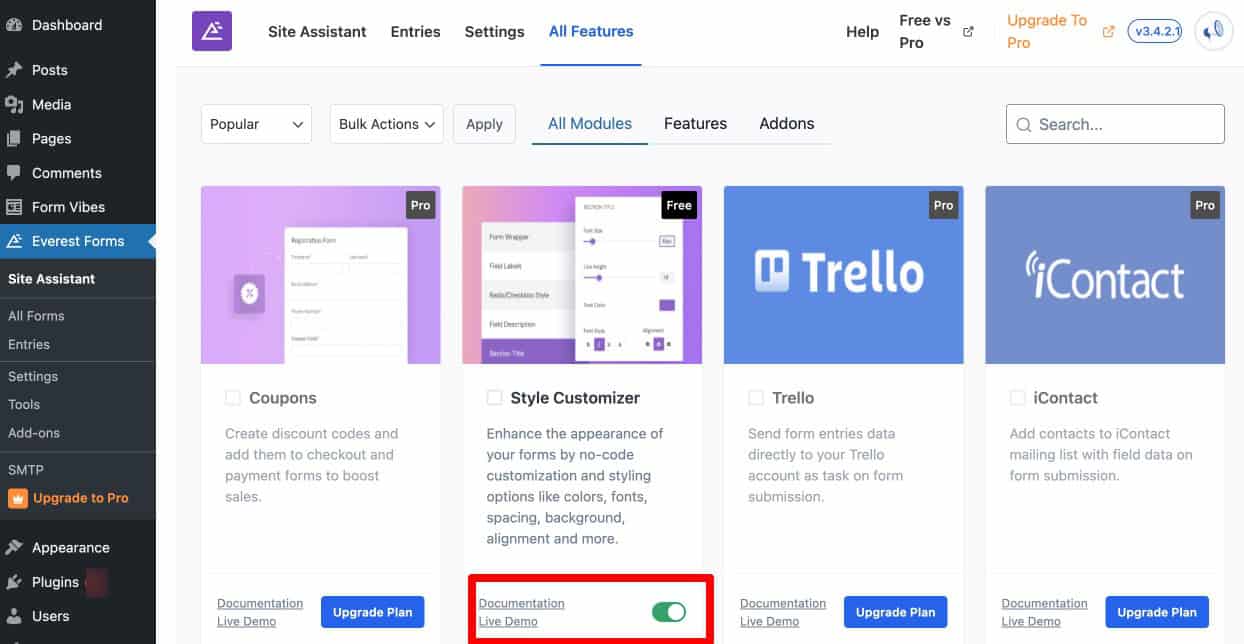
To customise the visual design of your forms, enable the Style Customizer module first.
1
Enable the Style Customizer Add-on
Go to Everest Forms > Add-ons, find the Style Customizer module, and enable it.
2
Open the Form Designer
Open the form you want to style in the form builder. Look for the Form Designer icon in the bottom-right corner of the form builder screen and click it to open the Style Customizer.
3
Choose the Template
The Active Template option allows you to change the overall layout and appearance of your form, choose from pre-designed templates, or create a new custom template. Click the Change button to browse available templates. Some templates are included in the free version while others require Pro.
4
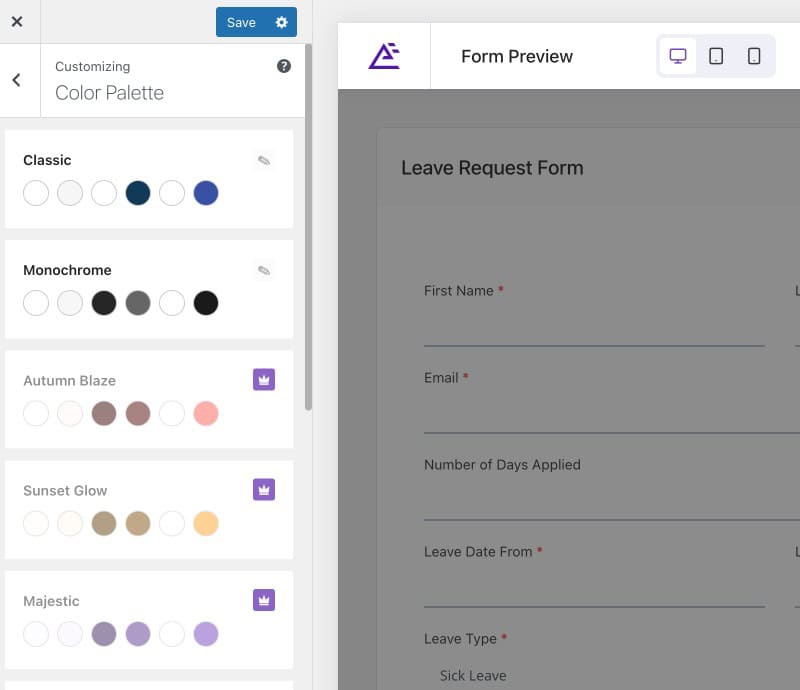
Choose the Color Palette
The Color Palette option lets you choose from pre-defined colour schemes or apply different colour combinations to your form. Advanced colour customisation is available in the Pro version.
5
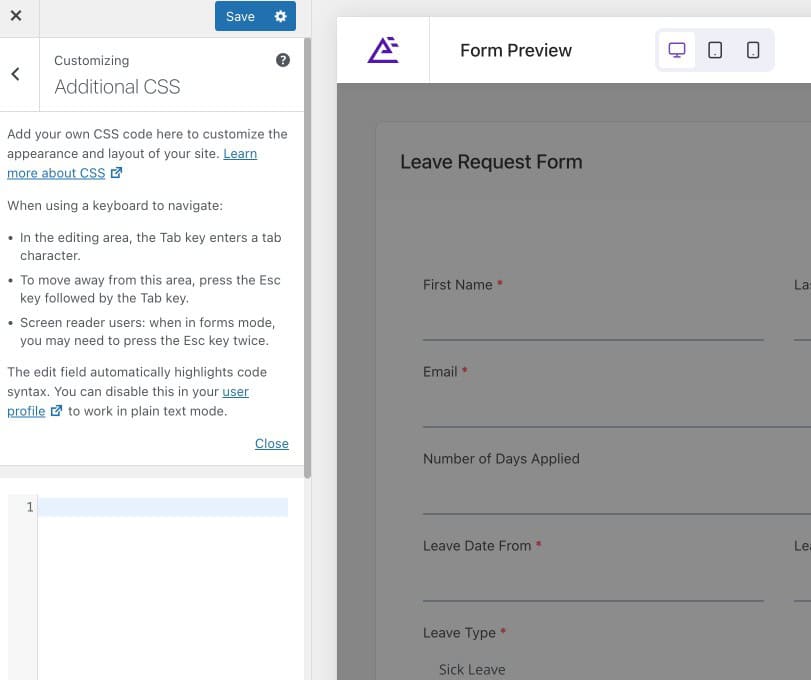
Apply Additional CSS
The Additional CSS option provides a built-in CSS editor where you can add custom rules, override default styling, or apply advanced design customisations. This option is useful for developers or users who want complete design control.
How Do You Display an Everest Form on Your Website?
After creating and customising your form, Everest Forms provides two methods for embedding it on the frontend.
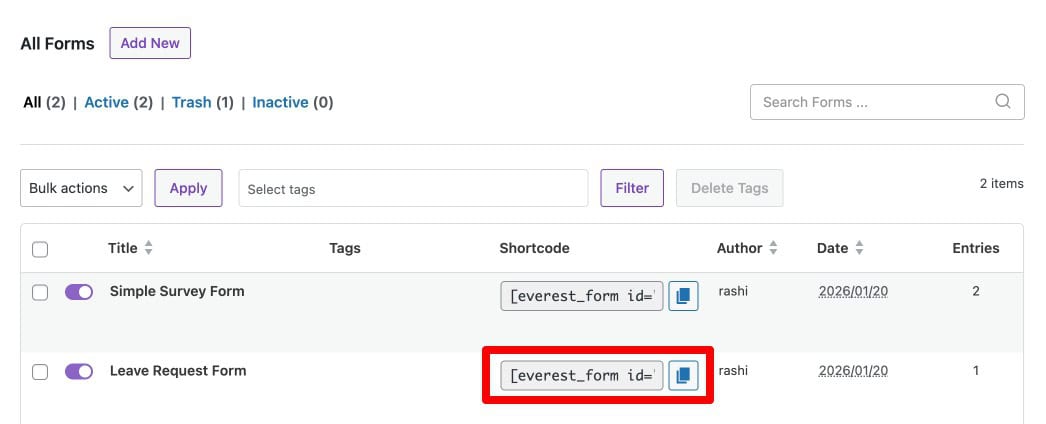
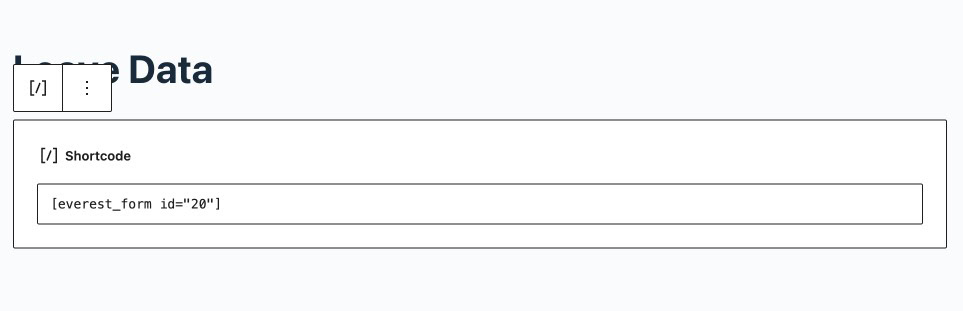
Display Using Shortcode
Go to Everest Forms > All Forms and copy the shortcode of the form you want to display. Open the page where you want to add the form, add a Shortcode block, and paste the copied shortcode. Publish or update the page and the form will appear on the frontend.
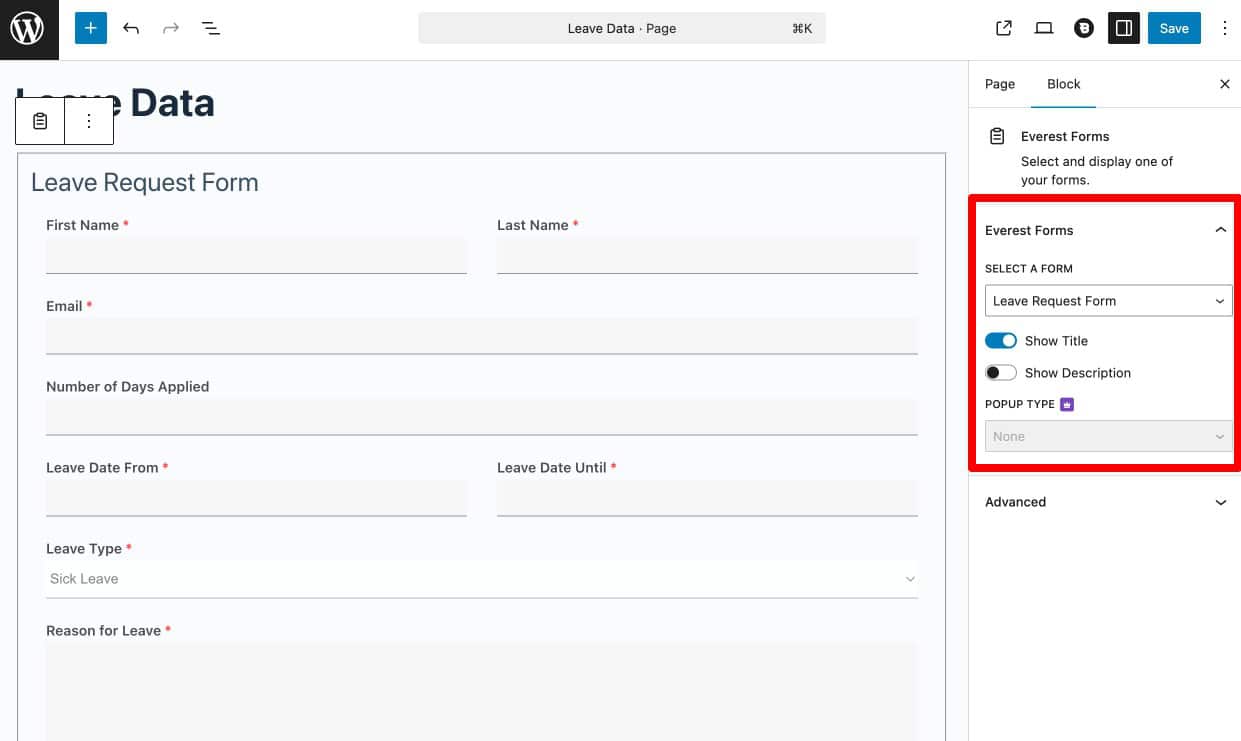
Display Using the Everest Forms Block
If you are using the WordPress block editor, open the page or post where you want to add the form, click Add Block, search for “Everest Forms”, and select your form from the dropdown. Update or publish the page. This method is easier for users who prefer working entirely within the visual editor.
What Happens to Submissions After the Form Goes Live?
Once your form is live and collecting responses, Everest Forms stores entries automatically in the WordPress database and provides built-in entry management tools for viewing, filtering, exporting, and spam management.
For a complete walkthrough of everything available for managing Everest Forms submissions including the starred entries system, search, spam controls, and CSV export, see the dedicated guide on how to manage Everest Forms submissions in WordPress.
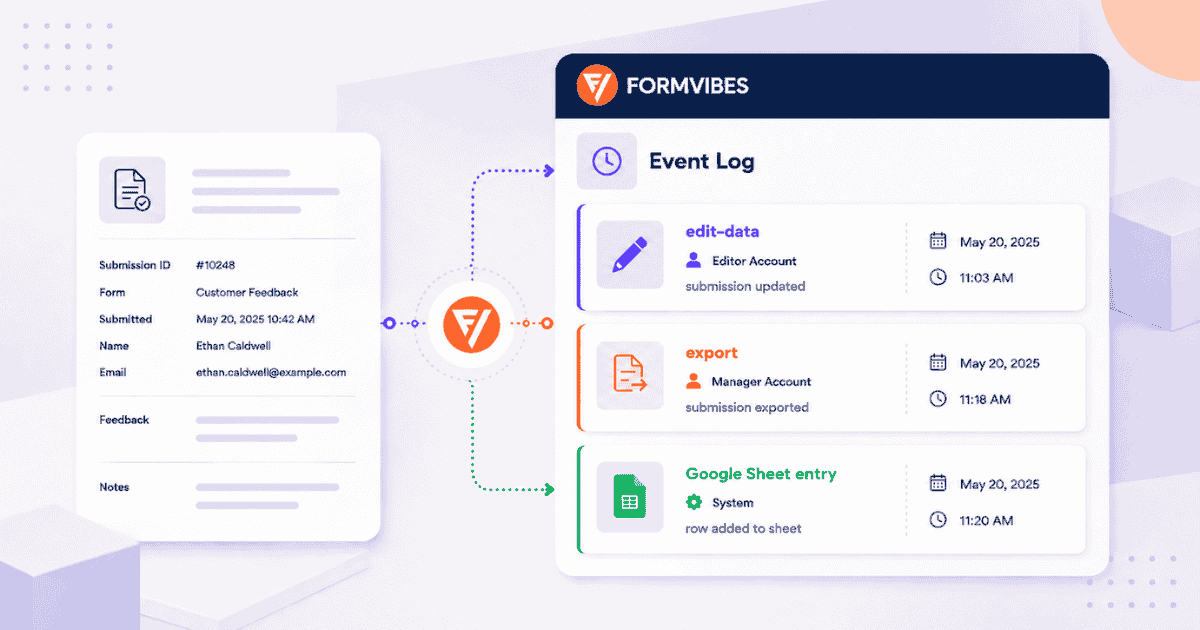
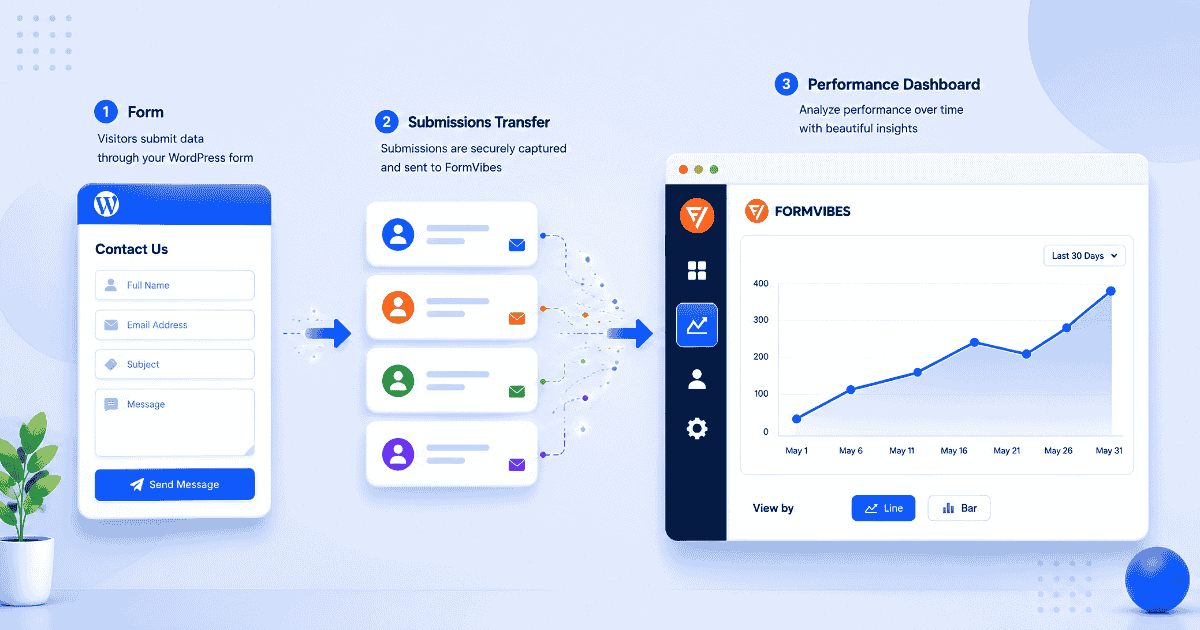
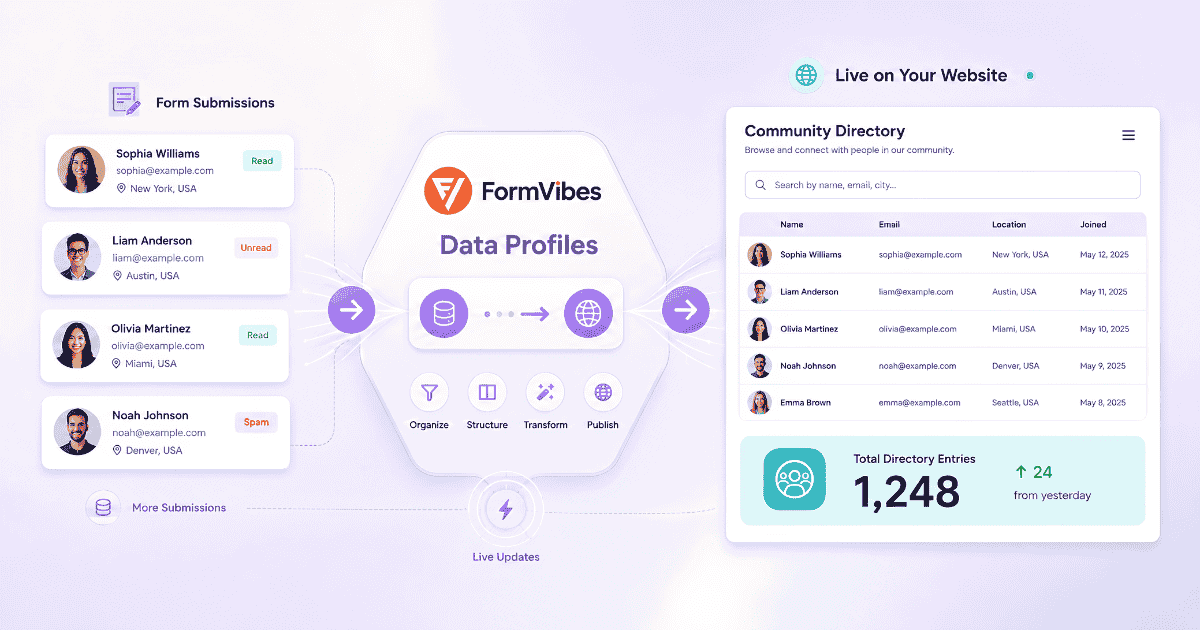
If you need more than Everest Forms’ native submission management provides, Form Vibes captures Everest Forms submissions in the WordPress database and adds a centralised dashboard for date filtering, advanced field-level filtering, CSV export, analytics charts, an Event Log, and submission status workflows. See the Form Vibes and Everest Forms setup guide for full details.
Key Takeaway:
Creating the form is only the first step. Managing submissions properly with Form Vibes helps teams respond faster, organize leads better, and improve workflow efficiency.
How Do You Import, Export, and Migrate Everest Forms?
If you need to back up your forms, move them to another website, or migrate from a different form builder, Everest Forms provides built-in tools for all of these tasks, exporting forms as JSON files, importing previously saved forms, migrating forms from supported plugins like Contact Form 7 and WPForms, and importing form entries.
For a full step-by-step walkthrough of every import, export, and migration option, see the dedicated guide on how to import, export, and migrate Everest Forms in WordPress.
Conclusion
Everest Forms provides a complete solution for creating, customising, and managing forms in WordPress. With flexible layout options, AJAX submission, multi-channel email notifications, redirect controls after submission, a visual style customiser, and built-in entry management, it works well for both simple contact forms and more advanced use cases.
Once your forms are live and collecting real responses, the next step is managing that data efficiently. Form Vibes adds the analytics, unified dashboard, and team workflow tools that take you beyond what the native Entries view provides.
Manage your Everest Forms submissions efficiently
Create professional forms with Everest Forms and manage submissions more effectively using Form Vibes.
Frequently Asked Questions
Common questions about Everest Forms.
Is Everest Forms free to use?
Yes, Everest Forms offers a free & pro both version with essential form-building and submission management features.
Does Everest Forms support AJAX form submission
es, Everest Forms allows you to enable AJAX form submission. When enabled, users can submit the form without the page reloading, which improves user experience.
Can I export form entries in Everest Forms?
Yes, you can export form entries in CSV format from the Entries section. This is useful for reporting, backups, or external data analysis.
Can I migrate forms from other plugins to Everest Forms?
Yes, Everest Forms includes a Form Migrator tool that allows you to import forms from supported plugins.
Can I customize the design of my form?
Yes, by enabling the Style Customizer add-on, you can modify layout templates, color palettes, and even add custom CSS to match your website design.
Leave a Reply