A Complete Guide to WPForms
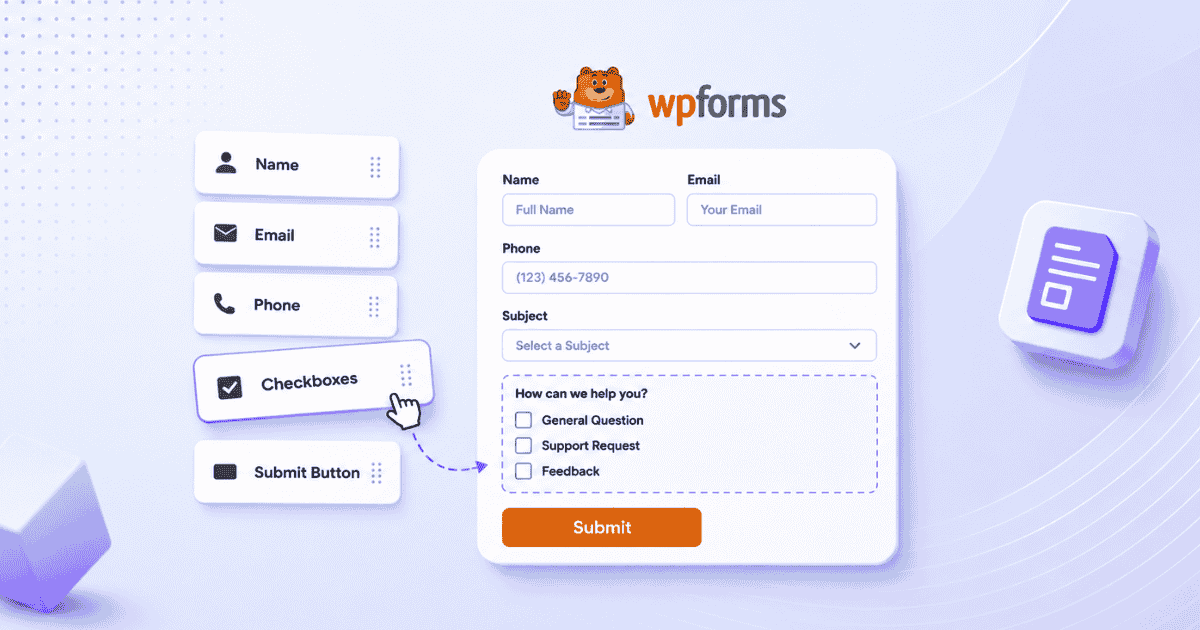
WPForms is a drag-and-drop WordPress form builder with over 6 million active installations. It covers contact forms, feedback forms, payment forms, multi-step forms, and surveys, all buildable from templates or a blank canvas without writing any code. The free Lite version handles basic contact forms, while WPForms Pro adds conditional logic, file uploads, payment integrations, and advanced field types.
This guide covers the complete WPForms workflow from installation through form creation, settings configuration, entry management, and embedding on your site.
Before You Start
WPForms Lite or Pro installed and activated
A clear idea of what type of form you want to create
Notes: WPForms Lite is free and covers basic form building, notifications, and confirmations. Entry storage and advanced filtering require WPForms Pro.
How to Create a Form in WPForms
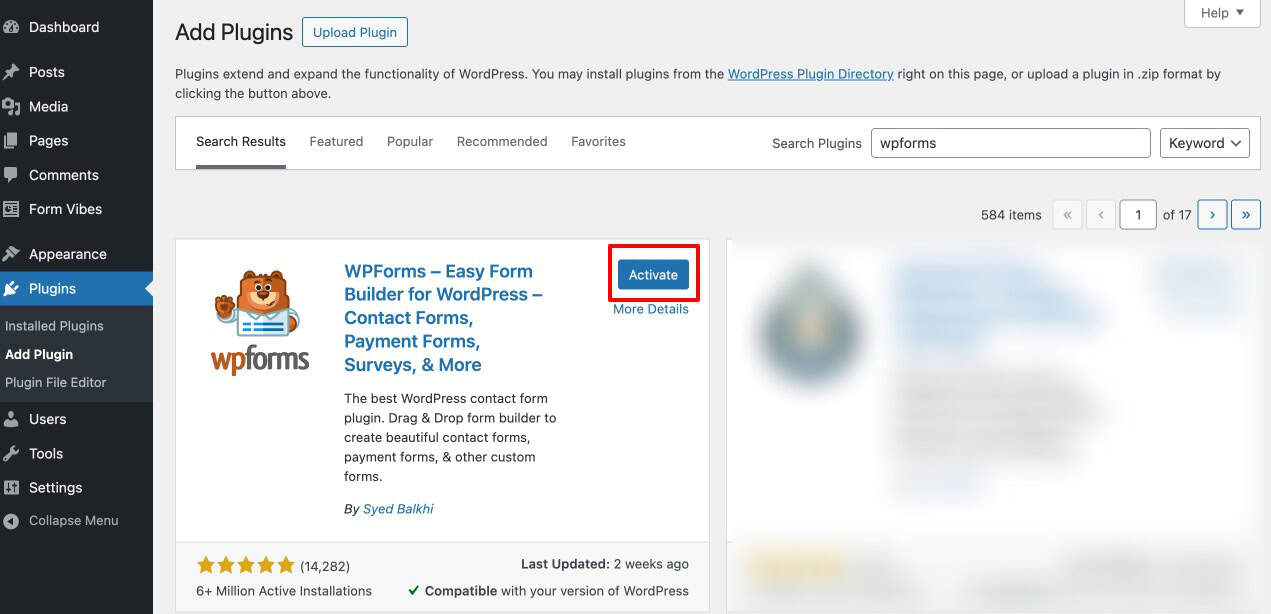
Before building your form, make sure WPForms is installed and activated on your WordPress site. It also helps to decide what kind of form you want to create, a contact form, a support form, a feedback form, or a lead enquiry form. Starting with a clear goal makes the setup easier.
1
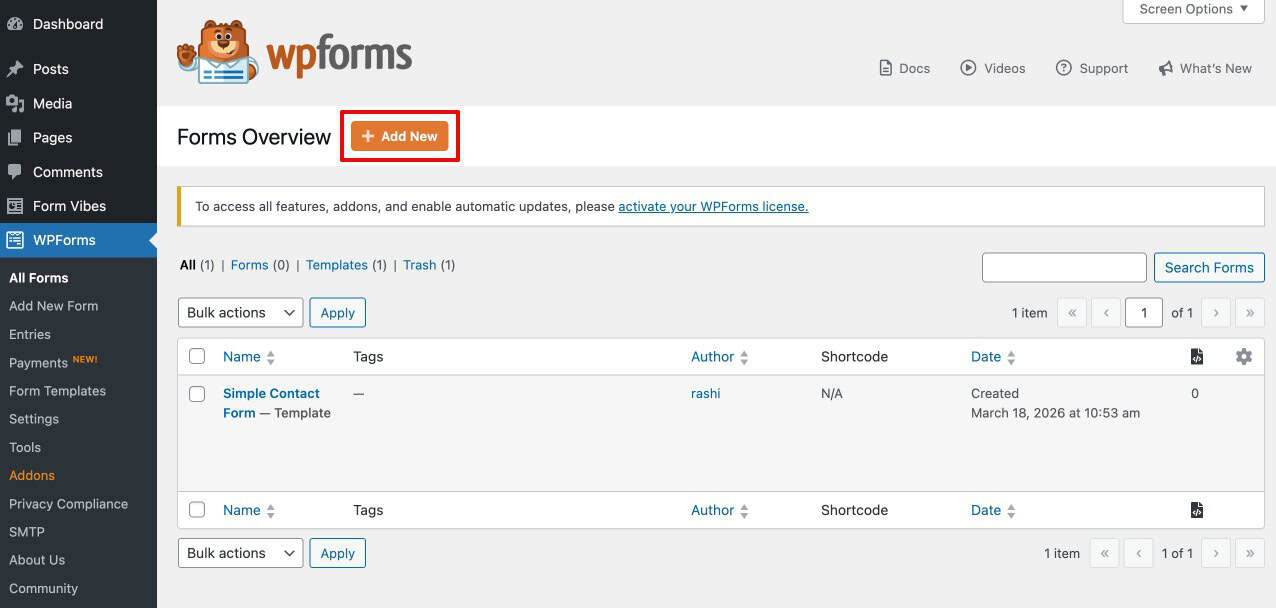
Create a New Form
After activating WPForms, open your WordPress dashboard and go to WPForms > Add New. Give your form a name, then choose whether to start with a blank form, use a pre-built template, or generate a form with AI.
2
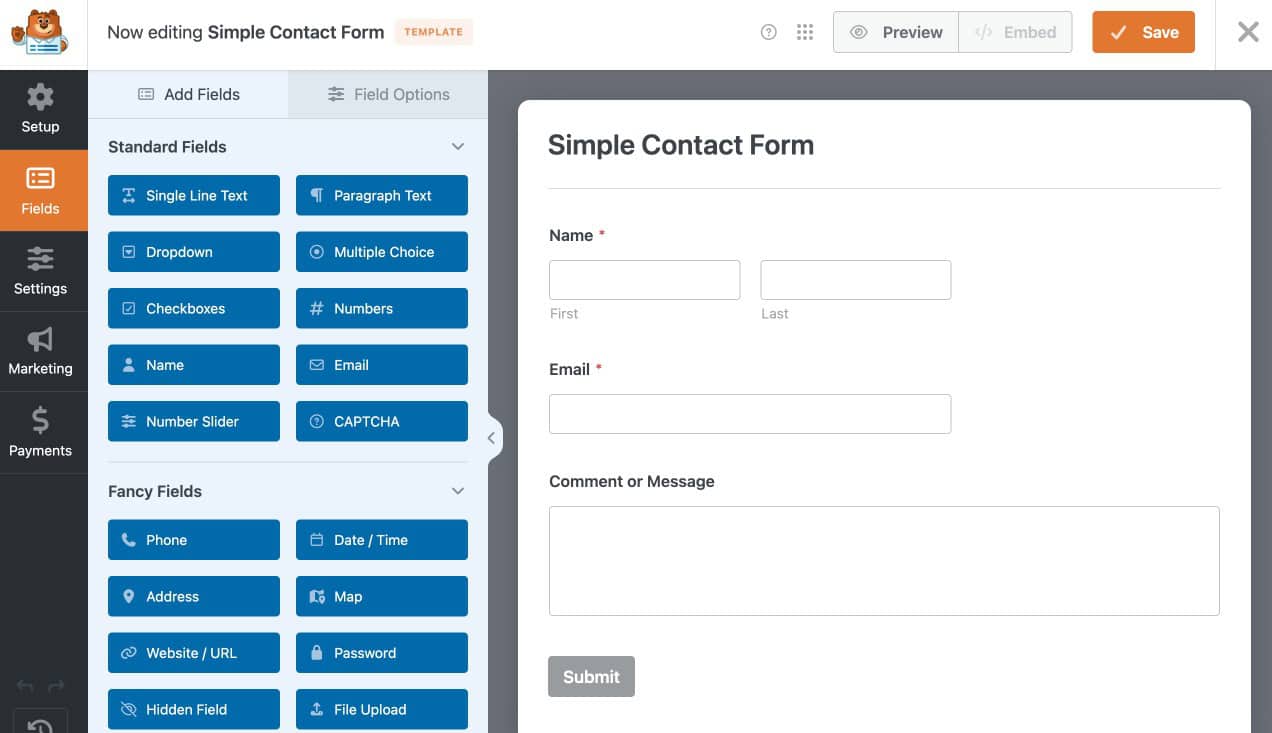
Add and Arrange Form Fields
WPForms uses a drag-and-drop builder. Drag fields into your form and move them around as needed. For a basic contact form, you will typically want Name, Email, and Message fields. Depending on your use case, add other fields as required.
3
Customise Field Labels and Settings
Click any field in the builder to edit it. You can change the label, placeholder text, description, required toggle, and other field options. This is where you make the form clear and easy for visitors to fill out.

4
Save the form
Once your form looks correct, click Save. This is an essential step, save your changes before leaving the builder or moving on to publishing.
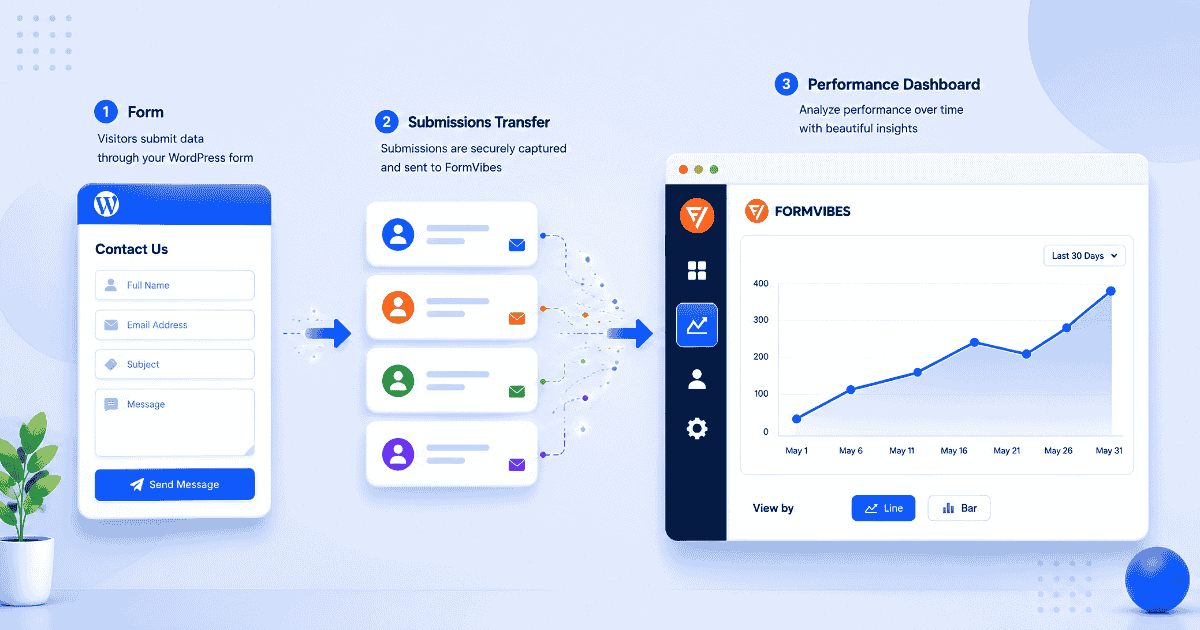
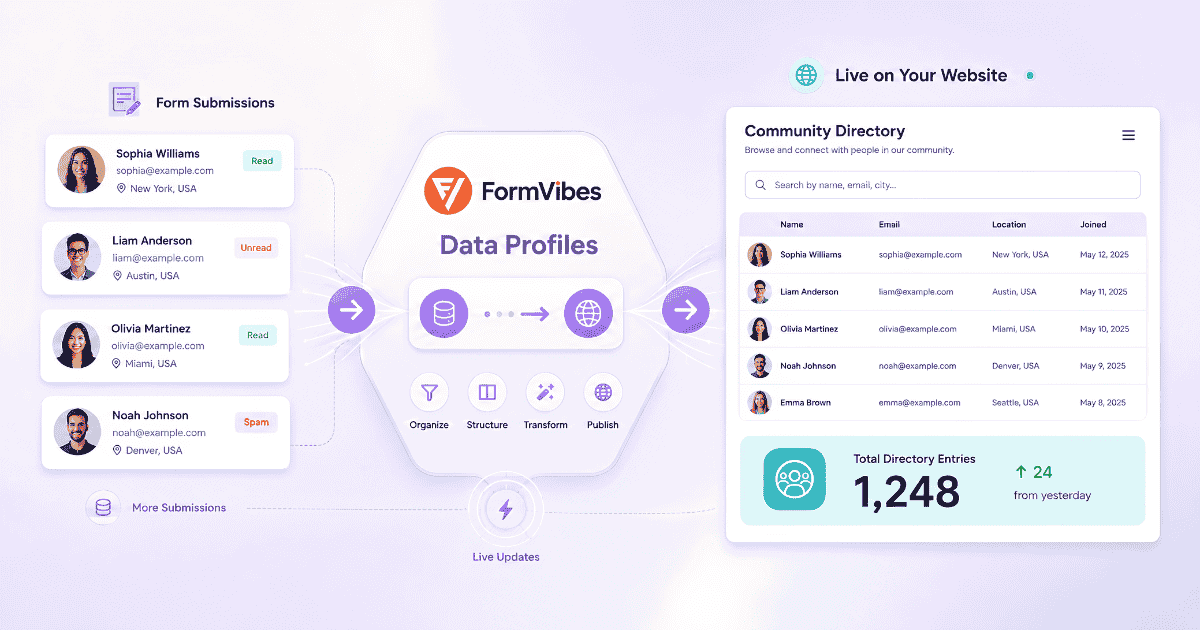
Your form is built – but where do the submissions actually go? WPForms Pro stores entries natively, while Form Vibes helps Lite users capture submissions and provides an organized dashboard for viewing, filtering, and managing entries more efficiently.
5
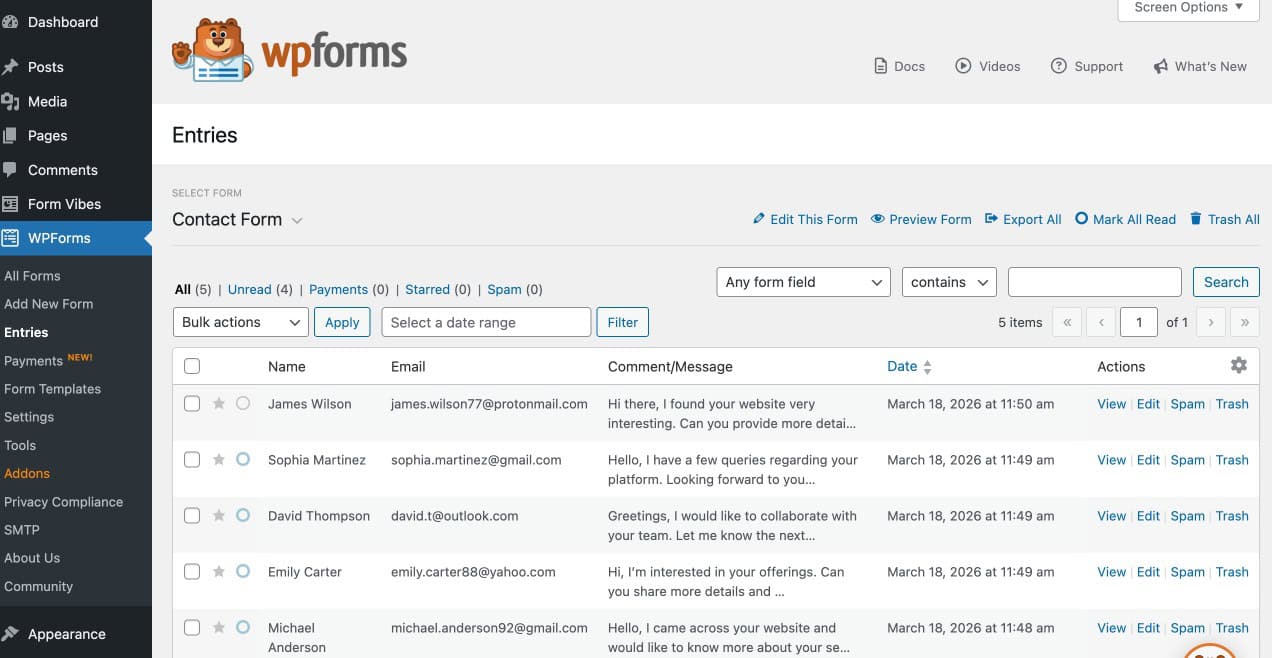
Viewing Form Entries in WPForms
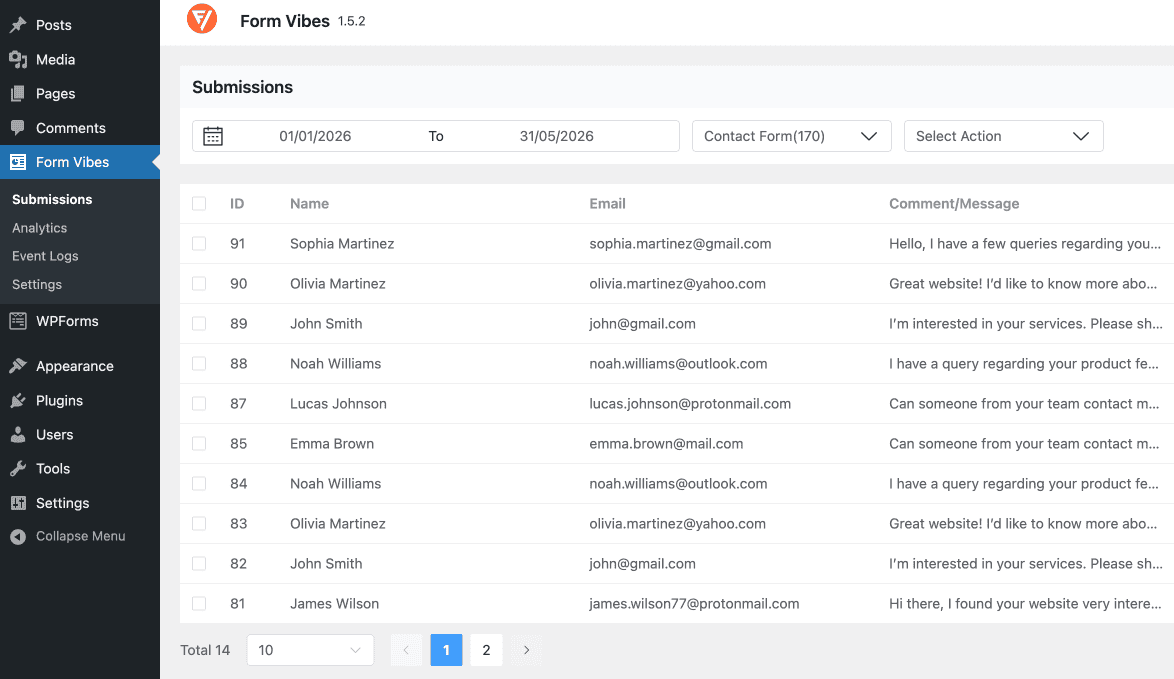
Once your form is live, go to WPForms > Entries and select your form to see all submitted responses. The WPForms Entries dashboard shows each entry with its field values, submission date, and status.
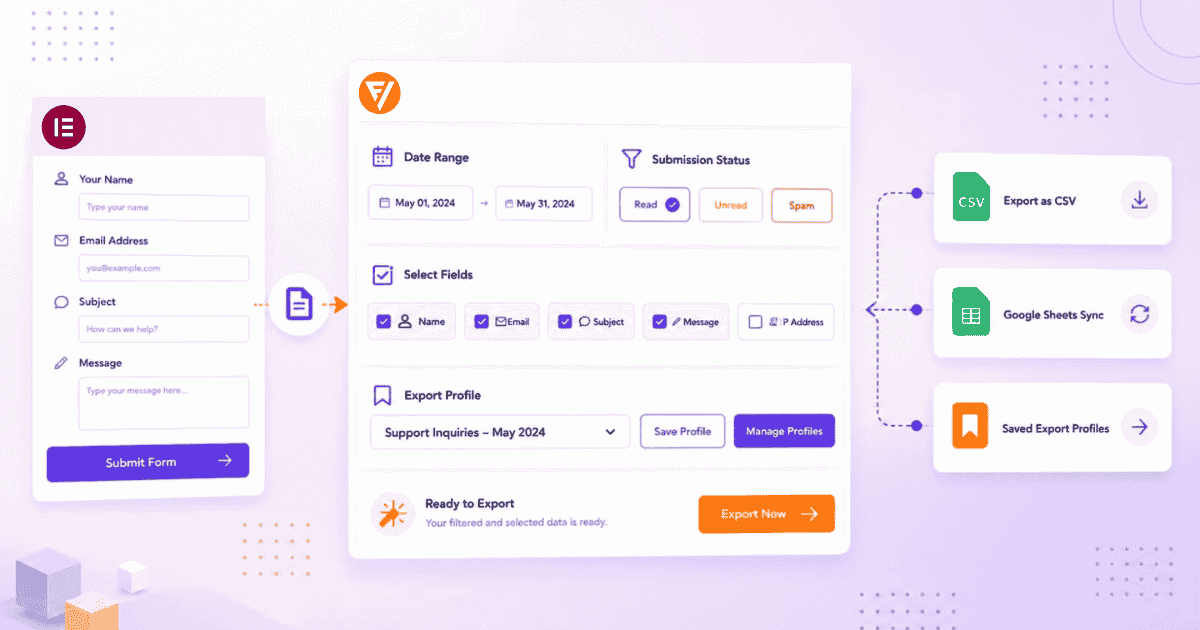
From the Entries dashboard you can view individual entry details, edit submissions, mark entries as spam, delete entries, filter by date range, search specific submissions, and apply bulk actions. You can also export entries, mark them as read, or organise them by status, unread, starred, or spam for a more structured review workflow.
What WPForms Settings Should You Review Before Publishing?
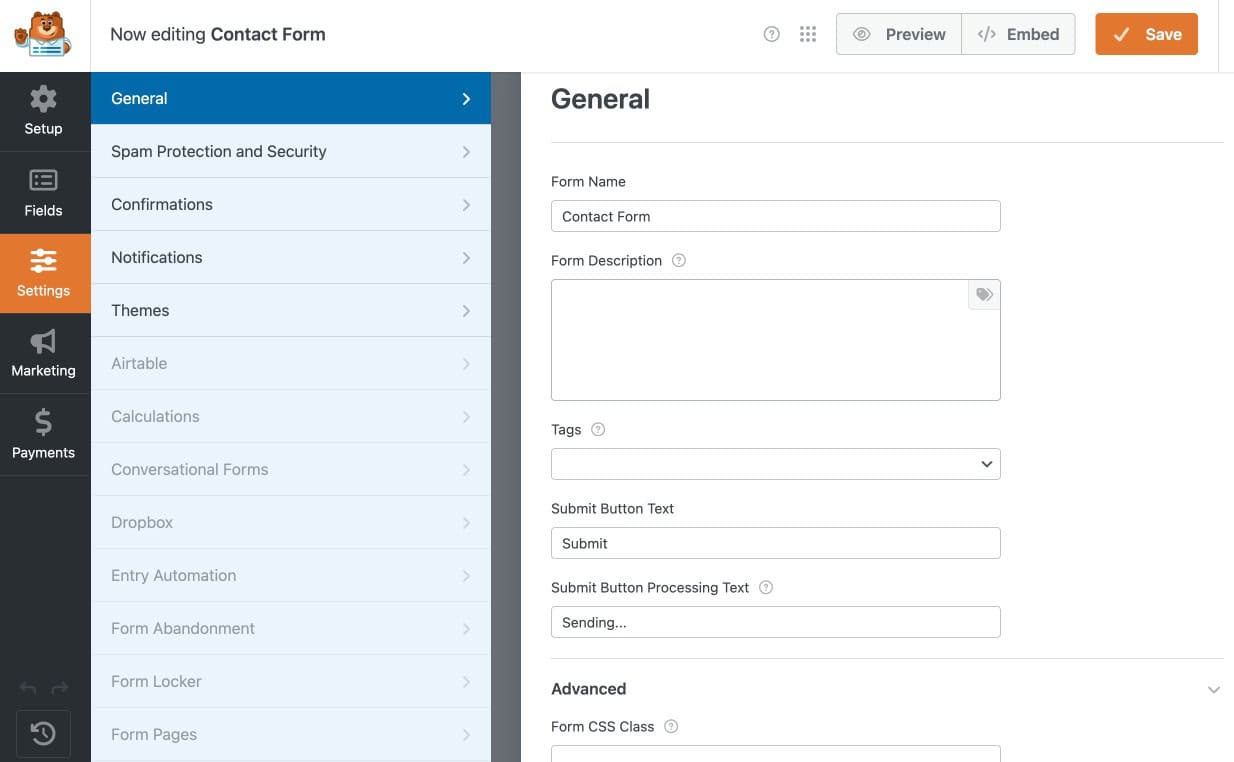
After creating the form, review the main form settings before making it live. Open the form in the builder and click the Settings tab at the top.
General
In the General settings area, configure the form name and basic display options including the Submit button text. In the Advanced Settings section, you can enable or disable AJAX form submission so forms submit without a page reload. You can also set up automatic purging of entries to delete submissions older than a specified number of days, and enable or disable submission storage entirely.
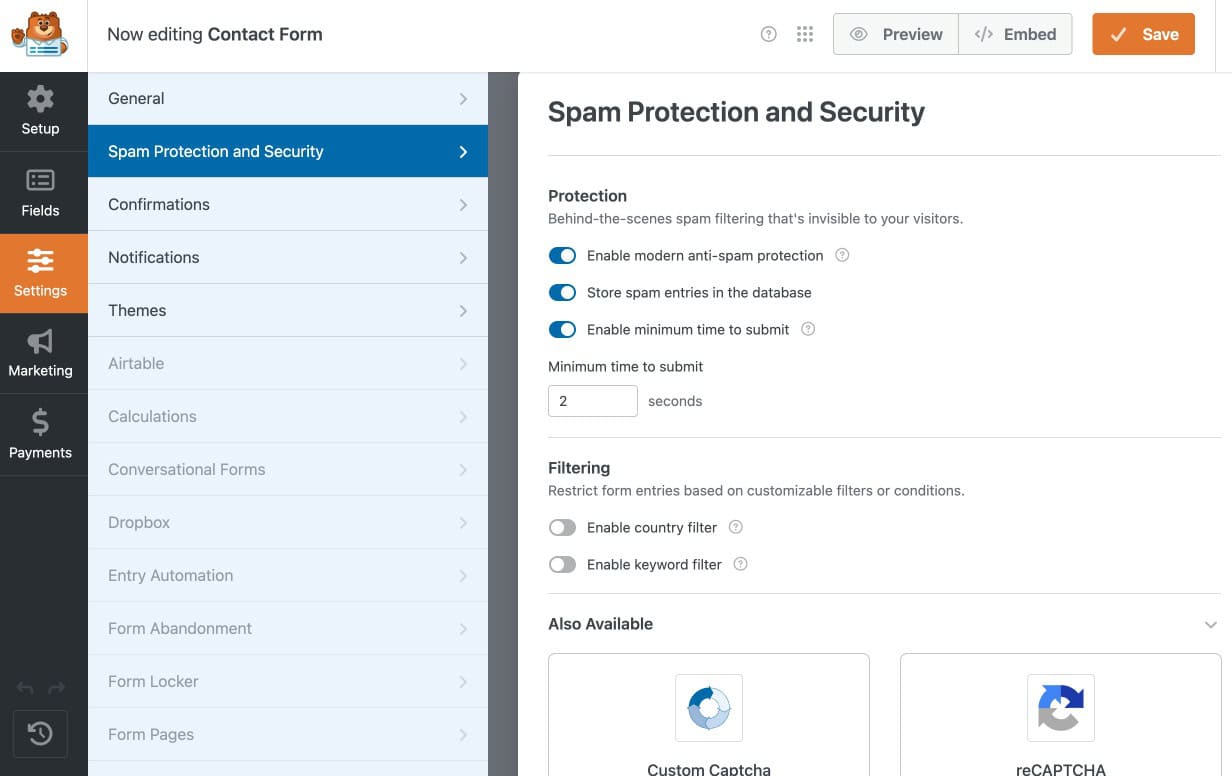
Spam Protection and Security
WPForms includes built-in spam protection tools. Enable anti-spam protection, set a minimum time to submit that blocks bots, and choose whether to store spam entries. Apply keyword or country filters for additional control. For extra security, connect a CAPTCHA solution – reCAPTCHA or hCaptcha – from the integrations settings.
For more advanced spam prevention methods, see the guide on how to stop form spam in WordPress.
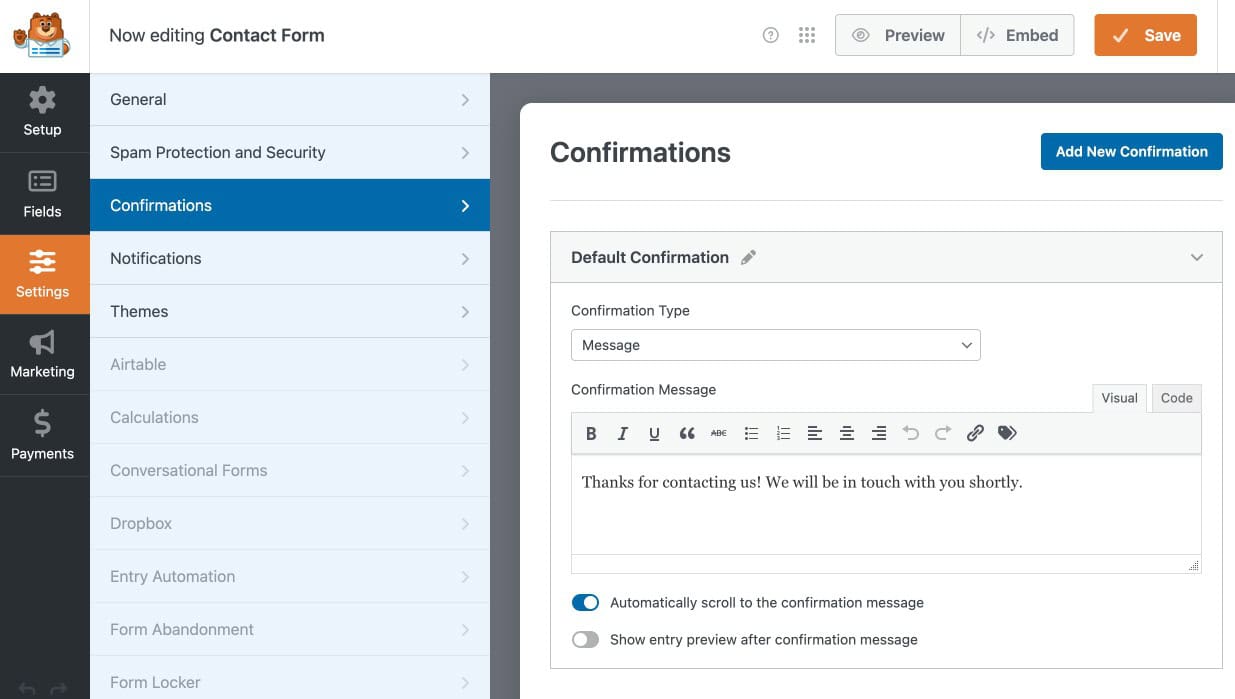
Confirmations
Confirmation settings control what the visitor sees after submitting the form. Choose from showing a success message on the same page, redirecting to a specific page on your site, or redirecting to an external URL. This helps visitors know their form was submitted successfully.
Notifications
Notifications are emails sent to your team after someone submits the form. Confirm the notification email address is correct before publishing. If notifications are not configured properly you may miss new submissions.

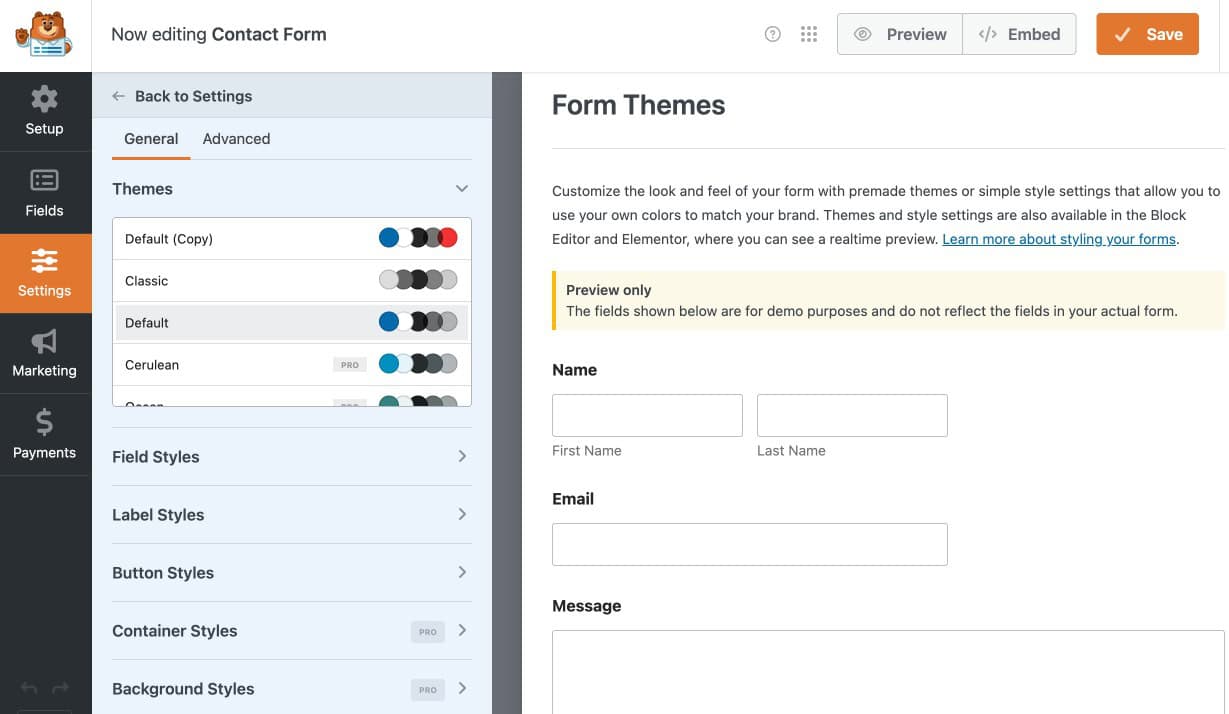
Themes
The Theme Settings let you customise the look and feel of your form using pre-designed themes. Adjust colours, fields, labels, and buttons to match your site’s branding. Use the Advanced section to add custom CSS or apply styles from another form for deeper design control.
How Do You Display a WPForms Form on Your Website?
WPForms provides three methods for embedding your form on any page or post.
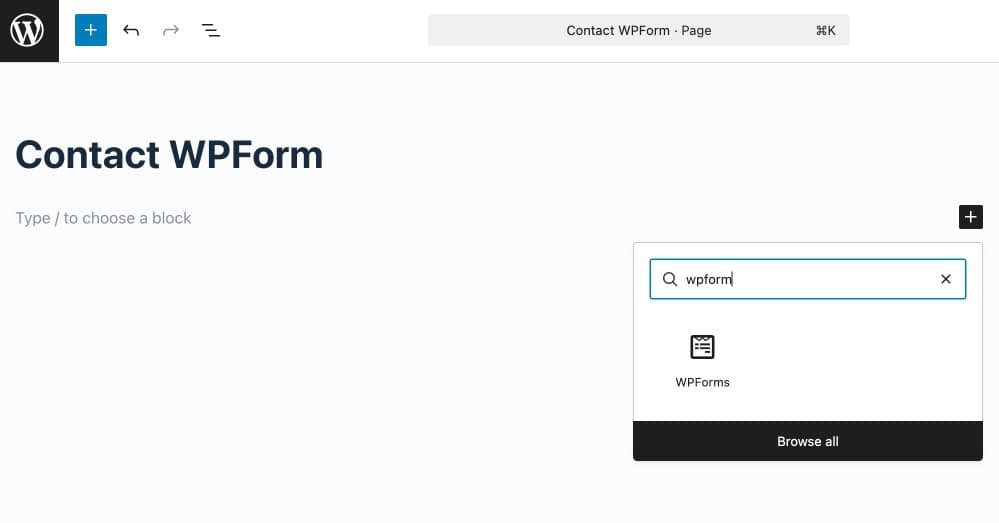
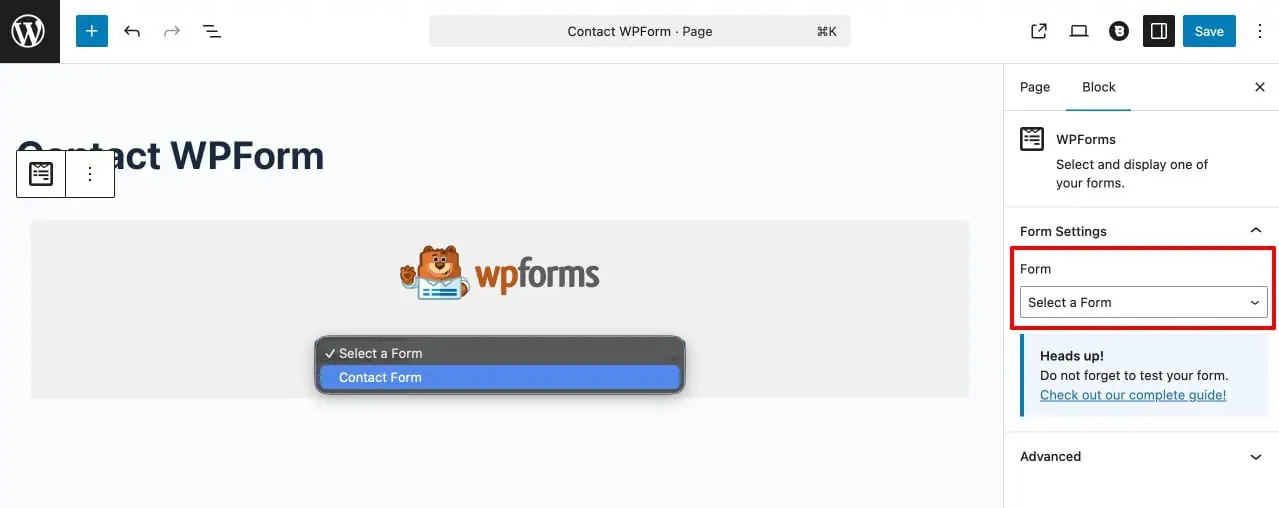
Using Block Editor
Go to Pages > Add New and give your page a name. Click the Plus icon to add a block and search for WPForms. Click the WPForms block, then select your form from the dropdown menu. WPForms loads a preview of the form inside the editor. Click Publish or Update to save.
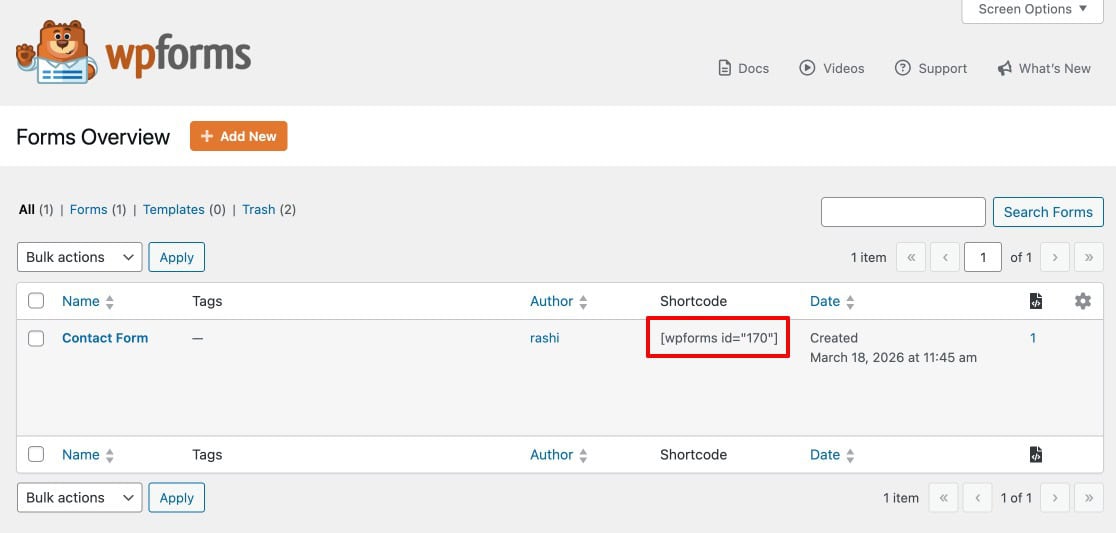
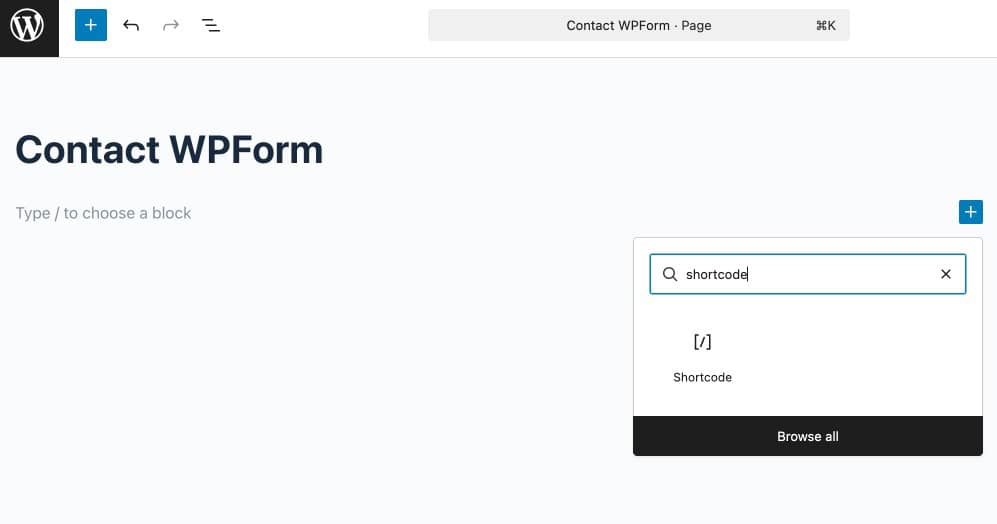
Using ShortCode
Go to WPForms > All Forms and copy the shortcode shown next to the form you want to display. Open the page where you want to embed the form, click the Plus icon, search for the Shortcode block, and paste the copied shortcode. Click Update or Publish and your form will be live on the page.
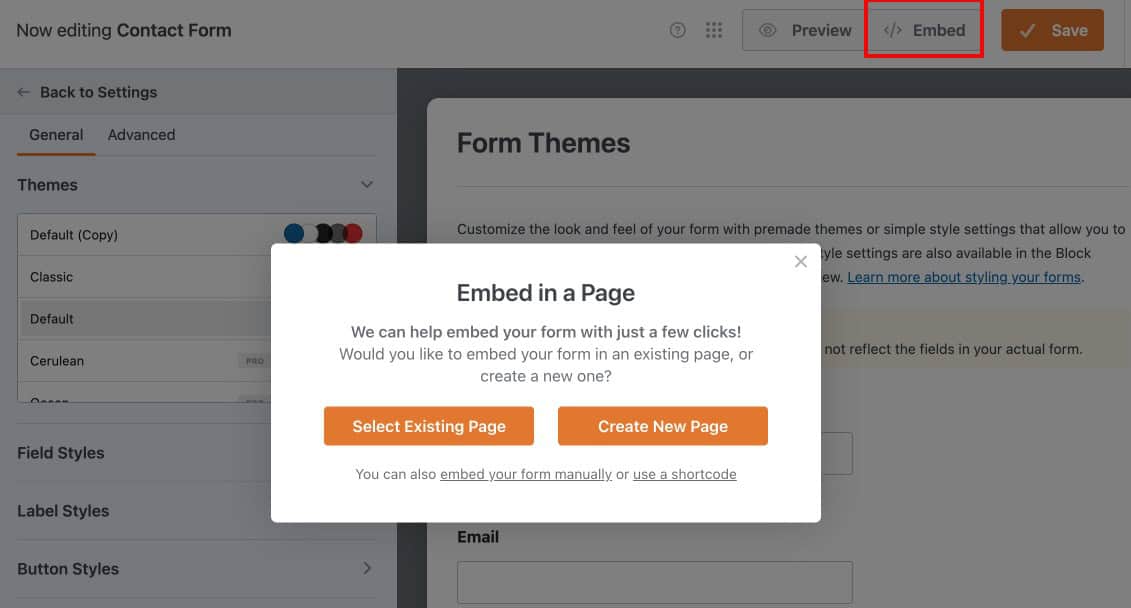
Using the Embed Option
WPForms also provides a direct embed option from the forms dashboard. This allows you to add the form to an existing page or create a new page and insert the form automatically without leaving the WPForms interface.
What Does Form Vibes Add After Your WPForms Form Goes Live?
WPForms stores submissions natively and provides a solid entry management dashboard for viewing, filtering, and exporting entries. For sites that need more, analytics charts showing submission trends over time, advanced field-level filtering, team review workflows, or managing WPForms entries alongside other form plugins in one place, Form Vibes adds all of that on top.
Form Vibes captures WPForms submissions automatically after installation with no changes needed inside WPForms.
| Feature | WPForms | Form Vibes |
|---|---|---|
| Submissions dashboard | Yes | Yes |
| Submission analytics chart | No | Yes |
| Event Log | No | Yes |
| CSV export | Yes | Yes |
| Date range filters | Yes | Yes |
| Submission Status | Yes | Yes |
| Notes per submission | No | Yes |
| Google Sheets sync | No | Yes |
| Role-based access manager | No | Yes |
Notes: Form Vibes works with both WPForms Lite and WPForms Pro. The integration is the same regardless of which WPForms plan you are on.
The analytics chart at Form Vibes → Analytics shows submission volume for each WPForms form — daily, weekly, or monthly. WPForms itself has no native analytics view at any plan level.
The Event Log records every change made to every entry – edits, status changes, deletions with a timestamp and username. There is no equivalent in WPForms.
If your site runs other form plugins alongside WPForms, all their submissions appear in the same Form Vibes dashboard. No switching between tools.
For a complete guide to setting up Form Vibes with WPForms and everything it adds to your submission management workflow, see how to save WPForms submissions in WordPress.
Key Takeaway:
If you are on WPForms Lite, Form Vibes gives you entry storage and a submissions dashboard for free, filling the biggest gap in the free plan. If you are on WPForms Pro, Form Vibes adds analytics, an audit trail, and cross-plugin visibility that WPForms Pro does not include
Conclusion
WPForms gives you a complete form building workflow, drag-and-drop field configuration, template library, spam protection, notification and confirmation management, visual themes, and multiple embedding options. The native Entries dashboard covers viewing, filtering, and exporting submissions for most straightforward use cases.
For sites that need analytics, team review workflows, advanced filtering, or a unified dashboard for WPForms alongside other form plugins, Form Vibes adds that management layer without replacing anything WPForms already provides.
Ready to set up Form Vibes with your WPForms installation? See the complete guide on how to save WPForms submissions in WordPress.
Know what’s happening with WPForms submission
Bricks stores entries natively, while Form Vibes also captures submissions and adds analytics, filtering, exports, and workflow features to manage submissions efficiently.
Frequently Asked Questions
Common questions about WPForms in WordPress.
How do I create a form in WPForms?
Go to WPForms > Add New in your WordPress dashboard, choose a template or blank form, add your fields using the drag-and-drop builder, configure the settings, and click Save. Once saved, embed the form on any page using the WPForms block, a shortcode, or the direct embed option from the forms list.
Why am I not receiving WPForms form notifications?
Check the form’s Notification settings in the builder and confirm the notification email address is configured correctly. Also verify that your WordPress site can send emails reliably, if email delivery is unreliable, configuring an SMTP plugin significantly improves deliverability. See the guide on how to configure SMTP in WordPress for full details.
Does WPForms provide analytics or charts for entries?
WPForms offers basic graphical insights including bar and line charts to help you understand submission trends. For more detailed analytics daily, weekly, and monthly submission volume charts, a dashboard widget showing quick counts, and analytics covering multiple form plugins in one view, Form Vibes provides a dedicated analytics dashboard at Form Vibes > Analytics.
How can I prevent spam in WPForms?
Enable the built-in spam protection features in the form’s Settings panel — anti-spam protection, minimum time to submit, keyword and country filters, and CAPTCHA options including reCAPTCHA or hCaptcha. For a full guide to preventing and managing spam across WordPress forms, see how to stop form spam in WordPress.
What is the difference between WPForms Lite and WPForms Pro?
WPForms Lite is free from the WordPress plugin directory and includes the drag-and-drop builder, standard field types, email notifications, and a limited template library. WPForms Pro adds multi-page forms, conditional logic, file uploads, payment integrations, advanced field types, and more. Form Vibes works with both WPForms Lite and WPForms Pro submissions from both versions are captured automatically once Form Vibes is installed.
Leave a Reply