How to Export Contact Form 7 Submissions to CSV with Form Vibes
Contact Form 7 has no built-in export option. Submissions go out as email and nothing is stored in your database by default so there is nothing to export unless you have a storage plugin installed.
If you have Form Vibes installed, exporting your CF7 submissions to CSV takes one click on the free plan. This guide covers the quick export, filtered exports for specific date ranges and field values, and Google Sheets sync for automatic live delivery.
Notes: This guide assumes Form Vibes is installed and active on your site. If you have not installed it yet, see how to save Contact Form 7 submissions to your database first. Once Form Vibes is active, CF7 submissions are captured automatically.
Why Contact Form 7 has no export option by default
Contact Form 7 has over 10 million active installations and by default it stores nothing. Every submission goes out as an email notification and no database record is created. With no data stored, there is nothing to export.
To export CF7 submissions you need two things in place: a plugin that saves submissions to your WordPress database, and a way to export from that database. Several plugins solve the storage side – Flamingo, CFDB7, and Form Vibes are the most common.
Form Vibes is the only one that adds filtered exports with date range, status, and field-level conditions, Google Sheets sync, and a unified dashboard across all your form plugins not just CF7.
Tip: Already using Flamingo to save CF7 submissions? See how Form Vibes compares with Flamingo, Form Vibes covers everything Flamingo does and adds a significantly better export workflow on top.
How to do a quick CSV export with Form Vibes free
The free plan includes a one-click Quick Export. Select your form, apply a date range if needed, and download.
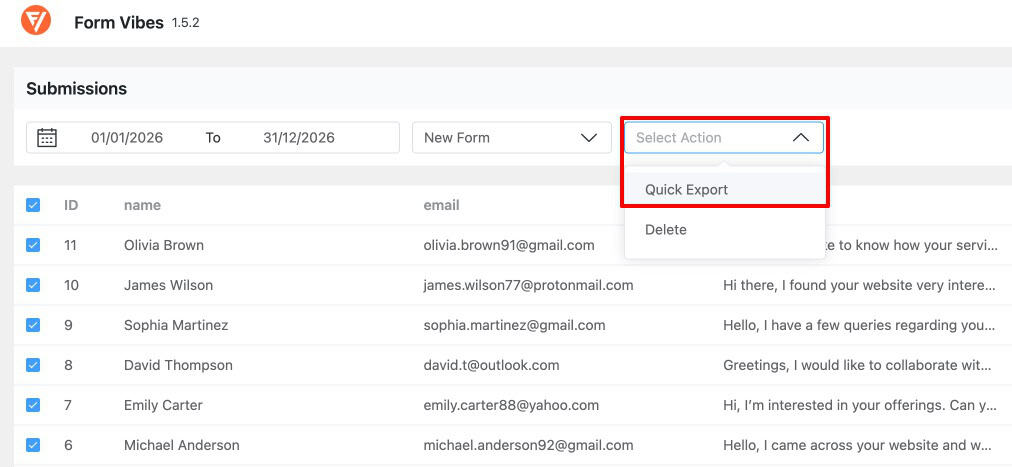
Export CF7 submissions in one click
- Go to Form Vibes > Submissions in your WordPress admin
- Select your Contact Form 7 form from the dropdown at the top
- Use the date range filter to narrow submissions to a specific period — Today, Last Week, Last Month, Last Quarter, or a custom date range
- Click the Quick Export button
- A CSV file downloads immediately
The free plan exports up to 1,000 rows per export. Each submission is a row. Every field from your CF7 form appears as a column along with the submission date and time. Open the file directly in Excel, Google Sheets, or any spreadsheet tool.
Ready to export your CF7 submissions? Quick Export is free, filtered exports and Google Sheets sync are part of Form Vibes Pro.
How to export filtered CF7 entries with Form Vibes Pro
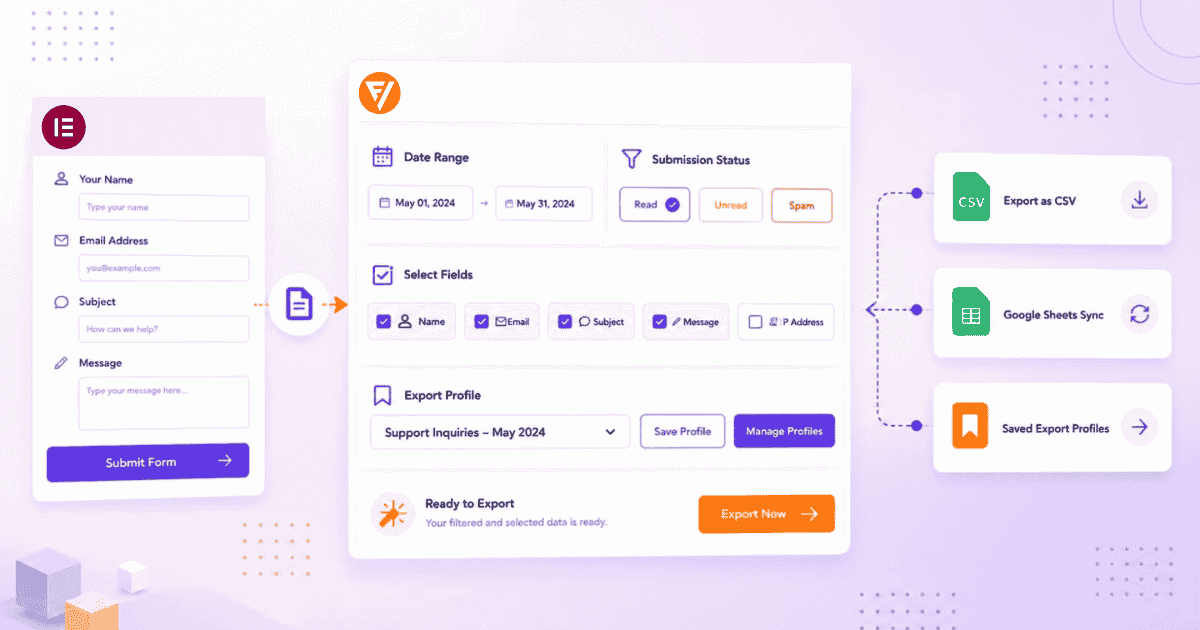
Form Vibes Pro lets you define exactly which submissions to include – by date range, submission status, and any combination of field values save that configuration, and re-run it in one click.
Set up your export filters
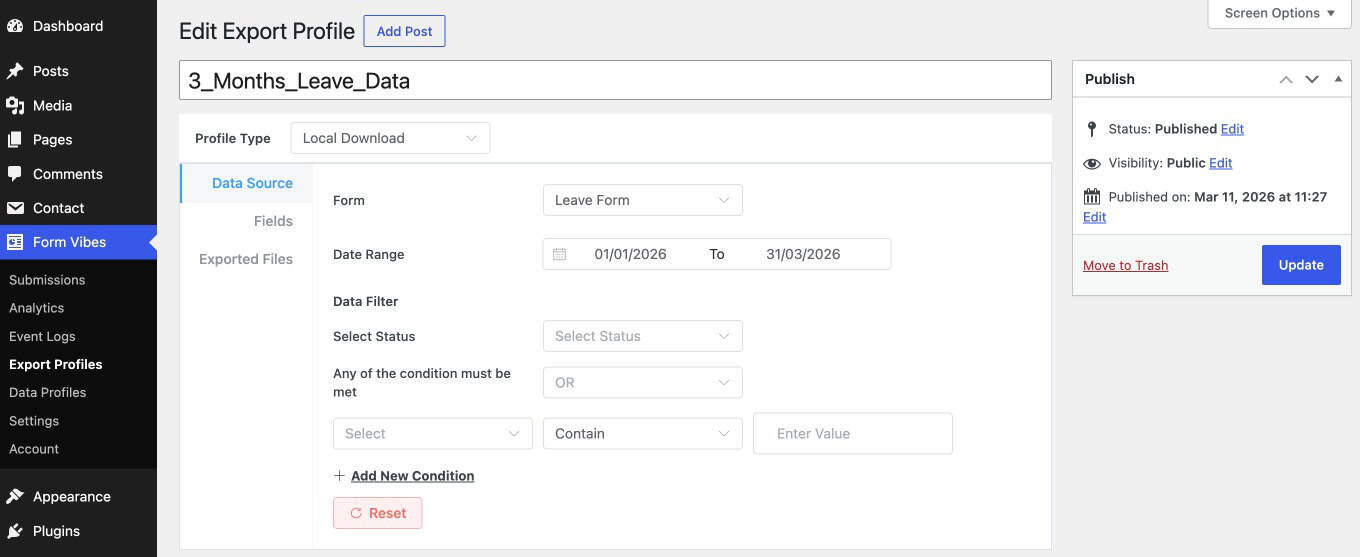
Go to Form Vibes > Export Profiles and create a new export configuration.
The Data Source tab is where you define what gets included. Select the CF7 form and set a date range, choose a preset period or set a custom start and end date. Filter by submission status from Read, Unread, or Spam to include only the entries that match your workflow needs.
Add field-level conditions to narrow the dataset further. Choose any field from your CF7 form, set a condition type equals, contains, not equal, not contain and enter the value. Stack multiple conditions using AND or OR logic. For example — service field equals “Web Design” AND budget field contains “5000”.
The Fields tab controls which form fields appear as columns in the exported CSV. Toggle off anything you do not need. The export includes only the fields you have enabled.

the exported CSV
Export the CSV
Once your configuration is set publish the export profile. Then, go to Form Vibes > Export Profiles and click the Export to CSV button. Before the file downloads, Form Vibes will ask you to enter an Export Reason, a short note explaining why the export was made. This reason is recorded in the Activity Log alongside your username and timestamp, giving your team a clear trail of every export action.
Important: Every file you export is saved in the Exported Files tab inside your export profile configuration. You can re-download any previously generated file directly from there without running the export again – useful when a client asks for a copy of last month’s data.

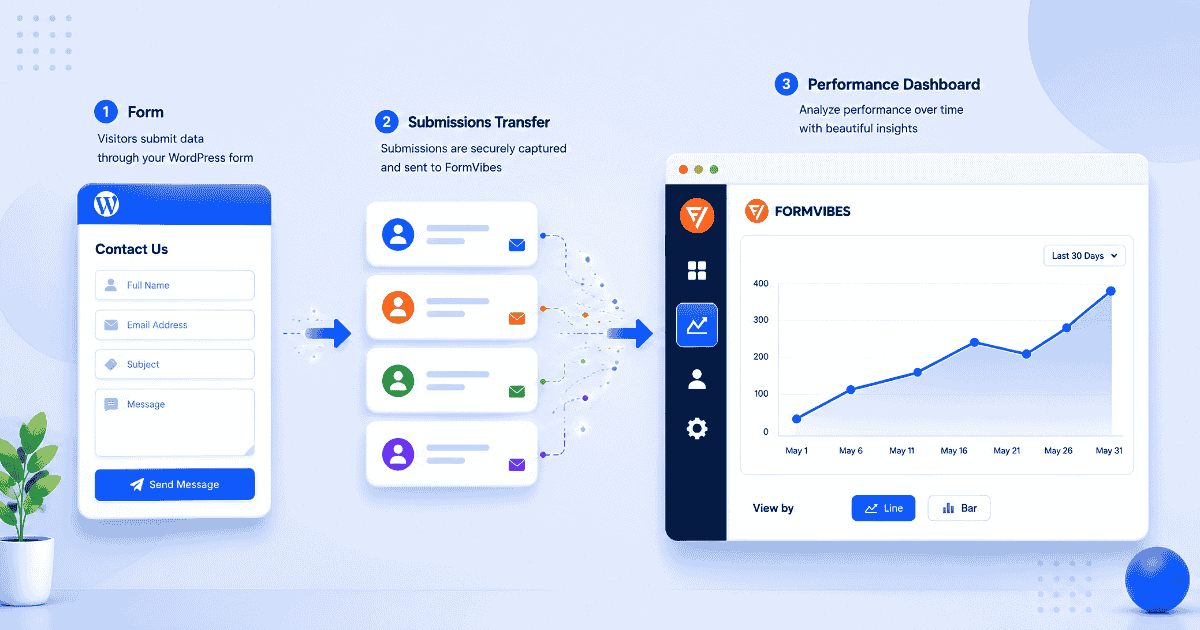
How to send CF7 submissions to Google Sheets automatically
For live spreadsheet access without any manual export step, Google Sheets sync pushes every new CF7 submission to a connected Google Sheet the moment it arrives.
Connect Form Vibes to your Google account
Before setting up Google Sheets sync you need to create API credentials and connect Form Vibes to your Google account. Follow the full setup guide here: How to connect Form Vibes with Google Sheets.
Once you have your API credentials ready:
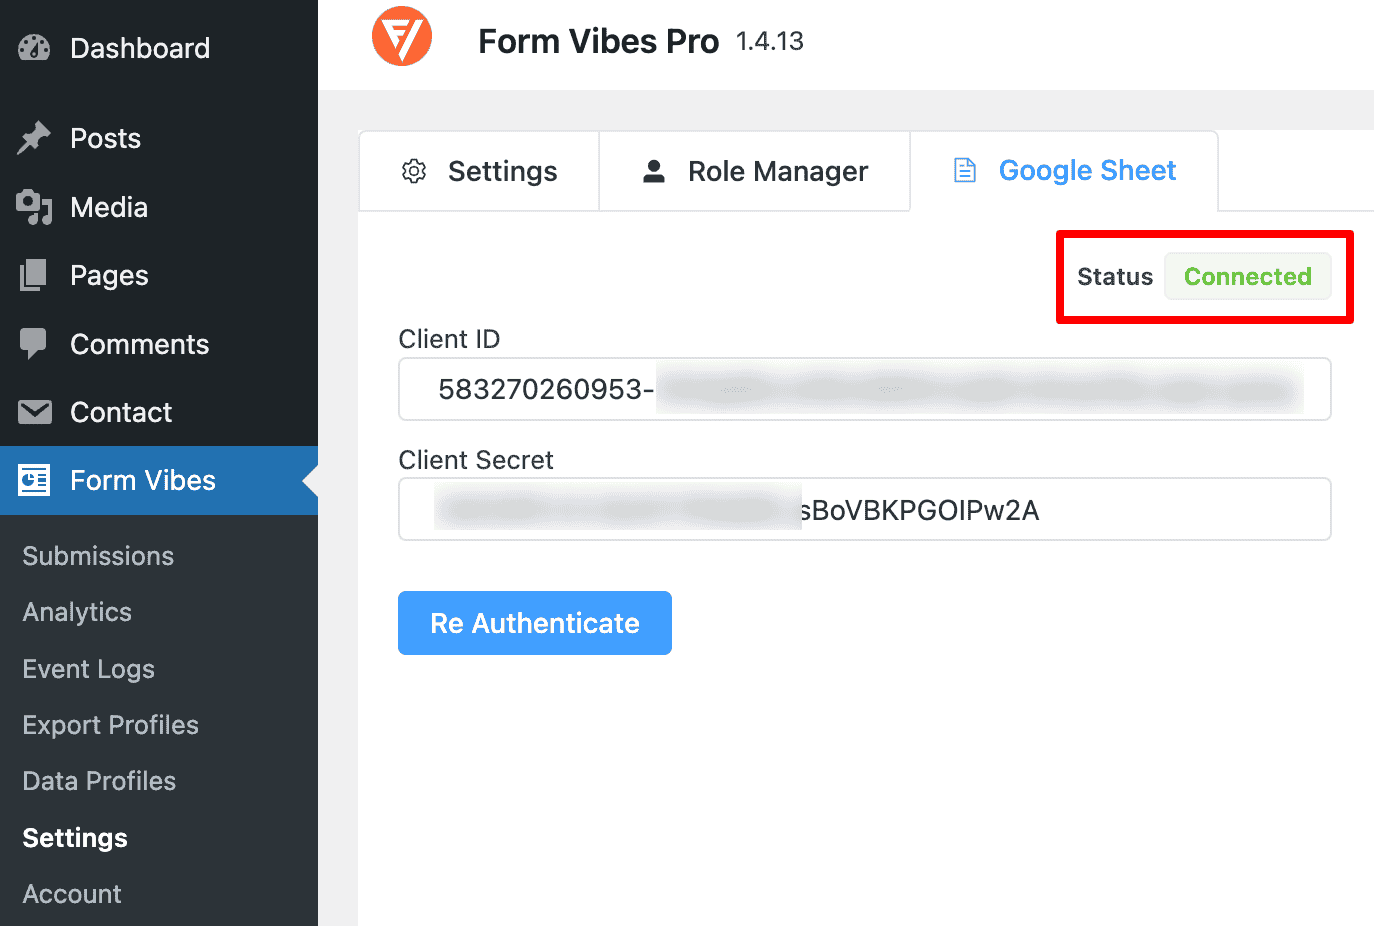
- Go to Form Vibes > Settings > Google Sheet in your WordPress admin
- Paste your Client ID into the Client ID field
- Paste your Client Secret into the Client Secret field
- Click Authenticate and sign in with your Google account when prompted
- After approving the requested permissions, the connection status updates to show the account as connected
Set up your Google Sheets export configuration
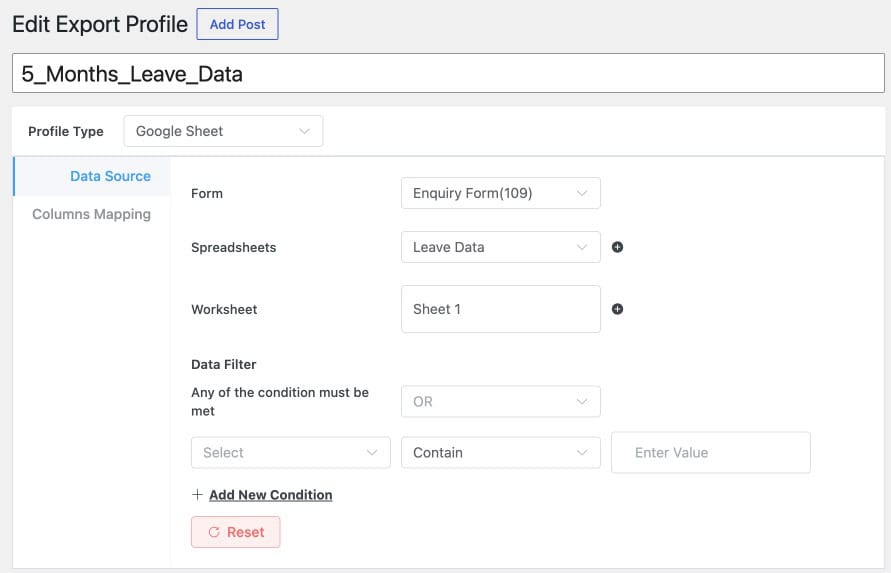
Once connected, create a new export configuration and set the Profile Type to Google Sheet. The Data Source tab shows these settings:
- Form – select your CF7 form
- Spreadsheets – Choose an existing connected Google Spreadsheet or create a new one directly from here.
- Worksheet – Select the worksheet where submissions should be sent, or create a new worksheet if needed.
- Data Filter – apply AND/OR field-level conditions to push only submissions that match specific criteria for example, push only submissions where the enquiry type contains “Sales”
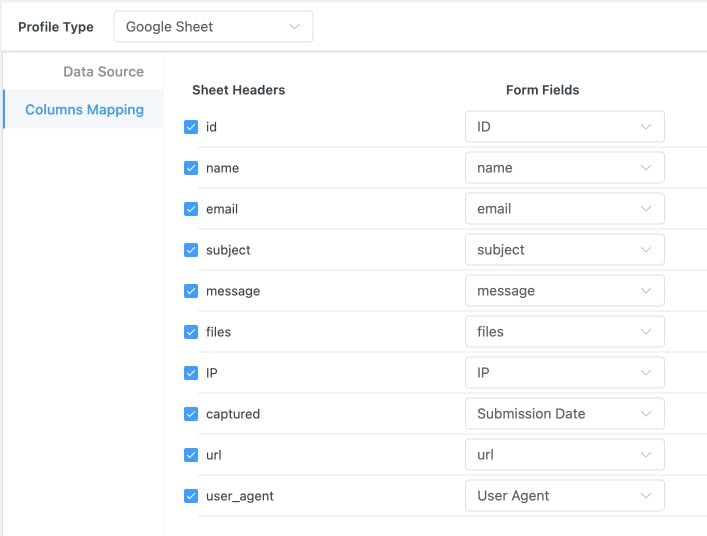
Map your fields: Each form field appears in a Columns Mapping tab. Match every form field to the appropriate Google Sheets column to ensure your submission data is organized and displayed correctly.
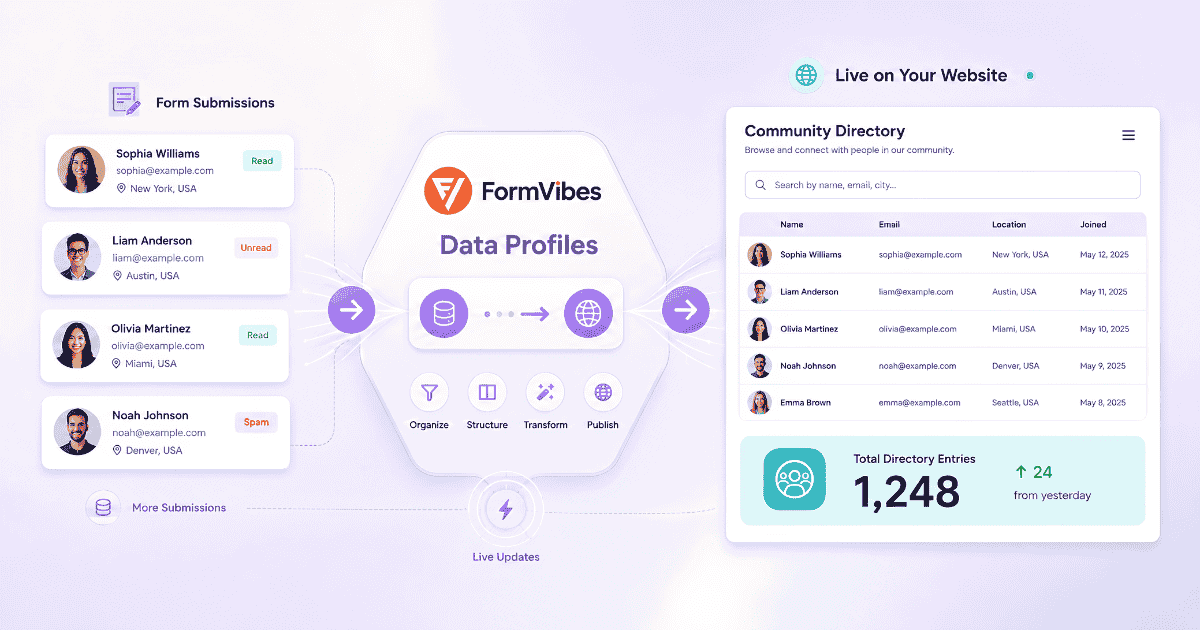
Once published, every new CF7 submission matching the configuration is delivered to the connected sheet automatically in real time. Team members or clients with access to the spreadsheet see new leads without logging into WordPress. Share the sheet as view-only for clients, they get a clean, familiar interface with no WordPress access required.
Pro: Google Sheets sync is particularly useful for client sites – the client sees their leads in a familiar spreadsheet interface without needing a WordPress login or any WordPress knowledge.
Conclusion
Contact Form 7 has no native export and no native storage either. Form Vibes adds both. Install it and every CF7 submission is saved to your database automatically. Quick Export gives you a one-click CSV download with date range filtering on the free plan. Form Vibes Pro adds filtered exports with submission status and field-level conditions, saved configurations you can re-run in one click plus Google Sheets sync for automatic real-time delivery to a spreadsheet.
Two minutes to install. Works immediately alongside Contact Form 7 with no extra configuration.
Export your CF7 submissions in one click
Form Vibes saves every Contact Form 7 submission to your WordPress database and adds one-click CSV export and connecting with Google Sheets.
Frequently Asked Questions
Common questions about exporting CF7 submissions to CSV.
Does Contact Form 7 have a built-in export option?
No. Contact Form 7 sends submissions by email and stores nothing in your database by default. To export CF7 entries you need a storage plugin installed first. Form Vibes saves every CF7 submission to your database automatically and adds one-click Quick Export on the free plan.
How do I export Contact Form 7 submissions to CSV?
Install Form Vibes, go to Form Vibes > Submissions, select your CF7 form from the dropdown, apply a date range filter if needed, and click Quick Export. A CSV file downloads immediately. The free plan exports up to 1,000 rows. Form Vibes Pro adds filtered exports with submission status and field-level AND/OR conditions.
Can I export only CF7 entries from a specific date range?
Yes, date range filtering is available on both the free and Pro plans. On the free plan, use the date range filter in the entries screen before clicking Quick Export. Form Vibes Pro adds field-level conditions, saved export configurations, and the ability to re-run the same export in one click.
How do I send Contact Form 7 submissions to Google Sheets?
Form Vibes Pro’s Google Sheets sync pushes every new CF7 submission to a connected spreadsheet automatically in real time. Connect your Google account, create a Google Sheets export configuration, select the spreadsheet and worksheet, apply any data filters, and new submissions are delivered the moment they arrive – no Zapier, no manual export step.
Can I open CF7 exported CSV in Excel?
Yes. The CSV file Form Vibes generates is standard comma-separated format and opens directly in Excel, Google Sheets, LibreOffice, or any spreadsheet application. Each form field appears as a column and each submission as a row.
Leave a Reply