How to Save and Manage Ninja Forms Submissions with Form Vibes
Ninja Forms stores your submissions. You can view them, search them, and export them to CSV. For most sites that is enough.
But if you want to see whether your forms are getting more or fewer submissions over time, send leads to a Google Sheet the moment they arrive, or let a client review their enquiries without logging into WordPress, you need something more.
Form Vibes works alongside Ninja Forms and adds exactly that. This guide covers what Ninja Forms does natively, what it does not, and what Form Vibes adds on top.
Notes: This guide assumes Ninja Forms is already installed and active on your site. If you are setting up Ninja Forms for the first time, see the complete Ninja Forms guide.
What does Ninja Forms do with submissions by default?
Ninja Forms has over 600,000 active installations and saves every submission to your WordPress database automatically. The Record Submission action is enabled by default on all new forms, entries are stored from the moment the form goes live, no setup needed.
To view submissions, go to Ninja Forms > Submissions in your WordPress admin. Select a form from the dropdown to see its entries. From there you can search by term, filter by date range, click any entry to open its full detail view, edit field values directly, export to CSV, and bulk delete entries.
By default only users with the Administrator role can access the submissions screen. Extending access to other roles requires the Ninja Forms User Management add-on.
Tips: If submissions are not appearing, go to the form’s Emails & Actions tab and confirm the Record Submission action has not been disabled.

What is missing from Ninja Forms native submission management?
Ninja Forms handles storage, search, filter, and CSV export well. What it does not provide is analytics, a unified view across multiple form plugins, Google Sheets sync, or a way for clients and colleagues to review submissions without WordPress admin access.
- No submission analytics. Ninja Forms shows you a list of entries. It does not show whether submission volume is trending up or down, which forms perform best, or how submissions compare week over week.
- No unified dashboard across plugins. If you run Ninja Forms alongside Contact Form 7, WPForms, or Elementor Pro Forms, each plugin has its own separate submissions screen. There is no single place to see everything.
- No Google Sheets sync. Ninja Forms can export to CSV manually. There is no native way to push submissions to a Google Sheet automatically without a third-party tool.
- No built-in access control for clients. No status tracking per entry, no internal notes, and no role-based access for clients without the paid User Management add-on.
Notes: These are not limitations of Ninja Forms as a form builder it is designed to build and manage forms, not to be a full submission management platform. Form Vibes fills these gaps without replacing anything Ninja Forms already does.
Already using Ninja Forms and want analytics, Google Sheets sync, and client access on top? Form Vibes installs in seconds and works alongside Ninja Forms automatically – no configuration required.
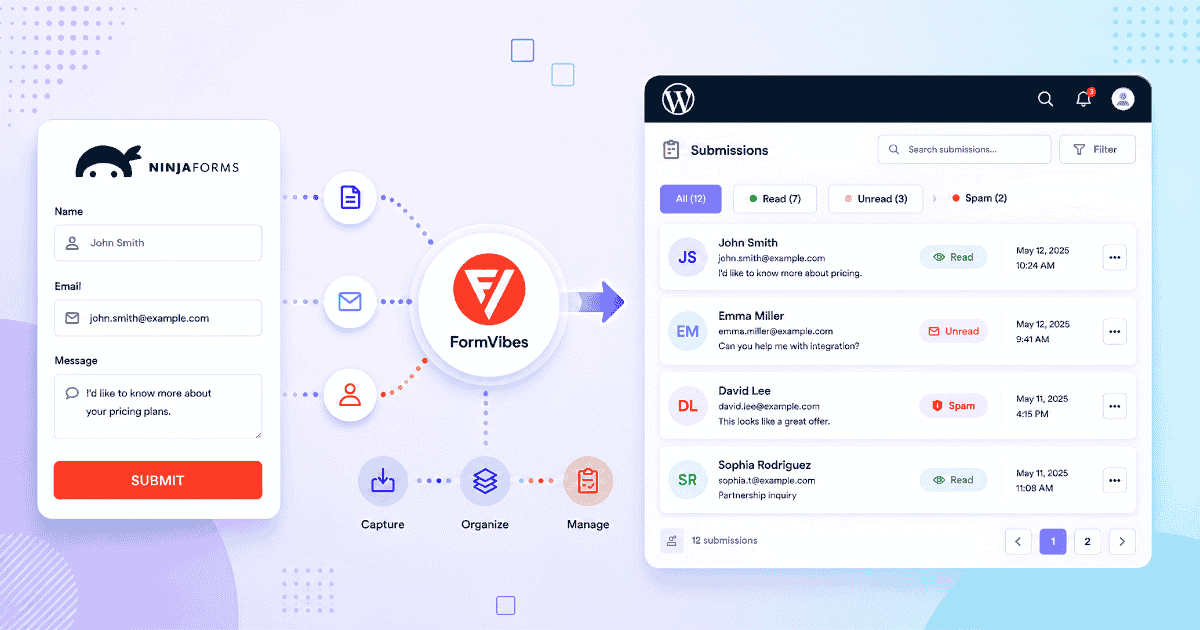
How does Form Vibes work with Ninja Forms?
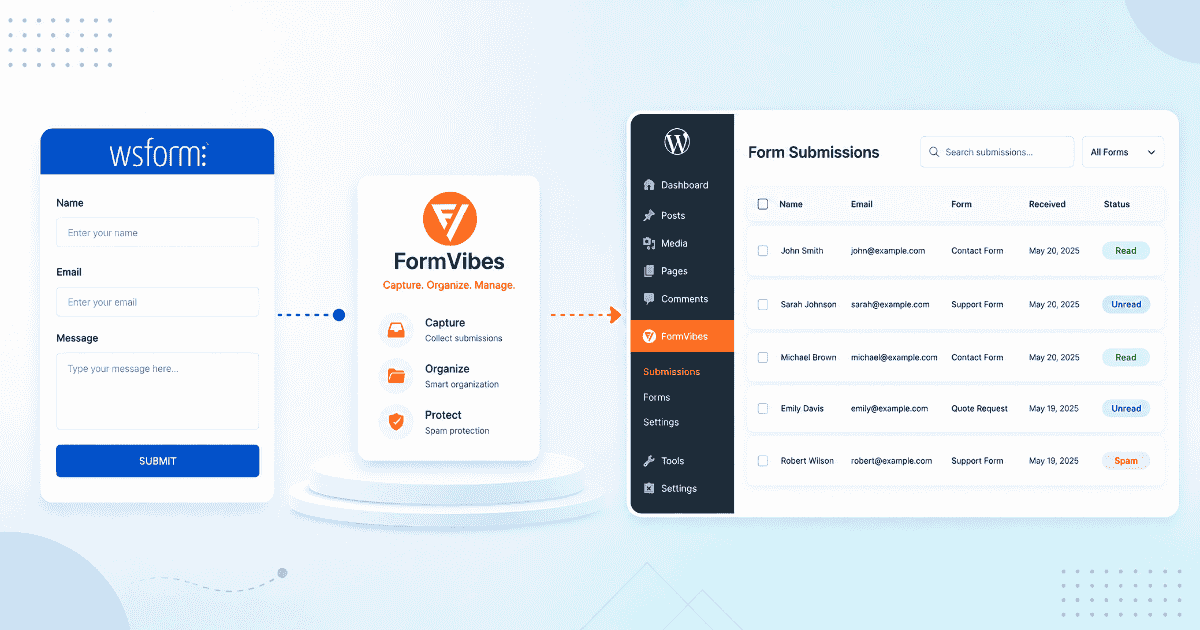
Install Form Vibes and it starts capturing Ninja Forms submissions automatically. There is no configuration required per form. From the moment Form Vibes is active on your site, every Ninja Forms submission is stored in the Form Vibes dashboard alongside submissions from any other form plugin you are running.
Both Form Vibes and Ninja Forms store each submission independently. Ninja Forms continues to manage submissions in its own screen exactly as before, Form Vibes adds a second layer on top without replacing or interfering with anything.
If you run other form plugins alongside Ninja Forms – Contact Form 7, WPForms, Elementor Pro Forms, or any of the other supported builders, all submissions from all plugins appear in the same Form Vibes dashboard. Switch between them using the form dropdown.
Tips: Form Vibes and Ninja Forms store submissions independently. Deleting an entry in one does not remove it from the other.
How do you connect Form Vibes to Ninja Forms?
Install Form Vibes from the WordPress plugin directory and activate it. That is all. Submit a test entry on any Ninja Form, then go to Form Vibes > Entries and select that form from the dropdown. The test submission should appear right away.
Important: Form Vibes captures submissions from the moment it is installed. Submissions that came in before installation are not pulled retroactively into Form Vibes. Those entries are still accessible in Ninja Forms > Submissions.
What can you do with Ninja Forms submissions in Form Vibes?
Once Form Vibes is active, you get a full management layer on top of Ninja Forms – analytics, advanced filtering, export options, and submission review features that the native Ninja Forms dashboard does not offer.
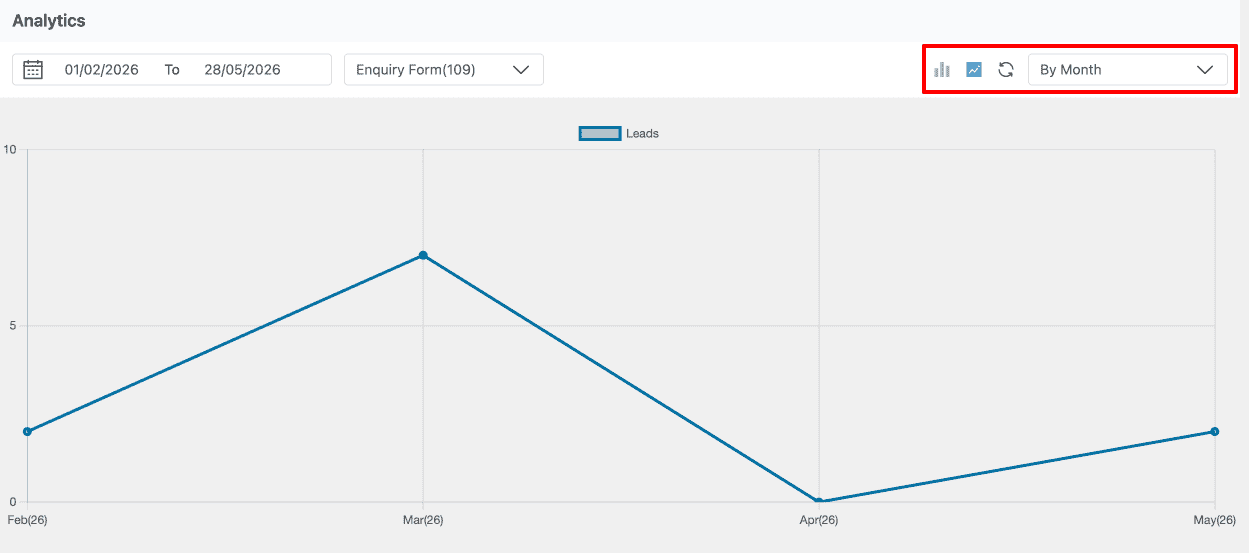
View submission trends with analytics
Go to Form Vibes > Analytics and select your Ninja Form from the dropdown. Daily, weekly, and monthly submission volume charts show whether your form is getting more or fewer submissions over any date range. This is the only way to see Ninja Forms submission trends without exporting data manually and building charts yourself.
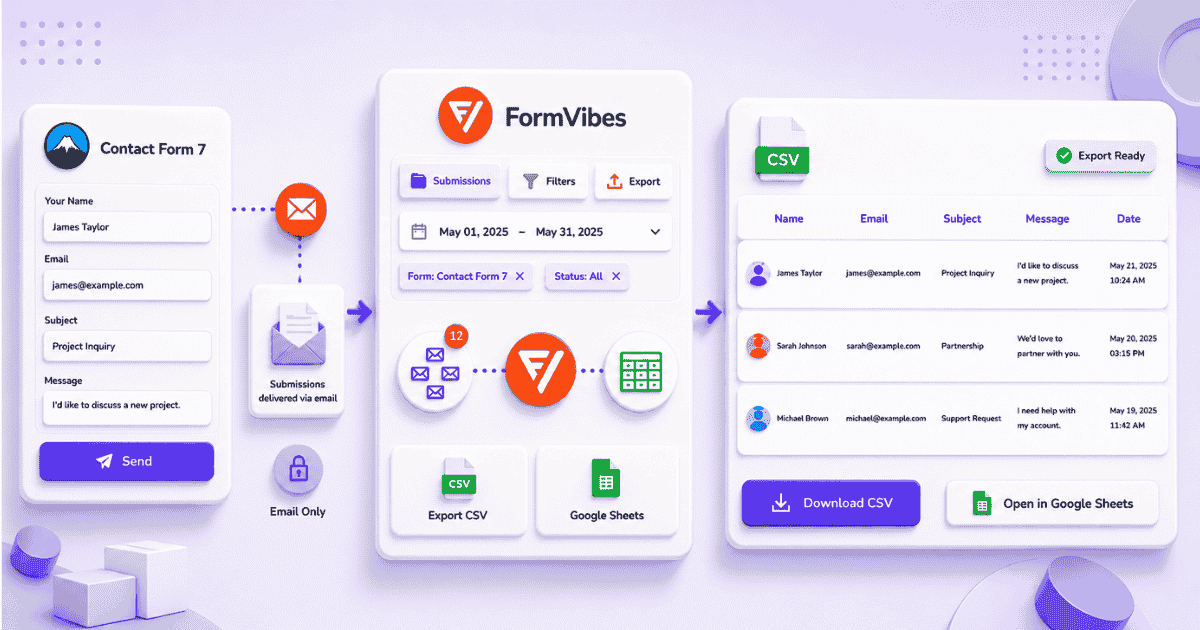
Export submissions your way
The free plan includes basic CSV export – one click, up to 1,000 rows. Form Vibes Pro adds Export Profiles, save a complete export configuration including date range, submission status filter, AND/OR field-level conditions, and field selection and re-run it in one click. The Export Files tab keeps a history of every previously generated file for re-download any time.
For automatic delivery to a spreadsheet, Google Sheets sync pushes every new Ninja Forms submission to a connected Google Sheet in real time – no Zapier, no manual export step.
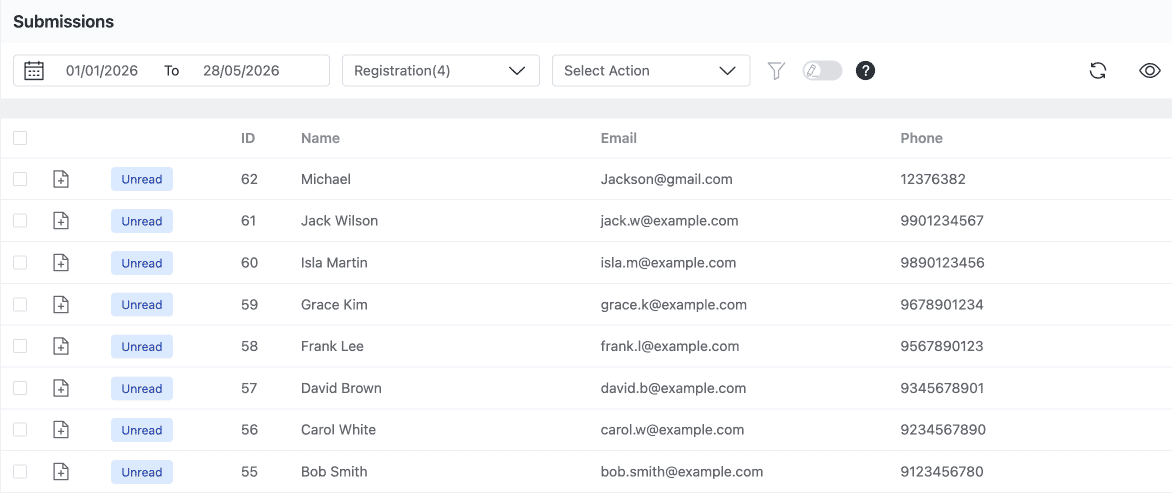
Review and manage submissions as a team
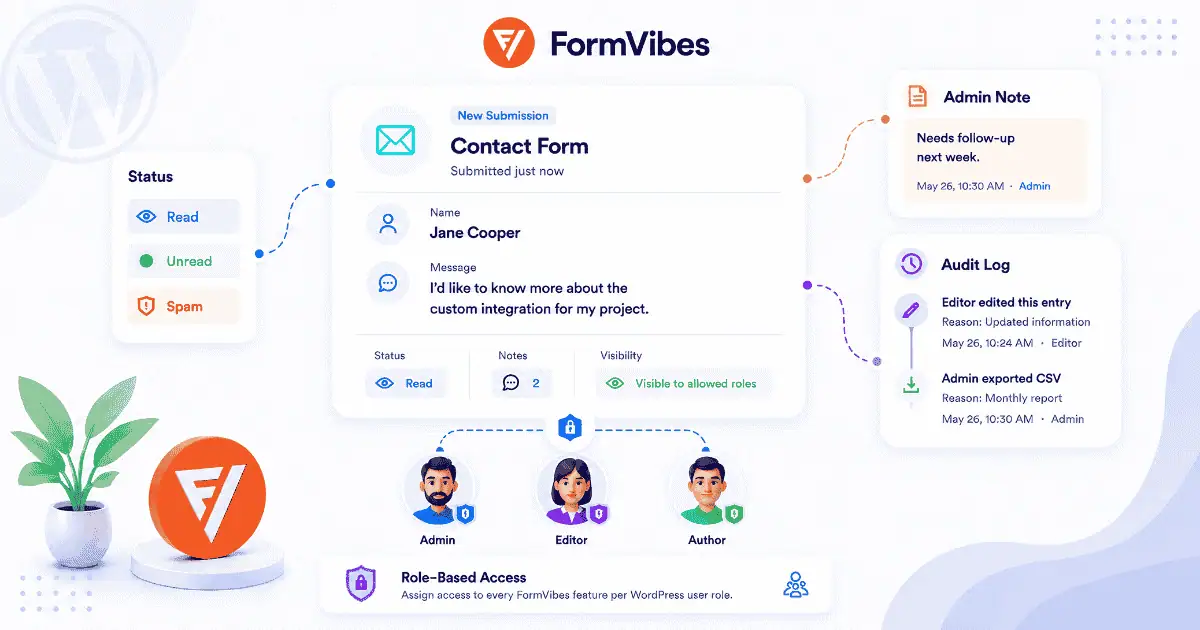
- Submission Status — mark entries as Read, Unread, or Spam. New submissions arrive as Unread so your dashboard always shows what has come in since your last session.
- Notes — add internal comments to individual entries, visible to everyone with access inside Form Vibes and never shown to the person who submitted the form.
- Role Manager (Pro) — give clients or colleagues access to Ninja Forms submission data with 13 individual permission toggles per WordPress user role. No WordPress admin access required.
Pro: Export Profiles, Google Sheets sync, Submission Status and Role Manager require Form Vibes Pro. Analytics, date filtering, and basic CSV export are included in the free plan. See the full Free vs Pro comparison.
Conclusion
Ninja Forms handles form building and basic submission management well – automatic storage, a searchable entries screen, and CSV export are all included free. What it does not provide is analytics, a unified dashboard across multiple form plugins, Google Sheets sync, or client-facing access to submissions.
Form Vibes fills all of these in one plugin. Install it and every Ninja Forms submission is automatically captured in a unified dashboard with analytics, advanced export options, and submission review features ready to use from day one.
Add analytics and exports to Ninja Forms
Form Vibes works alongside Ninja Forms from the moment it is installed. Free plan includes analytics and CSV export. Pro adds Google Sheets sync, Export Profiles, and more features.
Frequently Asked Questions
Common questions about managing Ninja Form submissions with Form Vibes.
Does Ninja Forms save submissions to the database?
Yes. Ninja Forms saves every submission automatically via the Record Submission action, which is enabled by default on all new forms. Go to Ninja Forms > Submissions to view entries. If submissions are not appearing, check that the Record Submission action has not been disabled in the form’s Emails & Actions tab.
How do I export Ninja Forms submissions to Google Sheets?
Ninja Forms does not have a native Google Sheets sync. Form Vibes Pro adds this, install Form Vibes, connect your Google account once, create a Google Sheet Export Profile for your Ninja Form, and every new submission is pushed to the connected spreadsheet automatically in real time.
Can I give clients access to Ninja Forms submissions without WordPress admin?
Not natively — Ninja Forms only allows Administrator-level access by default. Form Vibes Pro’s Role Manager lets you define exactly which WordPress user roles can view, export, or manage Ninja Forms submission data with 13 individual permission toggles per role. No additional Ninja Forms add-ons needed.
Does Form Vibes replace Ninja Forms submission management?
No. Form Vibes runs alongside Ninja Forms, both store submissions independently. Ninja Forms continues to manage submissions in its own dashboard. Form Vibes adds analytics, a unified view across all your form plugins, Google Sheets sync, and submission review features on top.
What analytics does Form Vibes provide for Ninja Forms?
Form Vibes provides daily, weekly, and monthly submission volume charts for each Ninja Form. You can view trends over any date range and compare submission volume across forms. Ninja Forms has no native analytics dashboard, Form Vibes is the only way to see submission trends without exporting and charting data manually.
Leave a Reply